Bleeding the brakes on your Jeep JK is a vital step for safe driving. If your brake pedal feels soft or you’ve just replaced brake parts, air may be trapped in the lines. Removing this air restores proper brake pressure. Many Jeep owners overlook brake bleeding, but it’s a straightforward task with the right tools and steps. This guide will show you how to bleed Jeep JK brakes, highlight common mistakes, and offer tips for clear results.
Tools And Materials Needed
Before starting, gather these essential items:
- Brake fluid (DOT 3 or DOT 4, check your owner’s manual)
- Wrench (usually 10mm or 11mm for bleeder screws)
- Clear tubing (fits snugly over bleeder screw)
- Catch bottle (for old fluid)
- Jack and jack stands
- Gloves and safety glasses
Having everything ready prevents delays and keeps the process clean.
When To Bleed Your Jeep Jk Brakes
Bleeding is necessary in several situations:
- After replacing brake lines or calipers
- When installing new master cylinder
- If brake pedal feels soft or spongy
- During routine brake fluid changes
Ignoring brake bleeding can lead to reduced stopping power and unsafe driving conditions.
Step-by-step Brake Bleeding Process
Follow these steps carefully for best results:
1. Prepare Your Jeep Jk
- Park on a level surface.
- Engage the parking brake.
- Loosen wheel lug nuts slightly.
- Raise the Jeep and secure with jack stands.
- Remove wheels for easy access to calipers.
2. Check And Fill Brake Fluid
Open the hood and locate the master cylinder. Fill it with fresh brake fluid up to the “MAX” line. Never let it drop below “MIN” during the process, or you’ll introduce more air.
3. Choose Bleeding Sequence
Jeep JK uses a diagonal split brake system. Bleed in this order for best results:
- Right rear
- Left rear
- Right front
- Left front
Starting farthest from the master cylinder ensures thorough air removal.
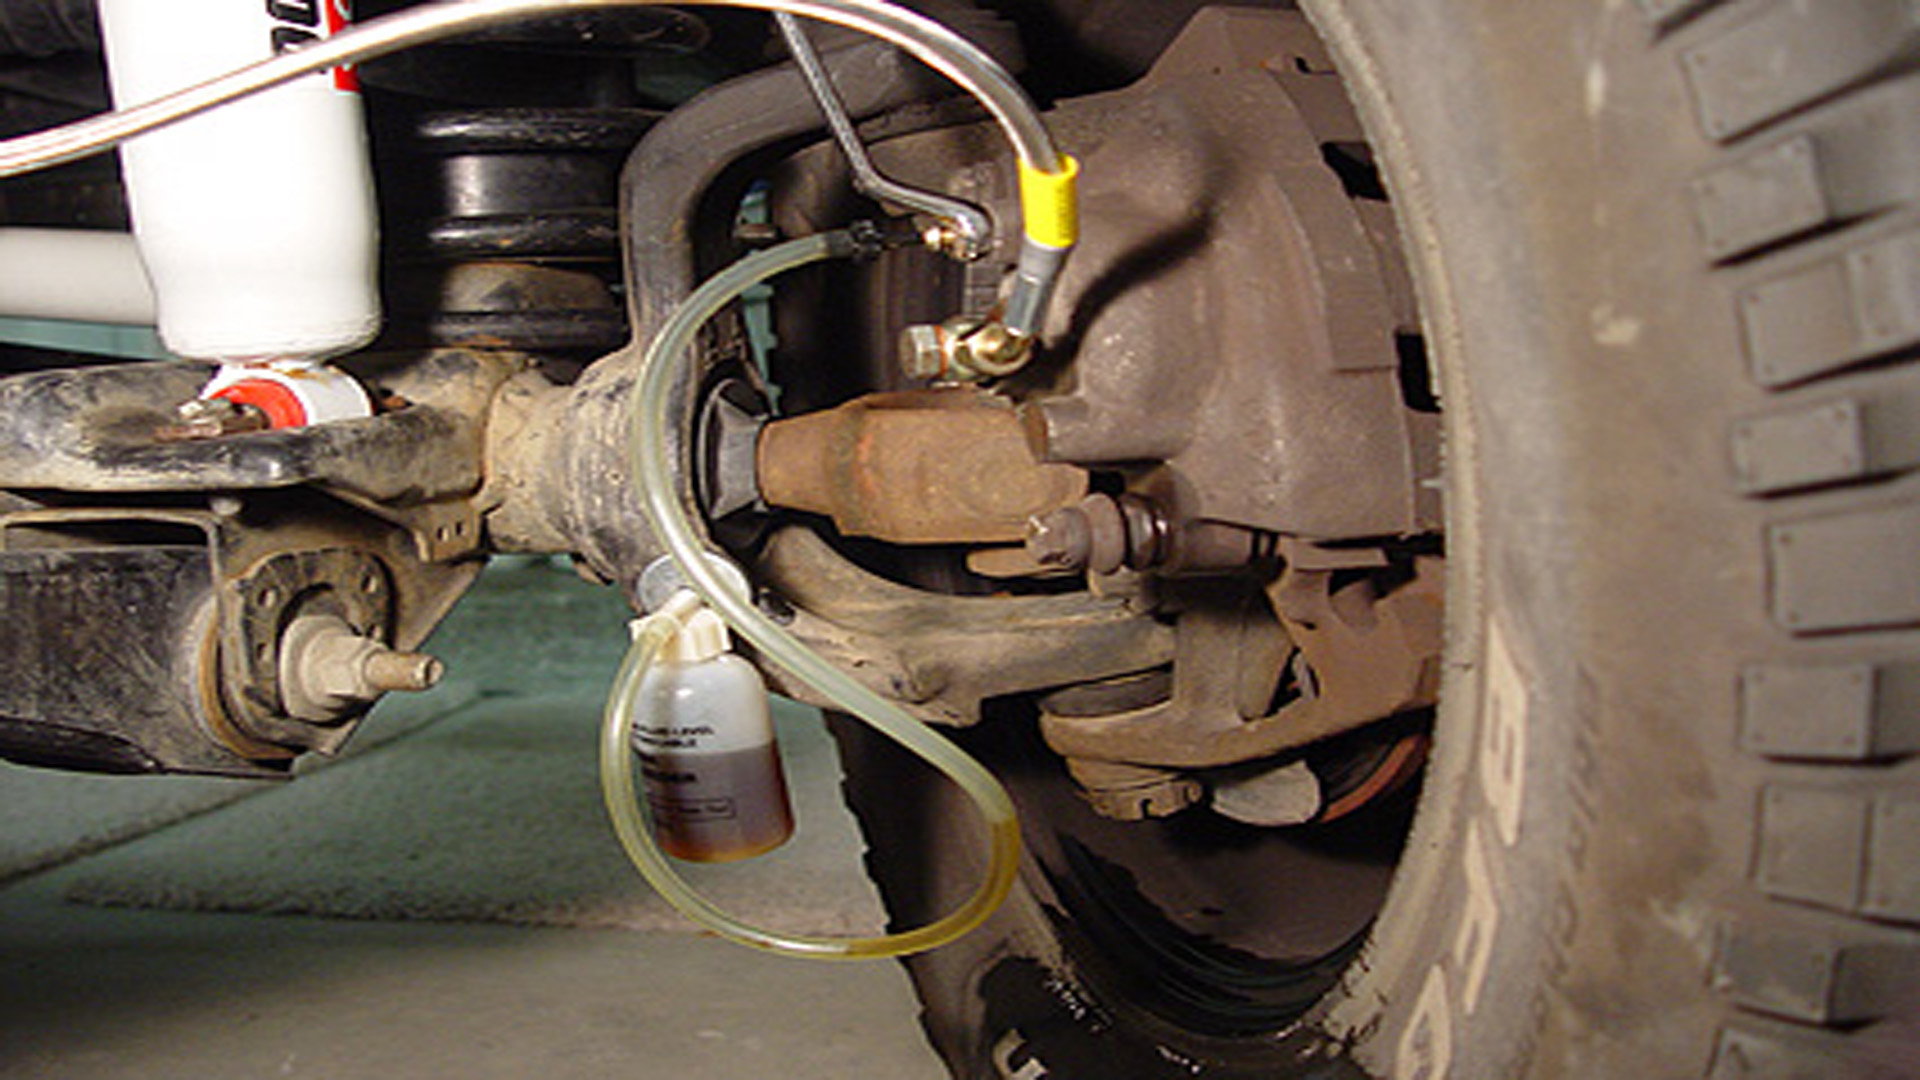
4. Attach Tubing And Catch Bottle
Place clear tubing over the bleeder screw on the first caliper. Put the other end into a catch bottle partially filled with brake fluid. This prevents air from returning to the system.
5. Bleed The Brakes
You’ll need a helper for this step:
- Helper presses brake pedal slowly and holds it down.
- You open the bleeder screw (quarter turn) with wrench.
- Fluid and air bubbles flow out through tubing.
- Close bleeder screw BEFORE helper releases pedal.
- Repeat until fluid runs clear and bubble-free.
- Move to next wheel in sequence.
Check fluid level after every wheel. Top off as needed.
6. Reinstall Wheels And Lower Jeep
Once all brakes are bled, reinstall wheels and torque lug nuts. Lower the Jeep from jack stands.
Common Mistakes To Avoid
Many Jeep owners make errors that reduce brake performance. Here are key mistakes to watch for:
- Letting master cylinder run dry (introduces more air)
- Bleeding in wrong order (leaves air trapped)
- Releasing pedal with bleeder open (pulls air back into system)
- Using dirty brake fluid (causes contamination)
- Skipping wheel removal (makes access difficult)
Avoiding these mistakes ensures lasting brake quality.
Brake Fluid Types And Maintenance
Choosing the right brake fluid matters. Jeep JK models usually use DOT 3 or DOT 4. Both have different boiling points:
| Brake Fluid Type | Boiling Point (Dry) | Boiling Point (Wet) |
|---|---|---|
| DOT 3 | 401°F | 284°F |
| DOT 4 | 446°F | 311°F |
Choose DOT 4 if you drive in hot conditions or tow heavy loads. Always use fresh fluid—old fluid absorbs moisture and loses effectiveness.
Manual Vs. Vacuum Bleeding
There are two main methods for bleeding brakes:
| Method | Pros | Cons |
|---|---|---|
| Manual (with helper) | Simple, no special tools needed | Requires two people |
| Vacuum pump | One-person operation, faster | Must buy a vacuum kit |
Manual bleeding is most common, but vacuum kits can speed up the process if you work alone.
Signs Of Successful Brake Bleeding
After bleeding, test your brakes:
- Pedal should feel firm and not sink slowly.
- Brakes should respond quickly.
- No unusual noises during braking.
If you still notice a soft pedal, repeat the process or check for leaks.
Practical Tips For Jeep Jk Owners
- Always use clear tubing to spot air bubbles easily.
- Replace brake fluid every 2 years for best performance.
- Don’t rush—take your time with each wheel.
- Test drive slowly after bleeding to check brakes under real conditions.
- Consider a gravity bleed as a quick pre-step (open bleeder and let fluid flow out) before full manual bleeding.
Many beginners forget to check the fluid level after each wheel. This can ruin the whole process and make you start over.

Frequently Asked Questions
How Often Should I Bleed Jeep Jk Brakes?
You should bleed your brakes every 2 years or whenever you replace brake components. If you notice a soft pedal or reduced braking power, bleed them immediately.
Can I Use Dot 5 Brake Fluid In My Jeep Jk?
No, Jeep JK models are designed for DOT 3 or DOT 4. DOT 5 is silicone-based and not compatible with ABS systems found in most JKs.
Is It Safe To Bleed Brakes Alone?
It is possible using a vacuum pump or pressure kit, but manual bleeding with a helper is safer and often more effective.
What Happens If I Skip Brake Bleeding After Repairs?
Air remains trapped in the system, leading to spongy brakes and longer stopping distances. This can be dangerous, especially in emergency situations.
Where Can I Find More Information On Brake Systems?
For detailed Jeep JK brake specs and maintenance tips, visit the official Jeep website: Jeep Owners Manual.
Bleeding your Jeep JK brakes is a simple but crucial job. By following these steps, using the right tools, and avoiding common mistakes, you can keep your brakes sharp and responsive. Remember, safe brakes mean safe adventures—so don’t skip this important maintenance.


