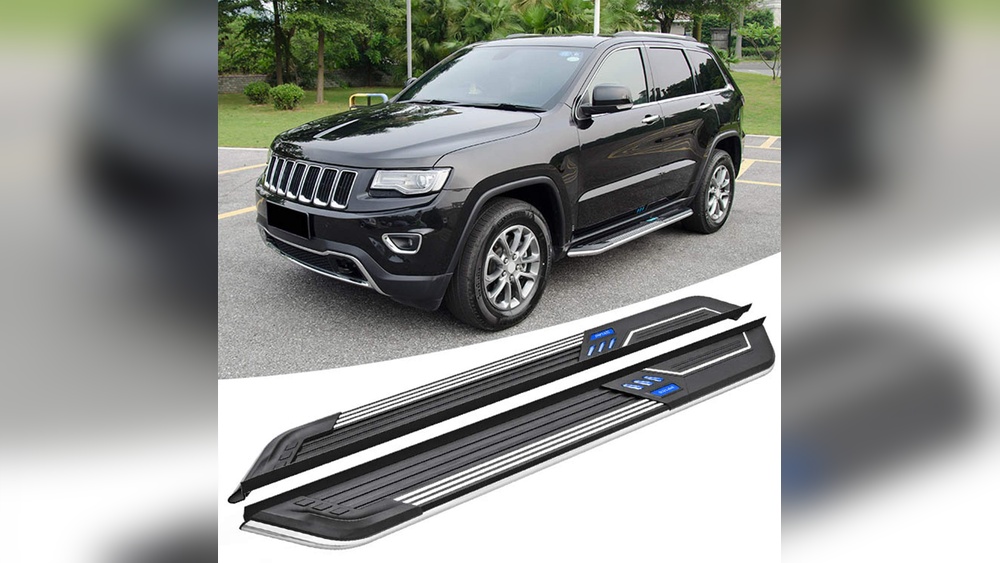
When you think about modifying your Jeep Renegade for better lighting, one of the most effective and versatile solutions is a pillar light mount.
This accessory allows you to easily add auxiliary lights to the exterior of your vehicle, improving visibility for off-roading, nighttime driving, or even just for a more aggressive look.
Unlike other mounting options, pillar mounts leverage existing structural points on your Renegade, offering a secure and often stylish way to integrate new lights.
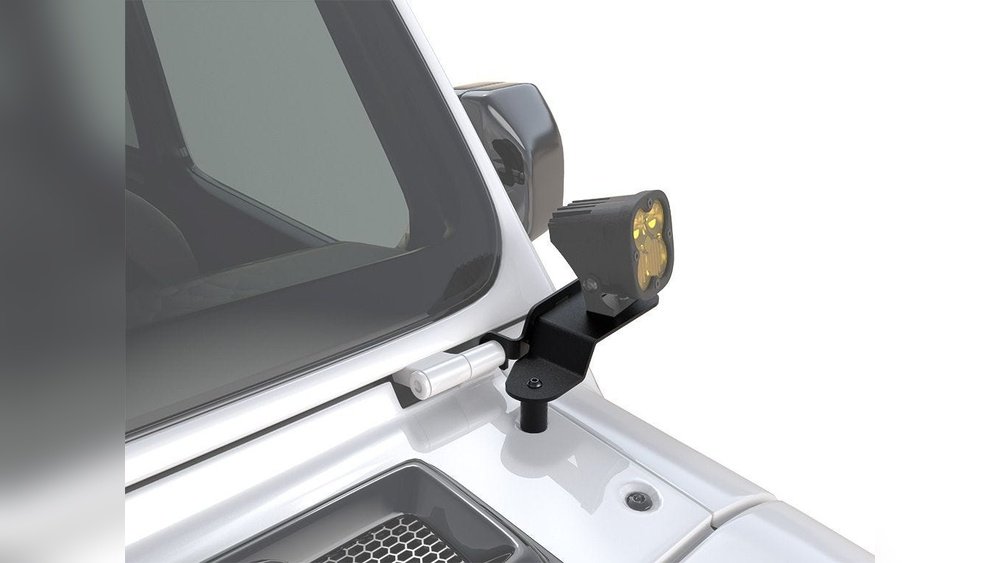
The Jeep Renegade, while a capable compact SUV, can benefit greatly from enhanced lighting. Whether you’re navigating dark trails, dealing with poor weather conditions, or simply want to make your vehicle more visible, auxiliary lights are a popular upgrade. However, figuring out where and how to mount them can be a challenge. This is where pillar light mounts come into play. They are designed to attach to the A-pillar (the front pillar that supports the windshield) or sometimes the C-pillar (rear pillar) of your Renegade, providing a sturdy platform for spotlights, floodlights, or light bars.
This guide will explore everything you need to know about pillar light mounts for the Jeep Renegade. We’ll cover what they are, the different types available, how to choose the right one, the installation process, and some key considerations to ensure you get the most out of this popular modification.
Understanding Pillar Light Mounts
A pillar light mount is a bracket specifically designed to attach auxiliary lighting to the A-pillar or C-pillar of a vehicle. For the Jeep Renegade, these mounts are engineered to fit the contours and mounting points of its specific body style. They typically bolt onto existing holes or use specialized hardware to secure firmly without requiring major modifications to the vehicle’s structure.
The primary purpose of these mounts is to provide a stable and elevated platform for lights. This elevation is crucial because it helps to direct light further down the road or trail, reducing the chances of glare reflecting back at the driver and improving the overall field of vision. They also contribute to the aesthetic of the vehicle, giving it a more rugged, off-road appearance.
Why Choose Pillar Mounts For Your Jeep Renegade?
Jeep Renegades, especially those equipped with the Trailhawk trim, are often used for light off-roading and adventure. Enhancing visibility is a common goal for owners. Pillar mounts offer several advantages over other mounting locations:
- Optimal Light Placement: The A-pillar location positions lights high and wide, ideal for illuminating the sides of the trail and extending forward vision. This is significantly better than bumper-mounted lights, which can be obstructed by brush or can cause glare.
- Minimal Vehicle Modification: Most pillar mounts are designed for bolt-on installation, utilizing factory mounting points. This means you typically don’t need to drill new holes in your body panels, preserving the vehicle’s integrity and resale value.
- Durability and Stability: Made from robust materials like steel or aluminum, these mounts are built to withstand the vibrations and stresses of off-road driving, ensuring your lights stay securely in place.
- Aesthetics: Pillar mounts contribute to a more aggressive, custom look. They complement the Renegade’s styling, especially for those aiming for a more adventurous persona.
- Versatility: They can accommodate various types of lights, from single powerful spotlights to smaller floodlights or even compact light bars.
Common Lighting Needs Addressed By Pillar Mounts
- Trail Navigation: For those who venture onto trails after dark, improved visibility is paramount. Pillar-mounted lights can illuminate the path ahead and to the sides, helping drivers spot obstacles, turns, and wildlife.
- Work and Utility: If you use your Renegade for work that involves being outdoors at night, such as construction, farming, or emergency services, enhanced lighting can significantly improve safety and efficiency.
- Off-Road Driving: Beyond simple trails, serious off-roading requires comprehensive lighting. Pillar mounts provide a solid base for lights that can cut through dust, fog, or heavy rain, offering a clear view of the terrain.
- Enhanced Safety: Even for daily driving, better illumination in poorly lit areas, rural roads, or during adverse weather can prevent accidents by making the vehicle more visible to others and by allowing the driver to see hazards sooner.
- Customization and Style: Many owners simply want to enhance the visual appeal of their Jeep Renegade, and pillar light mounts are a popular way to achieve a custom, rugged look.
Types Of Pillar Light Mounts For Jeep Renegade
When looking for pillar light mounts, you’ll primarily encounter two main types: A-pillar mounts and C-pillar mounts. The A-pillar mounts are by far the most common and generally offer the best performance for forward and side illumination.
A-pillar Light Mounts
These mounts attach to the vertical support structure between the hood and the windshield. They are the most popular choice for good reason.
- Design: A-pillar mounts are typically designed to fit flush against the pillar or extend slightly outwards. They often use existing bolts in the hood hinge area or door jamb for attachment. Some designs might require minor trimming of plastic trim pieces, but many are designed for a no-drill installation.
- Light Capacity: They can usually hold one or two smaller lights (like cube lights or pod lights) on each side, or sometimes a single, larger spotlight. Some heavier-duty mounts might even support smaller light bars.
- Placement Advantage: Mounting lights on the A-pillar provides excellent wide-angle illumination, crucial for spotting hazards on the sides of the road or trail. The elevated position also helps in piercing through fog and dust more effectively.
- Material: Most are made from powder-coated steel for durability and corrosion resistance, or sometimes aluminum for a lighter weight option.
C-pillar Light Mounts
Less common for the Renegade, C-pillar mounts attach to the rear pillar, between the rear doors and the tailgate.
- Design: These mounts are more niche and might be used for specific lighting needs, such as illuminating the rear of the vehicle for reversing or for campsite lighting.
- Light Capacity: They typically accommodate smaller lights.
- Placement: While useful for rearward visibility, they don’t offer the same forward or side-illumination benefits as A-pillar mounts. Their application is more specialized.
Integrated Vs. Aftermarket Mounts
- Factory/OEM Options: Some higher trims of the Jeep Renegade might come with provisions for accessory lighting, though dedicated pillar mounts are rare as factory options.
- Aftermarket Mounts: The vast majority of pillar light mounts for the Renegade are aftermarket. These are produced by various companies specializing in Jeep accessories and off-road gear. They offer a wide range of designs, materials, and price points.
Pro Tip: When selecting A-pillar mounts, pay close attention to the specific design. Some mounts are designed to work with factory roof racks or other accessories, while others might interfere. Always check compatibility with your Renegade’s year, trim level, and any existing modifications.
Choosing The Right Pillar Light Mount For Your Jeep Renegade
Selecting the correct pillar light mount involves considering several factors to ensure it meets your needs, fits your vehicle, and integrates seamlessly with your chosen lights.
Material And Durability
The material of the mount is critical for its longevity and performance, especially if you plan on using it for off-road adventures.
- Steel: Steel mounts are generally the most robust and affordable. They are strong enough to hold heavier lights and withstand significant impacts. However, steel can be prone to rust if the coating is damaged. Look for powder-coated steel for good corrosion resistance.
- Aluminum: Aluminum mounts are lighter than steel and naturally resistant to rust. They are a good option if weight is a concern or if you prefer a material less susceptible to corrosion. However, aluminum can be more expensive and potentially less rigid than high-quality steel.
Mounting Mechanism And Installation
The way the mount attaches to your Renegade is a key consideration.
- No-Drill Installation: These mounts are the most desirable as they utilize existing bolt holes, often around the hood hinges or door frames. This preserves your vehicle’s paint and bodywork.
- Minor Modification Required: Some mounts might require you to trim a small part of a plastic fender flare or trim piece to achieve a perfect fit. This is usually a straightforward process with basic tools.
- Hole Placement: Ensure the mount has pre-drilled holes that align with the mounting points of your chosen auxiliary lights. Standard hole patterns are common, but it’s always wise to double-check.
Compatibility With Your Renegade
Jeep Renegades come in various model years and trim levels. Pillar mounts are often designed for specific fitments.
- Model Year: Ensure the mount is listed as compatible with your specific Renegade model year. Minor body changes between years can affect fitment.
- Trim Level: Some trims might have slightly different A-pillar designs or factory-installed features (like specific sensors or cameras) that could interfere with certain mount designs. Check product descriptions carefully.
- Existing Accessories: If you have a roof rack, different mirrors, or other A-pillar accessories, verify that the light mount won’t cause interference.
Light Capacity And Type
The mount should be able to securely hold the lights you intend to install.
- Number of Lights: Most A-pillar mounts are designed for one or two lights per side.
- Size and Weight: Consider the physical dimensions and weight of your lights. A mount rated for small LED pods might not be suitable for larger, heavier spotlights.
- Light Bar Compatibility: While less common for pillar mounts on a Renegade, some robust designs might accommodate very small, narrow LED light bars.
Brand Reputation And Reviews
As with any automotive accessory, the reputation of the manufacturer and user reviews can provide valuable insights.
- Established Brands: Companies with a long history of producing Jeep accessories often offer well-engineered and durable products.
- User Feedback: Read reviews from other Jeep Renegade owners who have installed the same mount. They can offer real-world feedback on ease of installation, durability, and any potential issues.
Cost
Pillar light mounts can range in price from around $50 to over $150, depending on the material, brand, and complexity of the design. Balance your budget with the need for durability and a secure fit.
Investing a bit more in a quality mount can save you headaches and potential damage down the line.
Installation Guide: Mounting Lights On Your Jeep Renegade’s A-pillar
Installing pillar light mounts on a Jeep Renegade is generally a manageable DIY project for individuals with basic mechanical skills and tools. The process usually involves attaching the brackets to the vehicle and then mounting the lights to the brackets.
Disclaimer: Always consult the specific installation instructions provided by the manufacturer of your light mount and lights. If you are unsure about any step, it is advisable to seek professional installation. Improper installation can lead to damage to your vehicle or lights, or unsafe driving conditions.
Tools And Materials You’ll Likely Need
- Socket Set and Wrenches: For loosening and tightening bolts.
- Screwdrivers: Phillips and flathead, for trim pieces if necessary.
- Allen Wrenches (Hex Keys): Often required for light mounting hardware.
- Torque Wrench: To ensure bolts are tightened to the manufacturer’s specifications, preventing over-tightening or under-tightening.
- Drill and Drill Bits: Only if your chosen mount requires drilling (less common for A-pillar Renegade mounts).
- Wire Strippers and Crimpers: For electrical connections.
- Electrical Tape or Heat Shrink Tubing: For insulating wire connections.
- Zip Ties: For securing wiring neatly.
- Multimeter: To test for power and ground connections (optional but recommended).
- Safety Glasses: Always wear eye protection.
- Gloves: To protect your hands.
- The Pillar Light Mounts:
- Your Chosen Auxiliary Lights:
- Wiring Harness and Switch: Most aftermarket lights come with or require a separate wiring harness and a switch to control them from the cabin.
Step-by-step Installation Process (general Guide)
Step 1: Prepare the Vehicle and Mounts
- Park Safely: Park your Jeep Renegade on a level surface and engage the parking brake.
- Inspect Mounts: Unpack your pillar light mounts and ensure all parts are present and undamaged. Read the manufacturer’s instructions thoroughly.
- Identify Mounting Points: Locate the designated mounting points on your Renegade’s A-pillar. This often involves opening the hood and looking near the hood hinges or the door jamb. Some mounts may require removing a few bolts from the hood hinge.
Step 2: Install the Pillar Light Mounts
- Position the Mount: Place the first pillar mount bracket against the A-pillar in its intended position.
- Align Holes: Align the holes in the mount with the vehicle’s pre-drilled holes or existing bolt locations.
- Install Hardware: Insert the supplied bolts, washers, and nuts. For mounts that use hood hinge bolts, you might need to loosen the hinge bolts slightly, slide the mount into place, and then re-tighten the hinge bolts with the mount secured.
- Hand-Tighten: Initially, hand-tighten all fasteners. This allows for minor adjustments.
- Repeat for Other Side: Install the mount on the opposite A-pillar, ensuring it is positioned symmetrically to the first.
- Check Alignment: With both mounts in place and hand-tightened, check that they are level and properly aligned. Ensure they don’t interfere with the hood opening or closing.
- Final Tightening: Once satisfied with the alignment, use your socket set and a torque wrench (if specified) to securely tighten all bolts. Do not overtighten, as this can strip threads or damage the vehicle.
Step 3: Mount the Auxiliary Lights
- Position Lights: Place your auxiliary lights onto the mounting brackets. Align the light’s mounting holes with the pre-drilled holes on the pillar mount.
- Install Hardware: Use the hardware supplied with your lights (or sometimes with the mount) to attach the lights. Again, hand-tighten initially.
- Adjust Angle: Adjust the lights to your desired angle. It’s often best to do a rough alignment now and fine-tune it after testing the lights.
- Secure Lights: Once the angle is set, tighten the hardware to secure the lights firmly.
Step 4: Wiring the Lights
This is often the most complex part and requires careful attention to detail.
- Route the Wiring Harness: Most aftermarket lights come with a wiring harness that includes a relay, fuse, and switch