Removing fender flares from a Jeep TJ is one of the first steps many Jeep owners take when customizing or repairing their vehicle. Whether you want to install new flares, repaint your Jeep, or check for rust, knowing how to remove these parts safely is important. This guide will walk you through each step, highlight common mistakes, and answer questions Jeep TJ beginners often have.
Why Remove Jeep Tj Fender Flares?
Fender flares protect your Jeep’s body from mud, rocks, and debris. Over time, they can crack, fade, or become loose. Removing them lets you:
- Replace damaged flares with new ones
- Inspect and repair rust spots on the body
- Upgrade to wider flares for bigger tires
- Achieve a cleaner look for off-road use
Some owners also remove fender flares before painting, since paint can build up and create uneven surfaces.

Tools And Preparation
Before you start, gather these tools:
- Flathead screwdriver
- Phillips screwdriver
- Socket wrench (usually 8mm or 10mm)
- Torx bit set
- Pliers
- Trim removal tool (optional)
- Safety gloves
- Eye protection
Pro Tip: Wear gloves to protect your hands from sharp edges and rust. Many bolts are hidden under mud or debris, so clean the area around the flares first.
| Tool | Purpose |
|---|---|
| Socket wrench | Removes bolts |
| Trim tool | Helps pop clips |
| Torx bit | Removes special screws |
| Pliers | Grips damaged fasteners |
Step-by-step Removal Process
1. Locate All Fasteners
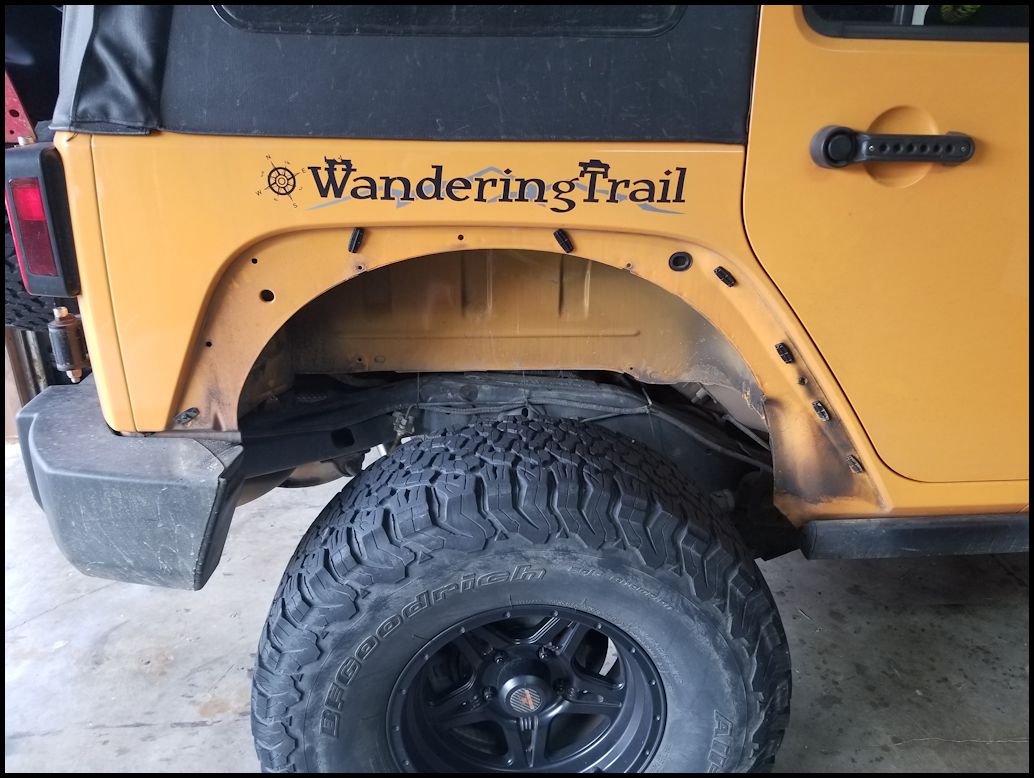
Jeep TJ fender flares are attached with screws, bolts, and plastic clips. Look inside the wheel wells and along the body lines. Most TJs use Torx screws or standard bolts, but some years have clips that require a trim tool.
2. Remove Screws And Bolts
Start by unscrewing all visible fasteners using your socket wrench or Torx bit. Work from one end to the other, usually from the front to the back. Keep all screws in a container so you don’t lose them.
Non-obvious tip: Some fasteners may be hidden under mud or paint. Scrape away debris for easier access.
| Location | Typical Fastener |
|---|---|
| Front wheel well | Torx screw (T-30) |
| Rear wheel well | 8mm bolt |
| Body side | Plastic clip |
3. Remove Plastic Clips
Plastic clips can be tricky. Use a trim removal tool or flathead screwdriver to gently pry them out. If a clip breaks, don’t worry—replacement clips are cheap and easy to find.
Insight: Many beginners rush this step and damage the paint. Work slowly to avoid scratches.
4. Separate The Fender Flare
Once all fasteners are out, gently pull the fender flare away from the body. You may need to wiggle it, as old flares can stick due to dirt or paint. If it does not move easily, double-check for missed screws or clips.
5. Clean And Inspect
With the flare removed, clean the area with water and soap. Inspect for rust or damage. If you find rust, sand it down and apply rust-proof paint before installing new flares.
Example: On some older Jeep TJs, you may notice rust forming behind the flare where moisture collects. Addressing this now will prevent bigger problems later.
Common Mistakes And How To Avoid Them
- Stripping fasteners: Use the correct tool size. Stripped bolts are hard to remove and replace.
- Damaging paint: Always pry slowly. Place a cloth under your tool to avoid scratches.
- Losing screws: Keep all fasteners in a labeled container for easy reinstallation.
- Forgetting hidden clips: Double-check around the wheel wells. Missed clips can break the flare or damage the body.
Many beginners overlook the importance of cleaning before removal. Dirt can hide fasteners and make removal harder. Always wash the area first.

Comparison: Oem Vs Aftermarket Fender Flares
If you plan to replace your flares, consider the difference between OEM (original) and aftermarket options.
| Feature | OEM Fender Flare | Aftermarket Fender Flare |
|---|---|---|
| Fit | Perfect | Varies |
| Price | Higher | Lower to high |
| Material | Plastic | Plastic or metal |
| Style | Factory look | Wide, custom |
OEM flares are best for factory restoration, while aftermarket flares offer more customization and often better coverage for larger tires.
What To Do After Removal
After removing the fender flares, decide if you want to reinstall them, replace them, or leave them off for a rugged look. If you plan to drive without flares, check your local laws—some states require flares to cover tires.
Practical tip: Use touch-up paint to cover any scratches left from removal. This prevents rust and keeps your Jeep looking good.
Frequently Asked Questions
Can I Remove Jeep Tj Fender Flares Without Special Tools?
Most fasteners can be removed with basic tools like a socket wrench and screwdriver. However, a Torx bit is often needed for certain screws. A trim tool helps with plastic clips but isn’t required.
How Long Does It Take To Remove All Four Fender Flares?
For beginners, removing all four flares usually takes about 1-2 hours. If bolts are rusty or stuck, it may take longer. Cleaning and prepping beforehand speeds up the process.
Will Removing Fender Flares Affect My Jeep’s Paint?
If you remove flares carefully and avoid scraping, the paint should stay intact. However, old flares sometimes hide scratches or rust. Use touch-up paint if needed after removal.
Do I Need To Replace The Clips And Bolts?
It’s a good idea to replace any broken or rusty clips and bolts. New hardware ensures a secure fit if you reinstall or upgrade flares. Replacement kits are available online and at auto stores.
Is It Legal To Drive Without Fender Flares?
Laws vary by state. In many areas, tires must be covered by flares to meet safety rules. Check your local regulations to avoid fines or inspection issues. For details, visit Jeep Official Site.
Removing Jeep TJ fender flares is a straightforward job if you follow the right steps and stay patient. Take your time, use the correct tools, and always inspect for hidden issues like rust. With a bit of care, you can customize your Jeep’s look and keep it protected for years to come.


