If you need to fix a window, replace a speaker, or repair wiring in your Jeep Grand Cherokee, you’ll probably have to remove the door panel first. Many owners worry about breaking clips or damaging trim, but with the right steps and a bit of patience, you can do this safely at home. This guide covers every detail you need to remove your Grand Cherokee’s door panel the right way—even if you’re new to car repairs.
Tools And Preparation
Before starting, gather these tools:
- Flathead screwdriver (ideally with a trim removal kit)
- Phillips screwdriver
- Torx bit set (usually T20 and T30)
- Needle-nose pliers
- Plastic trim panel tool
- Small container (for screws and clips)
- Work gloves
Disconnect the car battery if you plan to work near electrical parts like window switches. This prevents accidental short circuits.
Tip: Take photos at each step. It’s easy to forget where each screw or clip goes, especially if it’s your first time.
Step-by-step Door Panel Removal
Let’s walk through the process for most Jeep Grand Cherokee models (2011–2021). Some steps can vary for older or newer models, but the basics are similar.
Start by finding all screws. Jeep hides several under covers and trim pieces.
- Pry off the small plastic cover near the door handle with a trim tool or flathead screwdriver. You’ll find a Phillips screw underneath.
- Remove the armrest screw cover (usually a rubber insert). Another screw hides here.
- Check for screws at the lower edge of the panel.
Keep these screws in your container. Losing even one can mean a loose panel later.
2. Take Out Window And Lock Controls
Carefully pry up the window switch panel with your trim tool. Disconnect the wiring harness by pressing the tab and gently pulling it out. Set the switch aside.
Common mistake: Don’t pull hard on the wiring. The plastic tabs break easily.
3. Release The Door Panel Clips
Jeep uses plastic clips to hold the panel. Slide the trim panel tool between the panel and door at the bottom edge. Work your way around, popping each clip free. You’ll hear them click as they release.
If you feel strong resistance, check for missed screws before pulling harder.
4. Lift Off The Door Panel
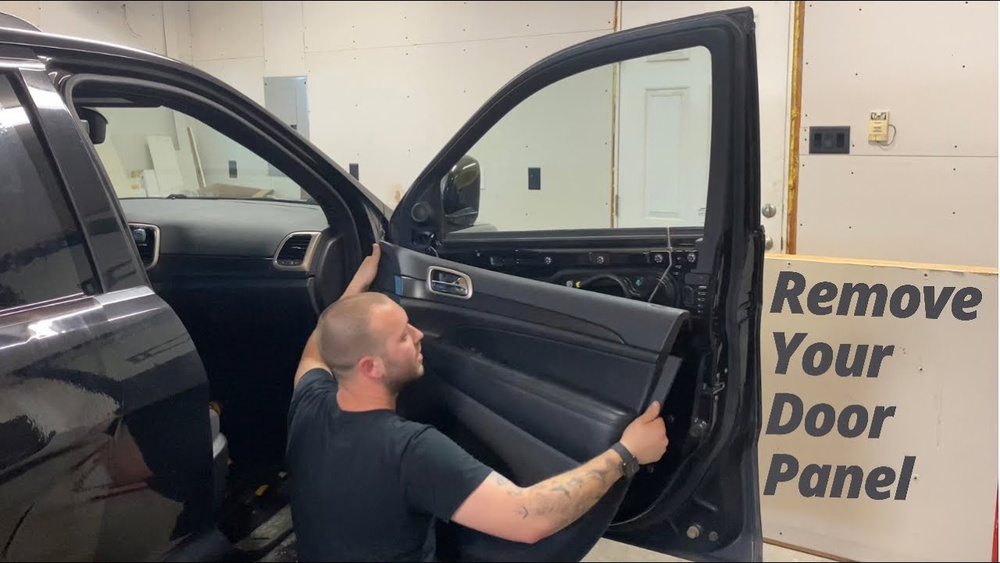
Once all clips and screws are out, lift the panel straight up. This unhooks it from the window ledge.
Behind the panel, you’ll see:
- Door handle cable
- Speaker wire (if equipped)
- Courtesy light plug
Disconnect these by pressing their tabs and gently removing them.
5. Inspect And Store The Panel
Set the panel on a soft surface to avoid scratches. Now you can access the door’s inside for repairs.
Non-obvious insight: Some clips may stay in the door rather than the panel. Remove them with needle-nose pliers and reinstall them on the panel before reassembly.
Table: Typical Screw And Clip Locations
Understanding where to look for fasteners makes removal easier. Here’s a helpful summary:
| Location | Fastener Type | Tool Needed |
|---|---|---|
| Behind door handle trim | Phillips screw | Phillips screwdriver |
| Armrest insert | Phillips screw | Phillips screwdriver |
| Lower door edge | Plastic clips | Trim panel tool |
| Window switch panel | Wiring harness | Fingers/pliers |
Reassembly Tips
Putting the door panel back is just as important as removing it.
- Line up all clips with their holes before pressing the panel in place.
- Reconnect all electrical plugs—window switches, door lights, and the handle cable.
- Test everything (window, lock, speaker) before securing final screws.
- Reinstall screws in reverse order and replace all trim covers.
Pro tip: If a clip breaks, replace it. Driving with loose panels leads to rattles and extra wear.

Table: Common Clip Types And Jeep Grand Cherokee Models
Different years use slightly different clips. Here’s a quick comparison:
| Model Year | Clip Material | Clip Shape |
|---|---|---|
| 2011-2015 | Nylon plastic | Pine tree |
| 2016-2021 | Reinforced plastic | Flat push-in |
| 2022-present | Composite plastic | Round push-in |
Buying the right clip saves headaches when reinstalling.
Safety And Practical Advice
Work slowly and never force anything. Most damage happens from rushing or missing hidden screws. If you’re unsure, check your owner’s manual or look for a repair video for your Grand Cherokee year. For official diagrams, see the Mopar official site.
Less-known tip: In cold weather, plastic clips are brittle. Try to do this work in a warm garage or wait for a mild day.
If you plan to upgrade speakers, measure the opening before buying replacements—Jeep uses different sizes across models.
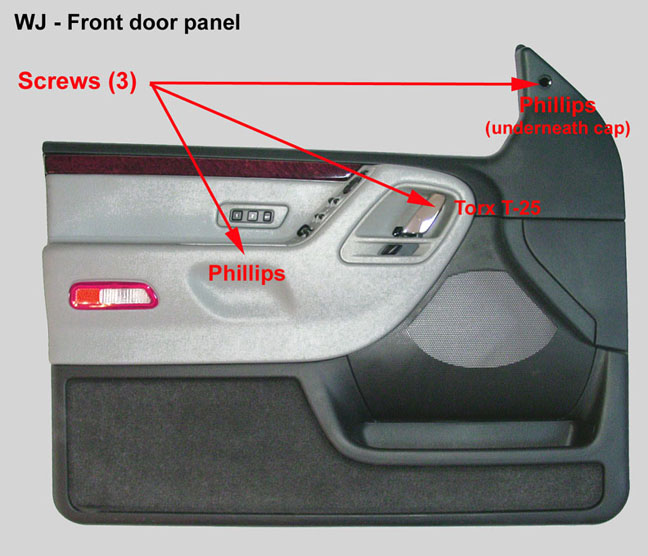
Table: Estimated Door Panel Removal Time
Knowing the time commitment helps you plan:
| Experience Level | Estimated Time |
|---|---|
| First-timer | 40–60 minutes |
| DIY regular | 20–30 minutes |
| Professional | 10–15 minutes |
Frequently Asked Questions
How Many Screws Hold The Jeep Grand Cherokee Door Panel?
Most models use two to four screws, often hidden under trim covers and inside the armrest. Always check your specific year, as locations can differ.
What If A Plastic Clip Breaks During Removal?
Broken clips are common. You can buy replacement clips online or at auto parts stores. Driving with missing clips leads to rattles and possible panel damage.
Can I Remove The Panel Without Special Tools?
While a flathead screwdriver works, a trim removal tool is much safer. It prevents marks and makes popping clips easier, especially on newer panels.
Do I Need To Disconnect The Battery Before Starting?
If you’re disconnecting any electrical parts (like window switches), it’s safest to disconnect the battery. This protects against short circuits and accidental airbag deployment.
Will This Void My Warranty?
Removing the panel for basic repairs usually does not void your warranty. However, damaging wiring or breaking components could affect coverage. Always check with your dealer if your Jeep is under warranty.
Removing your Jeep Grand Cherokee door panel isn’t as tough as it seems. With patience, careful tool use, and the right tips, you can handle this job yourself and save on repair costs. Take your time, keep track of screws and clips, and enjoy learning more about your Jeep’s inner workings.