A serpentine belt diagram for a 2008 Jeep Liberty is crucial for understanding how the engine's accessories are driven. This single, continuous belt snakes around various pulleys, powering components like the alternator, power steering pump, air conditioning compressor, and water pump.
Without a clear diagram, replacing or inspecting this vital part can be a confusing and error-prone task. This guide will walk you through the typical serpentine belt routing for a 2008 Jeep Liberty, discuss common issues, and provide tips for maintenance and replacement.
Understanding the serpentine belt system is more than just knowing where the belt goes. It’s about recognizing how these interconnected components work together to keep your vehicle running smoothly.
A worn or misaligned belt can lead to a cascade of problems, from a dead battery to an overheating engine.
For a 2008 Jeep Liberty, like many vehicles of its era, the serpentine belt is a single-ribbon marvel of engineering, but one that requires diligent attention.
Understanding The Serpentine Belt System
The serpentine belt is a modern replacement for older V-belts, which required multiple belts to drive different accessories. The advantage of a single serpentine belt is its efficiency and simplicity.
It’s a long, flat rubber belt with ribs on one side that engage with grooved pulleys.
The tensioner pulley keeps the belt taut, ensuring it doesn’t slip. The smooth side of the belt runs against the smooth pulleys.
Components Driven By The Serpentine Belt
In a 2008 Jeep Liberty, several key engine accessories rely on the serpentine belt to function:
- Alternator: This component generates electricity to charge the battery and power the vehicle’s electrical systems while the engine is running.
- Power Steering Pump: This assists the driver in turning the steering wheel, making it easier to maneuver the vehicle.
- Air Conditioning (A/C) Compressor: This compresses refrigerant to cool the air inside the cabin.
- Water Pump: This circulates coolant through the engine and radiator, preventing overheating.
- Idler Pulley: This is an unpowered pulley that helps guide the belt along its path and maintain proper tension.
- Tensioner Pulley: This pulley, often spring-loaded or hydraulic, applies constant pressure to the belt to keep it tight and prevent slippage.
How The Serpentine Belt Works
The engine's crankshaft drives the serpentine belt via a pulley. As the crankshaft rotates, so does the belt.
This rotational force is then transferred to the other pulleys connected to the accessories. The ribbed side of the belt fits into the corresponding grooves on pulleys like the alternator and water pump, providing a strong grip.
The smooth side of the belt runs against smooth pulleys, like the idler pulley. The tensioner pulley is critical; it automatically adjusts to maintain the correct belt tension, even as the belt heats up and expands or wears down.
Serpentine Belt Diagram For 2008 Jeep Liberty
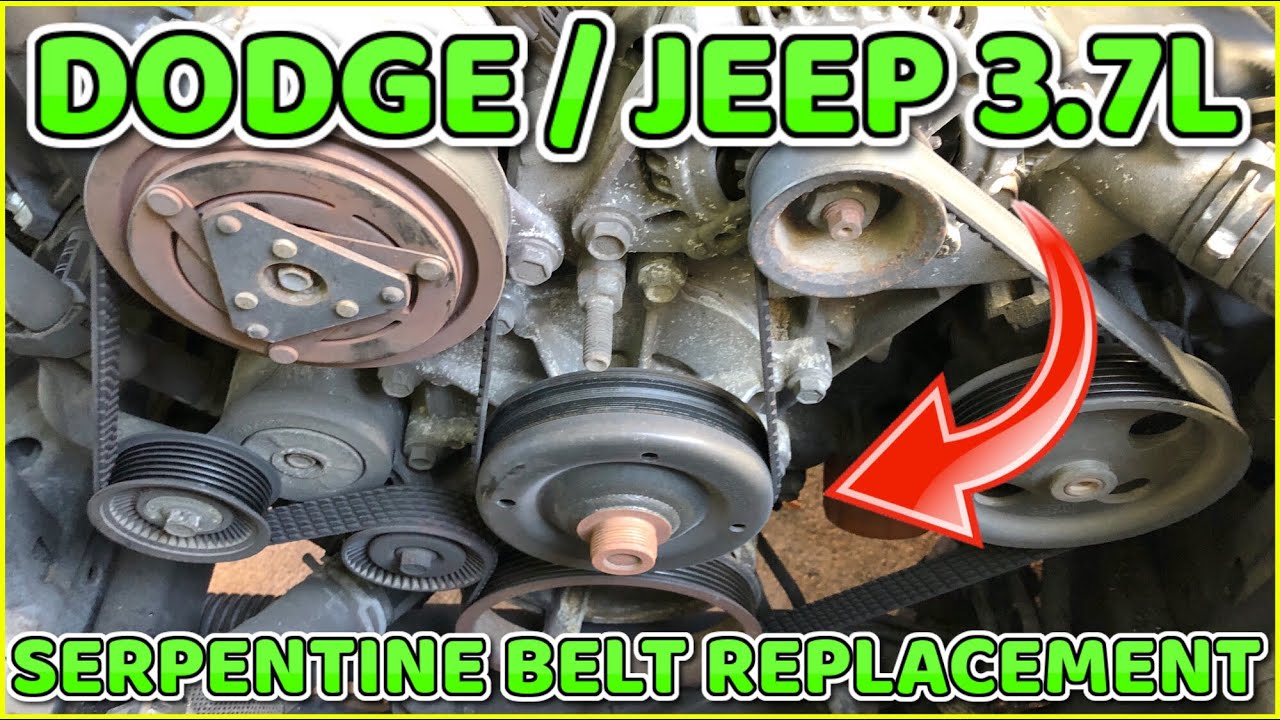
While specific engine configurations can vary slightly, the general serpentine belt routing for a 2008 Jeep Liberty typically follows a predictable path. The best way to confirm the exact routing for your specific vehicle is to locate the diagram often found on a sticker under the hood, usually on the radiator support or the underside of the hood itself.
However, we can describe a common layout.
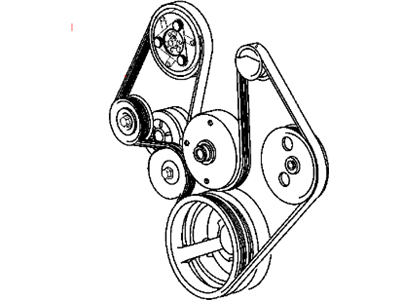
Imagine the belt starting from the crankshaft pulley at the bottom front of the engine. From there, it typically winds upwards towards the alternator, then down towards the power steering pump. Next, it might loop around the A/C compressor, then up to an idler pulley for guidance, and finally, around the water pump pulley. The belt then returns to the tensioner pulley, which is usually located near the other pulleys, before connecting back to the crankshaft pulley.
Visualizing The Path
To visualize this, picture the belt as a continuous loop. It’s not a simple circle but rather a complex path that hugs different pulleys at various angles. The tensioner pulley is the key to keeping this loop tight and functional. If the belt were to slip off any one of these pulleys, the accessory it drives would stop working.
Importance Of The Under-hood Diagram
It cannot be stressed enough: always refer to the diagram found on your 2008 Jeep Liberty’s hood or engine bay. These diagrams are specific to your vehicle’s exact engine and accessory setup. Trying to route the belt without this reference, or using a generic diagram, can lead to incorrect installation, belt damage, or failure of critical components.
Credit: www.youtube.com
Common Serpentine Belt Problems
Serpentine belts are made of rubber, a material that degrades over time due to heat, tension, and friction. Recognizing the signs of wear and tear is essential for preventing unexpected breakdowns.
Signs Of A Failing Serpentine Belt
Several indicators suggest your serpentine belt needs attention:
- Squealing Noises: A common symptom is a high-pitched squealing sound, especially when you start the engine, accelerate, or turn the steering wheel. This often indicates a loose belt or a pulley that is not aligned correctly. It can also happen if the belt is wet.
- Cracks and Fraying: Inspect the belt visually. Look for visible cracks, splits, or fraying along the edges or the ribbed surface. These are clear signs of wear and that the belt is nearing the end of its life.
- Glazed or Shiny Appearance: A belt that looks unusually shiny on its ribbed side might be slipping due to wear or contamination (like oil or coolant).
- Missing Chunks or Pieces: If you notice any missing pieces from the belt, it’s a critical failure waiting to happen.
- Accessory Malfunctions: If an accessory stops working, your A/C blows warm, the power steering becomes heavy, or the battery warning light comes on, the serpentine belt is a prime suspect.
Causes Of Belt Failure
Besides normal wear and tear, several factors can accelerate serpentine belt failure:
- Misaligned Pulleys: If a pulley is not perfectly aligned with the others, it can cause the belt to run at an angle, leading to premature wear and potential damage.
- Worn Pulleys: Bearings in pulleys can wear out, causing them to seize or wobble. This can damage the belt and the pulley itself.
- Contamination: Oil, coolant, or power steering fluid leaks can contaminate the belt, causing the rubber to degrade and lose its grip.
- Improper Tension: A belt that is too loose will slip and squeal. A belt that is too tight can put excessive strain on the belt itself and the bearings of the accessories it drives. The automatic tensioner is designed to prevent this, but a faulty tensioner can cause issues.
Serpentine Belt Maintenance And Replacement
Regular inspection and timely replacement of the serpentine belt are key to preventing roadside emergencies.
Inspection Schedule
It’s a good practice to inspect your serpentine belt at least twice a year or every oil change. Pay close attention to it, especially if you live in an area with extreme temperatures, as this can accelerate rubber degradation.
When To Replace The Belt
Most manufacturers recommend replacing the serpentine belt every 60,000 to 100,000 miles. However, this is a guideline. Always replace the belt immediately if you notice any signs of wear or damage, regardless of mileage. Also, if you’ve had a coolant or oil leak, it’s wise to inspect and potentially replace the belt even if it looks good, as contamination can weaken it internally.
Diy Replacement Vs. Professional Service
Replacing a serpentine belt can be a manageable DIY project for those with some mechanical experience and the right tools. The process typically involves:
- Locating the Tensioner: Find the automatic tensioner pulley.
- Releasing Tension: Use a wrench or breaker bar on the designated spot on the tensioner to rotate it and release tension on the belt.
- Removing the Old Belt: While holding tension off, carefully slip the old belt off one of the pulleys.
- Installing the New Belt: Route the new belt according to the serpentine belt diagram under the hood, ensuring it sits correctly in the grooves of each pulley.
- Applying Tension: Slowly release the tensioner to apply tension to the new belt.
- Final Check: Ensure the belt is seated properly on all pulleys and that it runs smoothly.
Pro Tip: Always have the serpentine belt diagram readily available and take a picture of the belt routing before removing the old one, just in case.
If you're not comfortable with car maintenance, it's best to have a qualified mechanic replace the belt. They have the necessary tools and expertise to ensure it's installed correctly and that no other issues are present.
The cost of professional replacement is usually reasonable and can save you from potential damage or a breakdown.
Credit: www.moparpartsgiant.com
Understanding Belt Tensioners And Idler Pulleys
The tensioner and idler pulleys are critical components of the serpentine belt system. Their health directly impacts the belt’s lifespan and performance.
The Role Of The Tensioner Pulley
The tensioner pulley is designed to maintain the correct amount of tension on the serpentine belt. It’s usually spring-loaded or hydraulic. As the belt heats up and expands, or as it wears down, the tensioner automatically adjusts to keep the belt snug. A failing tensioner can lead to a belt that is either too loose (causing squealing and slippage) or too tight (which can damage the belt and accessory bearings).
The Function Of Idler Pulleys
Idler pulleys are essentially guide pulleys. They don’t drive any accessories but are strategically placed to ensure the belt follows the correct path around the other pulleys. They help manage belt length, prevent flapping, and ensure proper contact with the driven pulleys. Like the tensioner, idler pulleys have bearings that can wear out, leading to noise or seizing.
Signs Of Tensioner Or Idler Pulley Failure
Symptoms of a failing tensioner or idler pulley can mimic those of a worn belt:
- Squealing or Grinding Noises: A worn bearing in a tensioner or idler pulley can produce a distinct squealing or grinding sound, often more constant than belt squeal.
- Wobbly Pulley: If you can see the pulley wobbling when the engine is running, its bearing is likely failing.
- Belt Jumping Off: A seized or improperly functioning tensioner or idler pulley can cause the belt to slip off the pulleys.
If you suspect a problem with the tensioner or idler pulley, it’s best to replace them along with the serpentine belt. These components work together, and replacing one without the other can lead to premature failure of the new belt.
Common Serpentine Belt Routing Variations
While a standard serpentine belt diagram exists for the 2008 Jeep Liberty, slight variations can occur based on engine size (e. g.
, 3. 7L V6) or specific option packages.
It's always paramount to consult the diagram specific to your vehicle.
Example Of A Common 3.7l V6 Routing
For the 3.7L V6 engine commonly found in the 2008 Jeep Liberty, a typical routing might look something like this:
- Crankshaft Pulley: The belt originates here.
- Power Steering Pump: Moves down from the crankshaft.
- A/C Compressor: Loops across to the A/C compressor.
- Idler Pulley (Upper): Moves up to an idler pulley.
- Water Pump: Goes around the water pump pulley.
- Alternator: Then loops to the alternator.
- Tensioner Pulley: Finally, it wraps around the tensioner pulley before returning to the crankshaft.
This is just one possibility, and the exact path can differ. The key is the continuous loop driven by the crankshaft and kept taut by the tensioner, engaging all necessary accessory pulleys.
Why Diagrams Are Essential
The complexity of serpentine belt routing is why diagrams are so important. A belt routed incorrectly will not engage all necessary pulleys, will likely slip, and could potentially damage other engine components or even get caught in moving parts, leading to catastrophic failure.

Credit: www.youtube.com
Choosing The Right Serpentine Belt
Not all serpentine belts are created equal. Selecting a quality replacement belt is crucial for longevity and performance.
Belt Material And Construction
Serpentine belts are typically made from EPDM (ethylene propylene diene monomer) rubber, which offers good resistance to heat, ozone, and weathering. Higher-quality belts may have additional reinforcing materials like Kevlar or polyester cords embedded within the rubber for increased strength and durability.
Oem Vs. Aftermarket Belts
- OEM (Original Equipment Manufacturer) belts: These are made by or for Jeep and are designed to meet the exact specifications of your 2008 Liberty. They are generally reliable but can be more expensive.
- Aftermarket belts: Many reputable brands offer serpentine belts for the Jeep Liberty. When choosing an aftermarket belt, look for well-known brands with good reviews. Pay attention to the warranty offered.
What To Look For In A Quality Belt
When purchasing a replacement belt, check for:
- Uniform Ribbing: The ribs should be evenly spaced and well-formed.
- Smooth Back: The non-ribbed side should be smooth and free of defects.
- Sturdy Construction: The belt should feel robust and not overly flexible or flimsy.
- Reputable Brand: Stick with brands known for automotive parts quality.
Troubleshooting Common Issues
When your 2008 Jeep Liberty’s serpentine belt system acts up, systematic troubleshooting can help pinpoint the problem.
Squealing On Startup
If you hear a squeal only when the engine is cold and it disappears as the engine warms up, it often indicates a slightly loose belt or moisture on the belt. Ensure your tensioner pulley is functioning correctly. If the noise persists, the belt may be glazed and need replacement.
Squealing During Acceleration Or While Turning
This type of squeal often means the belt is slipping under load. This could be due to:
- Loose belt: A weak tensioner is the usual culprit.
- Contaminated belt: Oil or coolant on the belt will cause it to slip.
- Worn belt: The ribs may no longer have enough grip.
- Seizing accessory: If an accessory (like the power steering pump or A/C compressor) is starting to seize, it puts extra drag on the belt, causing it to slip.
Grinding Or Rumbling Noises
This is usually a sign of a failing bearing in one of the pulleys, either the tensioner pulley, an idler pulley, or one of the accessory pulleys itself. To isolate the noise, you can carefully use a mechanic’s stethoscope or a long screwdriver (with the handle to your ear and the tip on the stationary part of each pulley housing) while the engine is running. Be extremely cautious around moving