Jeep Wrangler Tj Subwoofer Install: The Ultimate Guide To Perfect Sound
The Jeep Wrangler TJ is an icon. Its rugged charm and off-road prowess are legendary.
But when it comes to audio, the stock sound system often leaves much to be desired. For many TJ owners, the hum of the engine and the roar of the tires can drown out even the clearest music.
If you're looking to transform your TJ's interior into a concert hall on wheels, installing a subwoofer is the most impactful upgrade you can make.
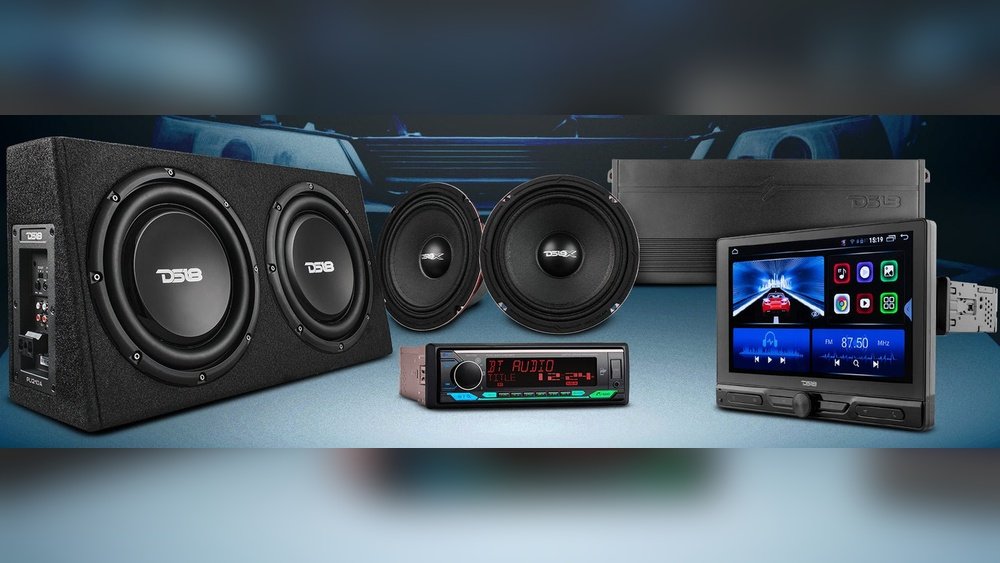
This guide will walk you through everything you need to know to achieve a perfect sound setup in your Jeep Wrangler TJ, from choosing the right components to the final wiring.
A subwoofer doesn’t just make things louder; it adds depth and richness to your audio. It handles the low frequencies, the bass notes that give music its power and emotion. Without a subwoofer, your speakers are trying to reproduce sounds they weren’t designed for, leading to muddy bass and a generally flat listening experience. A well-integrated subwoofer system can bring your favorite tracks to life, making every drive more enjoyable. This guide is designed for TJ owners who want to improve their sound system, whether you’re a seasoned car audio enthusiast or a complete beginner. We’ll cover the essential steps, important considerations, and common pitfalls to avoid.
Understanding Your Tj’s Audio System
Before you start buying parts, it's crucial to understand the limitations and capabilities of your Jeep Wrangler TJ's factory audio system. Most TJs came with a basic head unit (the radio/stereo) and either two or four speakers.
These speakers are typically small and not designed to reproduce deep bass frequencies.
The factory amplifier, if equipped, is also quite modest.
The head unit is the brain of your audio system. It’s where you control your music, adjust settings, and connect your devices. Aftermarket head units offer significant improvements in sound quality, power output, and features like Bluetooth connectivity and smartphone integration. However, for a subwoofer install, the most important factor is the head unit’s preamp outputs (RCA jacks). If your factory head unit doesn’t have these, you’ll need an adapter or consider replacing the head unit altogether.
The factory speakers in a TJ are usually located in the dashboard and soundbar. These are full-range speakers, meaning they try to play all frequencies.
Because they can't effectively produce low bass, this job falls to the subwoofer. The soundbar is a popular location for adding speakers, but for subwoofers, a dedicated enclosure is usually necessary.
Speaker Placement And Acoustics In A Tj
The TJ's interior presents unique acoustic challenges. The cabin is relatively small, but it's also noisy, especially with the top off or windows down.
The hard angles and the open-air nature of a Jeep mean that sound can bounce around in unpredictable ways.
This is why a subwoofer is so important, it can fill in the low-end frequencies that are easily lost in the ambient noise.
When planning your subwoofer install, consider how the sound will travel. The best placement for a subwoofer is often in the cargo area, but this can take up valuable space.
Other options include under-seat enclosures or custom-built boxes. The goal is to integrate the subwoofer so that its sound blends seamlessly with your main speakers, creating a balanced soundstage.

Choosing The Right Subwoofer And Enclosure
Selecting the correct subwoofer and enclosure is the most critical step in achieving great sound. There are many options, and the best choice depends on your budget, your desired sound quality, and how much space you’re willing to dedicate.
Subwoofer Types And Sizes
Subwoofers come in various sizes, commonly 8-inch, 10-inch, and 12-inch.
- 8-inch subwoofers: These are compact and ideal for smaller vehicles or when space is very limited. They provide a noticeable bass improvement over factory speakers but won’t deliver earth-shattering lows.
- 10-inch subwoofers: A good balance between size and performance. They offer more output and deeper bass than 8-inch models and are a popular choice for many TJ owners.
- 12-inch subwoofers: These deliver the most powerful bass and the deepest frequencies. They require more space and a more powerful amplifier to perform optimally.
You’ll also encounter different subwoofer designs:
- Component Subwoofers: These are sold individually and require a separate enclosure and often a separate amplifier. They offer the most flexibility for custom builds.
- Subwoofer Packages/Enclosed Subwoofers: These come pre-mounted in a box, ready to be connected to an amplifier. They are the easiest solution for beginners.
Enclosure Types: Sealed Vs. Ported
The enclosure is just as important as the subwoofer itself. It’s the box that houses the subwoofer and significantly impacts its sound.
- Sealed Enclosures: These are airtight boxes. They offer accurate and tight bass reproduction. They are generally smaller than ported boxes and easier to power. If you prefer a clean, musical bass response, a sealed enclosure is a great choice.
- Ported (Vented) Enclosures: These boxes have a tube or “port” that allows air to move in and out, amplifying certain bass frequencies. They offer louder output and deeper bass at specific frequencies. However, they can sometimes sound less precise than sealed enclosures and are typically larger.
For a Jeep Wrangler TJ, space is often at a premium. A sealed enclosure is often preferred because it’s more compact and provides a more controlled bass response, which can be beneficial in a noisy environment.
Subwoofer Power Handling (rms Vs. Peak)
When looking at subwoofers, you’ll see two power ratings:
- RMS (Root Mean Square): This is the continuous power the subwoofer can handle. This is the most important rating and indicates how much power the subwoofer can take long-term without damage.
- Peak Power: This is the maximum power the subwoofer can handle for very short bursts. It’s less important than RMS.
Always match your subwoofer’s RMS rating to your amplifier’s output. It’s generally better to have an amplifier that slightly *underpowers* a subwoofer than one that overpowers it.
Tj-specific Subwoofer Enclosure Options
Many companies make enclosures specifically designed for the Jeep Wrangler TJ. These are often designed to fit in specific locations, like the rear cargo area, under the rear seat, or even in place of the factory center console.
- Under-Seat Subwoofers: These are low-profile enclosures designed to slide under the front seats. They are a great space-saving option but typically house smaller subwoofers (6.5-inch or 8-inch) and offer less output.
- Cargo Area Subwoofers: These enclosures typically sit in the rear of the Jeep. They can accommodate larger subwoofers (10-inch or 12-inch) and offer more bass. Some are designed to fit snugly against the rear seat, while others might take up more floor space.
- Custom Enclosures: For the ultimate fit and performance, custom enclosures can be built. This allows you to maximize space and tune the enclosure perfectly for your chosen subwoofer.
A popular and effective option for the TJ is a downward-firing subwoofer enclosure that fits into the cargo area. This design protects the subwoofer cone from damage and can even use the floor of your Jeep as part of the enclosure, potentially increasing output.
Amplifiers: Powering Your New Subwoofer
A subwoofer needs more power than your factory head unit can provide. This is where an amplifier comes in.
An amplifier takes the low-level audio signal from your head unit and boosts it to a level powerful enough to drive your subwoofer.
Amplifier Types: Mono Vs. Multi-channel
- Mono (Single-Channel) Amplifiers: These are specifically designed to power one or more subwoofers. They are the most common choice for subwoofer installations because they are optimized for low-frequency output.
- Multi-Channel Amplifiers: These amplifiers have multiple channels (e.g., 2-channel, 4-channel). A 4-channel amp can power your front and rear speakers, and some can be “bridged” to power a subwoofer. However, a dedicated mono amp is usually more efficient and provides better performance for subwoofers.
Matching Amplifier To Subwoofer
The most crucial aspect of choosing an amplifier is matching its power output to your subwoofer’s RMS rating.
- RMS Power Output: The amplifier’s RMS power output per channel (or total bridged RMS power for a mono amp) should be as close as possible to the subwoofer’s RMS power handling. For example, if your subwoofer is rated at 300W RMS, you’ll want an amplifier that can deliver around 300W RMS to that subwoofer.
- Impedance (Ohms): Subwoofers have an impedance rating (measured in Ohms, Ω). Common ratings are 2Ω, 4Ω, or dual voice coils (DVC) which can be wired to present a 1Ω, 2Ω, or 4Ω load. Your amplifier will also have specific impedance ratings it can handle. Ensure your subwoofer’s wired impedance matches what the amplifier is designed to drive. For instance, a 4Ω subwoofer wired to a 4Ω input on the amp is standard. A DVC subwoofer can offer more wiring flexibility.
Pro Tip: It’s generally better to slightly *underpower* your subwoofer with a quality amplifier than to overpower it with a weak or unstable one. An amplifier that is too weak may distort the signal, which can damage the subwoofer faster than clean power.
Amplifier Installation Considerations
- Power Wire: A dedicated power wire needs to run from the battery to the amplifier. The gauge (thickness) of this wire is critical and depends on the amplifier’s current draw and the length of the run. Undersized wires can cause performance issues and even become a fire hazard.
- Ground Wire: A good ground connection is essential for amplifier performance and preventing noise. The ground wire should be as short as possible and connected to a clean, unpainted metal surface of the Jeep’s chassis.
- Remote Turn-On Wire: This small wire tells the amplifier when to turn on and off, usually connected to the head unit’s remote turn-on output.
- Fusing: An inline fuse should be installed on the power wire near the battery to protect the vehicle’s electrical system and the amplifier in case of a short circuit.

Wiring And Installation Process
Installing a subwoofer and amplifier involves several steps, from running wires to making connections. Take your time, double-check your work, and prioritize safety.
Step 1: Planning And Preparation
- Gather Your Tools: You’ll need wire strippers, crimpers, screwdrivers, a socket set, a drill (if needed), electrical tape, zip ties, and a multimeter.
- Disconnect the Battery: Crucially, disconnect the negative battery terminal before starting any electrical work to prevent short circuits and damage.
- Run Power Wire: Route the power wire from the battery location to where the amplifier will be mounted. Many TJs have a firewall grommet that can be used to pass wires into the cabin. Avoid running power wires alongside speaker wires or RCA cables, as this can cause electrical interference (noise).
- Run Ground Wire: Connect the ground wire to the amplifier and then to a solid, unpainted metal point on the Jeep’s chassis. Scrape away any paint or rust to ensure a clean connection.
- Run Remote Turn-On Wire: Route the remote turn-on wire from the head unit to the amplifier.
- Run RCA Cables and Speaker Wires: Route the RCA cables (for the audio signal) and speaker wires from the head unit (or line-output converter) to the amplifier and then to the subwoofer. Keep these away from the power wire.
Step 2: Mounting The Amplifier
Choose a location for your amplifier. Common spots in a TJ include:
- Under a front seat
- Behind the rear seat
- On the back of the rear seat
- In the cargo area, mounted to a custom panel
Ensure the amplifier has adequate ventilation. It will generate heat during operation.
Step 3: Wiring The Components
- Connect Power and Ground: Connect the power wire to the amplifier’s power terminal and the ground wire to its ground terminal.
- Connect Remote Turn-On: Connect the remote turn-on wire to the amplifier’s remote terminal.
- Connect RCA Cables: Plug the RCA cables into the amplifier’s input jacks. If you are using the factory head unit without RCA pre-outs, you will need a line-output converter (LOC). This device takes the speaker-level output from your factory head unit and converts it to a low-level RCA signal that the amplifier can use.
- Connect Speaker Wires: Connect the speaker wires from the amplifier’s output terminals to your subwoofer. Pay attention to polarity (+ and -). Incorrect polarity can result in poor bass response. If you have a dual voice coil (DVC) subwoofer, ensure you wire both coils according to the amplifier’s capabilities and your desired impedance.
Step 4: Connecting The Subwoofer
Connect the speaker wires from the amplifier to the subwoofer terminals. If using an enclosed subwoofer, this often involves connecting wires to the enclosure’s input terminals.
Step 5: Final Checks And Powering Up
- Double-Check All Connections: Ensure all wires are securely connected and that there are no stray strands of wire that could cause a short circuit.
- Install Inline Fuse: Install the correctly rated fuse in the inline fuse holder near the battery.
- Reconnect Battery: Reconnect the negative battery terminal.
- Test: Turn on your head unit. The amplifier should power on (often indicated by a small light). Play some music with bass and check if the subwoofer is working. Listen for any unusual noises or distortions.
Warning: If you smell burning or see smoke, immediately disconnect the battery and re-check all your wiring. Improper wiring can be dangerous.
Integrating With Your Factory Head Unit (or Aftermarket)
Connecting your new subwoofer system to your existing audio setup is crucial for a balanced sound.
Using A Line-output Converter (loc)
If your TJ has a factory radio that lacks RCA pre-outputs, a Line-Output Converter (LOC) is your best friend. This device taps into the speaker wires coming from your factory radio and converts the high-level speaker signal into a low-level RCA signal that an amplifier can understand.
There are basic passive LOCs and more advanced active LOCs. Active LOCs often provide better signal quality and may include features like remote turn-on signal generation.
The wiring involves tapping into the rear speaker outputs of your factory radio harness.