The Essential Guide To Jeep Wrangler Steering Wheel Pullers
Removing a steering wheel on a Jeep Wrangler can seem like a daunting task, especially for those new to automotive repair. The steering wheel is a critical component, connecting the driver directly to the vehicle's direction.
When it needs to be removed, whether for upgrades, repairs, or maintenance, a specialized tool is often required: the Jeep Wrangler steering wheel puller. This tool is designed to safely and effectively detach the steering wheel from the steering column without causing damage to either part.
Without the correct puller, attempting to force the wheel off can lead to bent components, stripped threads, or even injury.
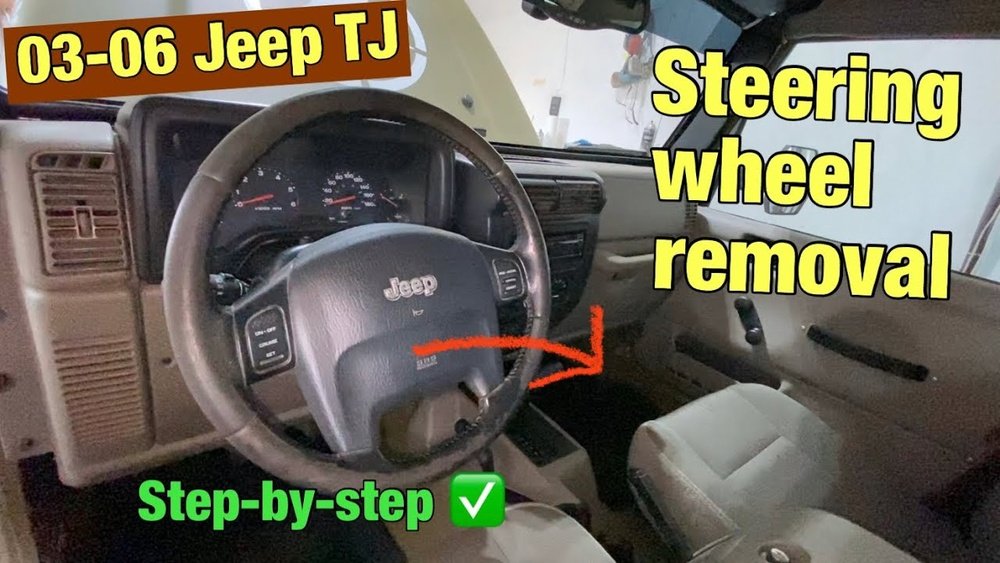
This guide will cover everything you need to know about these essential tools, from what they are and why you need one, to choosing the right one and using it correctly.
Why You Need A Steering Wheel Puller For Your Jeep Wrangler
The steering wheel on a Jeep Wrangler, like many vehicles, is typically press-fitted onto a tapered shaft, often secured by a nut. Over time, or due to heat cycles and vibrations, this fit can become incredibly tight. The tapered design, while strong, makes the wheel very difficult to remove without specialized leverage. Simply pulling or prying with brute force is rarely effective and highly likely to cause damage. This is where a steering wheel puller becomes indispensable.
A steering wheel puller works by applying even, controlled pressure to remove the wheel. It typically involves a strong metal plate or bracket that attaches to the steering wheel’s bolt holes (or the horn cap area) and a central forcing screw that presses against the end of the steering column shaft.
As the screw is tightened, it gradually pulls the steering wheel off the shaft. This method ensures that the force is applied directly and uniformly, preventing stress on the delicate steering wheel spokes or the steering column itself.
For a Jeep Wrangler, where off-roading can expose the vehicle to harsher conditions and more frequent component checks, having the right tools for maintenance is crucial.
Understanding The Different Types Of Steering Wheel Pullers
While the basic function of a steering wheel puller remains the same, to safely remove a steering wheel, there are variations in design. Understanding these differences can help you choose the best tool for your specific Jeep Wrangler model and needs.
The Universal Steering Wheel Puller
The most common type is the universal steering wheel puller. These kits are designed to fit a wide range of vehicles, including most Jeep Wranglers. They typically consist of a heavy-duty steel plate with multiple holes, allowing you to align it with the steering wheel’s bolt pattern. Accompanying this plate are several bolts of varying lengths and thread patterns, which thread into the steering wheel’s bolt holes. A central forcing screw then pushes against the steering column.
The advantage of a universal puller is its versatility. If you work on multiple vehicles or are unsure of the exact bolt pattern, a universal kit is a good starting point.
However, they can sometimes be bulkier and require more setup time to find the correct bolt configuration.
The Jeep-specific Steering Wheel Puller
Some manufacturers offer Jeep-specific steering wheel pullers. These are designed with the exact bolt patterns and steering column dimensions of Jeep vehicles in mind, including various Wrangler generations. While they might be more expensive than a basic universal kit, they often offer a more precise fit and can sometimes be easier to use because the guesswork of bolt selection is eliminated.
These pullers might have a yoke that fits around the steering column or a plate that perfectly aligns with the Wrangler’s specific wheel bolt pattern. If you primarily work on Jeep Wranglers, investing in a Jeep-specific tool can be a worthwhile decision for efficiency and ease of use.
Other Puller Designs
Beyond the common plate-style pullers, you might encounter other designs, though they are less common for DIY use on Wranglers:
- Three-Legged Pullers: These have three adjustable arms that grip the back of the steering wheel. They are less common for steering wheels and more often used for gears or pulleys.
- Two-Armed Pullers: Similar to a gear puller, these have two arms that hook under the steering wheel. They can work but might offer less even pressure than a plate-style puller.
For most Jeep Wrangler owners, a quality universal steering wheel puller or a Jeep-specific puller will be the most appropriate and effective choice.
Key Features To Look For In A Jeep Wrangler Steering Wheel Puller
When selecting a steering wheel puller, several features can significantly impact its effectiveness, durability, and ease of use. Investing in a quality tool will save you frustration and potential damage in the long run.
Material And Construction Quality
The primary material for steering wheel pullers is usually high-strength steel. Look for pullers with a robust, thick steel plate and strong, well-machined bolts. The forcing screw should also be substantial, with clean threads that turn smoothly. Cheaply made pullers might use thinner metal that can bend under pressure, or poorly threaded screws that bind up, making the job harder and potentially damaging the steering column. A black oxide finish or chrome plating can offer some corrosion resistance, though proper storage is still important.
Bolt Variety And Thread Pitch
A good universal puller will come with a wide assortment of bolts in various lengths and thread pitches. This is crucial because different steering wheel designs and horn button assemblies use different bolt sizes. Ensure the kit includes bolts that are specifically designed to thread into the steering wheel’s bolt holes, not just generic bolts. Some kits might also include adapters or washers to accommodate different steering wheel configurations. For Wranglers, common bolt sizes are often M8 or M10, but having a variety ensures compatibility.
Forcing Screw Design
The forcing screw is the heart of the puller. It needs to be strong, with a fine thread pitch for controlled pressure application. A ball-end tip on the forcing screw can help it seat securely in the center of the steering column shaft without slipping. Some forcing screws might also have a swivel handle or a hex head for easier turning with a wrench or socket. A smooth, consistent thread is paramount to avoid damaging the steering column’s end.
Ease Of Use And Setup
Consider how easy the puller is to set up. Does the plate have clearly marked holes? Are the bolts easy to thread in? Some pullers include a small tray or organizer for the bolts, which can be a helpful convenience. The overall design should allow for straightforward attachment to the steering wheel and clear access to the forcing screw for tightening.
Compatibility With Your Jeep Wrangler Model
While many pullers are universal, it’s always wise to check compatibility with your specific Jeep Wrangler year and model. Different generations (e.g., JK, JL, TJ, YJ) might have subtle differences in their steering wheel or column design that could affect puller fitment. Some pullers might be advertised as fitting specific Jeep models, which can be a good indicator.
How To Use A Jeep Wrangler Steering Wheel Puller: A Step-by-step Guide
Using a steering wheel puller requires patience and careful execution. Rushing the process is the surest way to cause damage.
Here's a general step-by-step guide. Always consult the specific instructions that come with your puller and your Jeep's service manual for model-specific details.
Step 1: Preparation And Safety
Before you begin, ensure you have the correct tools and a safe working environment. This includes:
- The steering wheel puller kit.
- A socket set and ratchet (likely 13mm, 15mm, or 19mm for the center nut, but verify).
- A torque wrench (for reassembly).
- Gloves to protect your hands.
- Safety glasses to protect your eyes from debris.
- A way to secure the steering wheel once it’s loose, to prevent it from falling.
Crucially, disconnect the negative battery terminal and wait at least 15-30 minutes before starting. This is essential to disarm the airbag system, which can deploy unexpectedly and cause serious injury if the electrical system is still live.
Step 2: Remove Airbag And Center Nut
This is the most critical safety step.
- Locate the airbag module: On most Wranglers, the airbag is housed within the steering wheel. There are usually access holes on the back or sides of the steering wheel hub.
- Disengage the airbag clips: Using a small screwdriver or a specialized tool, carefully release the clips that hold the airbag module in place. This often involves pushing a spring clip inwards. Be gentle; these clips can be fragile. Once disengaged, the airbag module can usually be carefully lifted or tilted away from the steering wheel.
- Disconnect airbag wiring: Carefully unplug the electrical connector(s) for the airbag. They usually have a small locking tab that needs to be pressed. Never force these connectors.
- Remove the center steering wheel nut: Once the airbag is out of the way, you’ll see a large center nut holding the steering wheel to the steering column shaft. Use the appropriate socket and ratchet to remove this nut. Do not remove it completely yet. Leave it threaded on a few turns. This nut protects the threads on the steering column shaft and prevents the steering wheel from being damaged when it pops loose.
Step 3: Position The Steering Wheel Puller
Now it’s time to attach the puller.
- Assemble the puller plate: Place the puller plate over the steering column, aligning its holes with the bolt holes on the steering wheel hub.
- Select and install the bolts: Choose the appropriate bolts from your kit that will thread securely into the steering wheel’s bolt holes. Thread them in partway by hand.
- Center the forcing screw: Place the tip of the forcing screw into the center of the steering column shaft. Ensure it is seated properly. Some shafts have a small indentation for the screw’s tip.
Step 4: Tighten The Forcing Screw
This is where the pulling action happens.
- Apply pressure: Use a wrench or socket to slowly and steadily tighten the forcing screw. As you tighten, the plate will pull outwards on the steering wheel, and the screw will push inwards on the steering column.
- Listen for pops: You will likely hear a loud pop or creak as the steering wheel breaks free from the tapered shaft. This is normal.
- Continue tightening if needed: If the wheel doesn’t release, continue tightening. If it becomes extremely difficult, re-check that the center nut is still slightly threaded and that the puller is securely attached. Do not over-tighten to the point of stripping threads or bending components.
Step 5: Remove The Steering Wheel
Once the wheel is loose:
- Back off the forcing screw: Once the wheel has moved sufficiently, unscrew the forcing screw.
- Remove the puller: Detach the puller plate and bolts from the steering wheel.
- Remove the center nut: Now you can completely remove the center nut you left on earlier.
- Lift the steering wheel off: The steering wheel should now slide off the shaft easily. Be prepared to catch it so it doesn’t fall. Be mindful of the clock spring behind the steering wheel; do not let it spin freely, as this can damage it.
Step 6: Reassembly
Reassembly is essentially the reverse of removal, with a few key points:
- Align the steering wheel: Carefully slide the new or repaired steering wheel onto the splined shaft. Ensure it’s aligned correctly, paying attention to the clock spring’s orientation. Do not force it.
- Install the center nut: Thread the center nut back on by hand, then tighten it with a socket. Use a torque wrench to tighten it to the manufacturer’s specified torque. This is critical for safety.
- Reconnect airbag: Carefully reconnect the airbag electrical connector(s) and then re-seat the airbag module, ensuring the clips engage properly.
- Reconnect battery: Reconnect the negative battery terminal.
- Test systems: Start the vehicle and check that the airbag warning light goes out. Test the steering wheel’s operation and ensure all functions (horn, buttons) work correctly.
Common Mistakes To Avoid When Using A Steering Wheel Puller
Even with the right tool, mistakes can happen. Being aware of common pitfalls can help you avoid them.
Mistake 1: Forcing It Without A Puller
This is the most common and damaging mistake. Trying to pry, hammer, or yank the steering wheel off without a proper puller will almost certainly result in damage. The tapered shaft and press-fit design are deceptively strong. You risk breaking the steering wheel spokes, damaging the steering column housing, or bending the steering column shaft itself. Always use a steering wheel puller.
Mistake 2: Not Disconnecting The Battery
The airbag system is a significant safety feature, but it can also be a hazard if not handled correctly. Forgetting to disconnect the battery and wait before working on the steering wheel can lead to accidental airbag deployment. This can cause severe injury and damage to the vehicle’s interior. Always disconnect the battery and wait.
Mistake 3: Damaging The Steering Column Threads Or Shaft
When tightening the forcing screw, it’s essential to ensure it’s centered on the steering column shaft. If it’s off-center, it can put uneven pressure on the shaft, potentially bending it. Also, if the center nut is removed completely before the wheel is loose, the forceful pop can send the steering wheel flying off, potentially damaging the column threads or the wheel itself. Leaving the center nut on a few turns is a crucial safety step.
Mistake 4: Spinning The Clock Spring
The clock spring (also known as the spiral cable or slip ring) is a delicate component located behind the steering wheel. It allows electrical connections to the airbag, horn, and steering wheel controls to function while the wheel is turning. If the steering wheel is removed without securing the clock spring, or if it’s allowed to spin freely, it can be easily damaged. This will result in a malfunctioning airbag light, horn, or steering wheel controls, requiring replacement of the clock spring assembly. Always secure the clock spring before removing the steering wheel, often by using tape to hold it in its centered position.
Mistake 5: Improper Torque On Reassembly
Tightening the center nut to the correct torque specification is vital for steering wheel security. If it’s too loose, the steering wheel could potentially come off while driving, a catastrophic failure. If it’s overtightened, you risk stripping the threads on the steering column shaft or the nut itself. Always use a torque wrench for reassembly.
Choosing The Right Puller For Your Jeep Wrangler Generation
Jeep Wranglers have evolved over the decades, and while many steering wheel pullers are universal, some subtle differences might make one type or