Jeep Wrangler Rock Rail Install: A Step-by-step Guide For Ultimate Protection
The Jeep Wrangler is more than just a vehicle; it's a symbol of adventure, freedom, and the capability to tackle almost any terrain. For owners who push their Jeeps to the limit, especially off-road, rock rails are not a luxury, but a necessity.
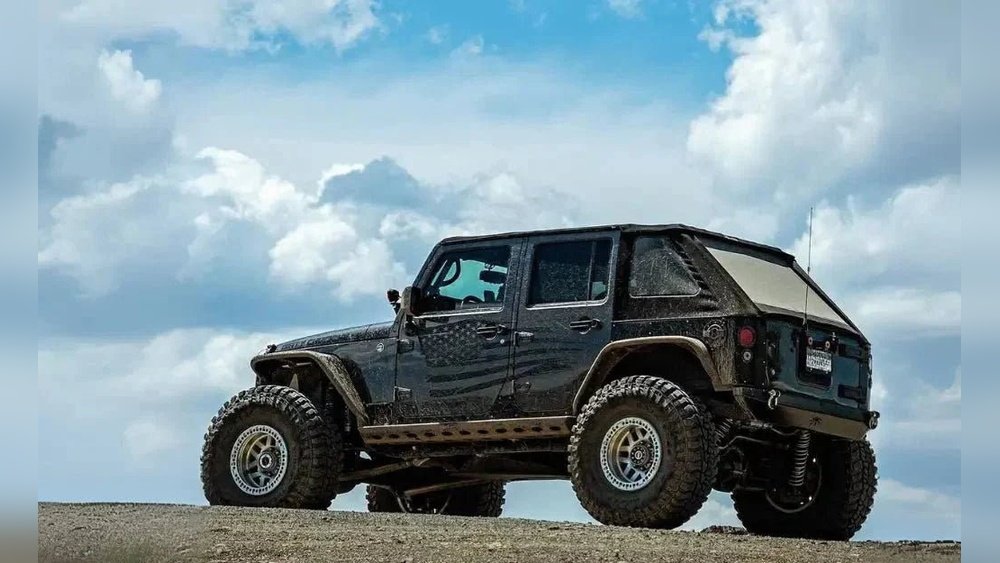
These sturdy additions bolt directly to the frame of your Wrangler, acting as a shield against rocks, logs, and other trail hazards that can cause significant damage to your rocker panels and body.
Installing rock rails might seem daunting, but with the right tools, patience, and this step-by-step guide, you can significantly enhance your Jeep's off-road protection.
This guide will walk you through the entire process, from choosing the right rails to tightening the final bolt, ensuring your Wrangler is ready for any adventure.
The importance of rock rails cannot be overstated for serious off-roaders. Stock rocker panels are notoriously vulnerable.
A misplaced rock or a sharp edge can easily dent, tear, or even puncture them, leading to costly repairs and compromising the structural integrity of your Jeep.
Rock rails, often made from thick steel, absorb impacts and slide over obstacles, protecting the vulnerable underside of your vehicle. Beyond protection, many rock rails also double as steps, making it easier to get in and out of lifted Wranglers, and some even integrate with other armor components for a complete underbody protection system.
Why Your Jeep Wrangler Needs Rock Rails
Off-roading is inherently risky for your vehicle’s body. When you’re crawling over rocks or navigating tight trails, the sides of your Jeep are exposed to potential damage.
- Rock Damage: The most obvious threat. Sharp rocks can goude, dent, and tear the metal of your rocker panels, which are the panels located below your doors.
- Log and Debris Impact: Fallen trees, branches, and other trail debris can also cause significant damage if your Jeep slides or bottoms out.
- Frame Stress: While less common, severe impacts can potentially stress the frame itself, which is a much more serious and expensive problem to fix.
- Aesthetics: Dents and scrapes on the rocker panels can detract from your Jeep’s appearance, and for many owners, maintaining the look of their vehicle is important.
Types Of Rock Rails
Before you start the installation, it’s crucial to understand the different types of rock rails available. This will help you choose the best option for your specific needs and budget.
1. Bolt-on Rock Rails
These are the most common and generally the easiest to install. They bolt directly to the Jeep’s frame or body mounts using existing holes.
- Pros: Relatively simple installation, no welding required, typically more affordable.
- Cons: May offer slightly less rigidity than welded options, might require drilling in some cases depending on the specific model.
2. Welded Rock Rails
These are designed to be welded directly onto the Jeep’s frame. They offer the strongest and most robust protection.
- Pros: Maximum strength and durability, can be integrated directly into the frame for superior rigidity.
- Cons: Requires welding equipment and expertise, permanent modification to your Jeep’s frame, usually more expensive due to professional installation costs.
3. Hybrid Rock Rails
Some rock rails combine bolt-on mounting with additional features like integrated steps or body protection.
- Pros: Versatile, offering protection and added functionality.
- Cons: Can be heavier and more complex to install than basic bolt-on rails.
For this guide, we will focus on the bolt-on installation of rock rails, as it is the most common DIY project for Wrangler owners.
Choosing The Right Rock Rails For Your Jeep Wrangler
Selecting the right rock rails involves considering several factors beyond just the type of mounting.
Material And Strength
Most rock rails are made from steel, typically mild steel or high-strength steel. The thickness of the steel (measured in gauge, with lower numbers being thicker) is a key indicator of strength. Look for rails made from 1/8-inch or 3/16-inch steel for serious off-road protection.
Design And Coverage
Consider the design and shape of the rock rails. Some offer a low-profile design that stays close to the body, while others extend further out to provide wider protection. Many also include a top plate, which can function as a step. Ensure the rails you choose are compatible with your specific Wrangler model (e.g., JK, JL, JT) and year, as mounting points can vary.
Integrated Features
Some rock rails come with additional features:
- Steps: Many rails have a textured top surface that acts as a convenient step, especially useful for lifted Jeeps.
- Body Protection: Some designs extend further up the body to protect the lower door skins as well.
- Accessory Mounts: Certain rails might offer mounting points for additional accessories.
Manufacturer Reputation
Stick with reputable manufacturers known for producing high-quality Jeep accessories. Brands like Rock-Slide Engineering, Smittybilt, Rugged Ridge, Poison Spyder, and TeraFlex are well-regarded in the off-road community. Reading reviews from other Jeep owners can provide valuable insights.
Tools And Materials Needed
Before you begin the installation, gather all the necessary tools and materials. Having everything ready will make the process smoother and prevent delays.
Essential Tools:
- Socket Set: Including metric and SAE sizes, with deep sockets.
- Wrench Set: Metric and SAE sizes.
- Torque Wrench: Crucial for tightening bolts to the manufacturer’s specifications to ensure safety and proper fit.
- Ratchet: With extensions and universal joints for hard-to-reach bolts.
- Drill and Drill Bits: If your chosen rock rails require any drilling (some bolt-on kits use factory holes, others may need new ones). Use appropriate bits for metal.
- Measuring Tape: For precise placement if needed.
- Jack and Jack Stands: To safely lift and support your Jeep.
- Safety Glasses: Absolutely essential for eye protection.
- Gloves: To protect your hands and improve grip.
- Wire Brush: To clean mounting surfaces and threads.
- Penetrating Oil (like WD-40 or PB Blaster): To loosen stubborn or rusted bolts.
- Level: To ensure the rails are mounted straight.
- Helper: Rock rails can be heavy, and having an extra pair of hands is highly recommended for lifting and positioning them.
Materials:
- Your chosen rock rails: Ensure they are the correct model for your Jeep.
- Hardware kit: Usually included with the rock rails. Check that all bolts, nuts, and washers are present.
- Threadlocker (Blue Loctite): Recommended for certain bolts to prevent them from vibrating loose.
- Anti-seize compound: Useful for bolts that might be difficult to remove in the future.
Step-by-step Installation Guide
This guide assumes you have purchased a set of bolt-on rock rails designed for your specific Jeep Wrangler model. Always refer to the manufacturer’s instructions that came with your rock rails, as specific mounting points and procedures can vary.
Step 1: Prepare Your Workspace And Jeep
- Find a Level Surface: Park your Jeep on a flat, level surface. This is critical for safety when using jacks and for accurate alignment of the rock rails.
- Engage Parking Brake: Ensure the parking brake is firmly engaged.
- Chock Wheels: Place wheel chocks behind the rear wheels for added safety.
- Disconnect Battery (Optional but Recommended): For safety, especially if working near electrical components, consider disconnecting the negative terminal of your battery.
Step 2: Access Mounting Points
- Lift the Jeep (If Necessary): Depending on the design of your rock rails and your Jeep’s suspension, you might need to lift the vehicle to gain better access to the frame or mounting holes. Use your jack to lift the Jeep and secure it with jack stands. Never work under a vehicle supported only by a jack.
- Inspect Mounting Locations: Locate the designated mounting points on your Jeep’s frame or body. These are often pre-drilled holes.
- Clean the Area: Use a wire brush to clean any dirt, rust, or debris from the mounting holes and surrounding frame areas. This ensures a clean surface for the bolts and helps prevent corrosion.
Step 3: Loosen Or Remove Existing Bolts (if Applicable)
Many rock rail kits utilize existing factory holes. You may need to remove some factory bolts or nuts to attach the new rails.
- Apply Penetrating Oil: If bolts are stubborn or rusted, spray them with penetrating oil and let it soak for a few minutes.
- Carefully Loosen: Use your socket set and wrench to carefully loosen and remove any necessary factory hardware. Keep these bolts and any associated washers in a safe place, as you might need to reuse them or compare them to your new hardware.
Step 4: Position The Rock Rail
This is where a helper is invaluable.
- Align the Rail: With your helper, carefully lift the rock rail into position against the Jeep’s frame or mounting points.
- Initial Bolt Insertion: Start by hand-threading a few bolts through the rock rail and into the mounting holes. Do not tighten them fully yet. This allows you to adjust the position of the rail.
- Check Alignment: Ensure the rock rail is sitting flush against the frame and is properly aligned with the body. Use a level if necessary. Make sure it’s centered between the front and rear wheels as intended by the design.
Step 5: Secure The Rock Rail
Once the rock rail is in the correct position, you can begin to secure it.
- Install Remaining Hardware: Insert and hand-thread all the remaining bolts, nuts, and washers provided in the kit.
- Tighten Bolts Gradually: Using your socket wrench, begin to tighten the bolts. Work in a crisscross pattern, similar to how you would tighten lug nuts on a wheel. This ensures even pressure and prevents the rail from shifting.
- Tighten Snugly: Tighten all bolts until they are snug, but do not fully torque them yet. This allows for minor adjustments as you tighten.
Step 6: Final Tightening And Torqueing
This is a critical step for ensuring the rock rails are securely attached and will withstand off-road abuse.
- Torque Specifications: Consult the rock rail manufacturer’s instructions for the specific torque specifications for each bolt. If no torque specs are provided, a common torque for frame-mounted hardware of this type is between 40-75 ft-lbs, but always confirm with the manufacturer.
- Use a Torque Wrench: Use your torque wrench to tighten each bolt to the specified value. Again, work in a crisscross pattern. Over-tightening can strip threads or damage the frame/rail, while under-tightening can lead to loose rails.
- Check for Movement: Once all bolts are torqued, try to wiggle the rock rail. It should feel solid and firmly attached to the Jeep.
Step 7: Repeat For The Other Side
- Mirror the Process: Repeat steps 2 through 6 for the rock rail on the opposite side of the Jeep. Ensure the alignment is symmetrical.
Step 8: Final Inspection And Clean-up
- Double-Check All Bolts: Go over every bolt one last time to ensure they are all torqued correctly.
- Check Clearance: Ensure the rock rails do not interfere with the operation of your doors or suspension components.
- Clean Up: Remove any tools, hardware, or debris from around your Jeep.
- Reconnect Battery (If Disconnected): If you disconnected the battery, reconnect the negative terminal.
Post-installation Checks And Maintenance
After successfully installing your rock rails, there are a few things to keep in mind for long-term performance and safety.
Re-torqueing
- Initial Check: It’s a good practice to re-check the torque on all bolts after your first off-road trip or after a few hundred miles of driving. Vibrations from driving can sometimes cause bolts to loosen slightly.
- Regular Checks: Periodically inspect the bolts for tightness, especially if you frequently engage in aggressive off-roading.
Cleaning And Care
- Washing: Clean your rock rails along with the rest of your Jeep. Use mild soap and water. Avoid abrasive cleaners that can damage the finish.
- Rust Prevention: If your rock rails are made of bare steel or have a powder-coat finish that gets scratched, consider applying a rust inhibitor or touch-up paint to prevent corrosion. For powder-coated rails, touch-up paint specifically designed for automotive applications is best.
- Inspect for Damage: After off-road excursions, visually inspect the rock rails for any signs of impact damage, bending, or loosening. Address any issues promptly.
Common Mistakes To Avoid
Even with a detailed guide, DIY installations can sometimes go awry. Being aware of common pitfalls can save you time, frustration, and potential damage.
- Not Reading Instructions: Every rock rail kit is slightly different. The manufacturer’s instructions are tailored to their specific product and mounting system. Always read them thoroughly before starting.
- Using the Wrong Tools: Trying to use pliers instead of a socket wrench, or not having a torque wrench, can lead to stripped bolts, uneven tightening, or damage to the rails.
- Over-Tightening or Under-Tightening: Both can cause problems. Over-tightening can strip threads or crack the mounting points. Under-tightening means the rails won’t be secure and could come loose on the trail.
- Forgetting a Helper: Rock rails are often heavy and awkward. Trying to maneuver them into place alone is difficult and can lead to dropped parts or personal injury.
- Not Cleaning Mounting Surfaces: Dirt and rust can prevent a proper fit and compromise the integrity of the mounting.
- Ignoring Torque Specs: Relying on “feel” for tightening can be inaccurate. Using a torque wrench ensures the bolts are secured to the manufacturer’s recommended tension.
- Not Checking for Door Clearance: Ensure the rails don’t interfere with your doors opening or closing fully. This is especially important for aftermarket doors or body modifications.
Understanding Rock Rail Performance On The Trail
Once installed, your rock rails are ready to do their job. Here’s what to expect and how they perform.
Sliding Vs. Impacting
The primary function of a rock rail is to allow your Jeep to slide over obstacles rather than taking a direct impact. When you encounter a rock or log that is higher than your rails, the rail is designed to make contact and