The Jeep Wrangler is an icon of off-road capability and rugged adventure. Its legendary status is built on a foundation of robust engineering, and a critical component of this drivetrain is the rear axle.
Within the rear axle assembly, the axle seal plays a vital, albeit often overlooked, role. These seemingly small parts are responsible for keeping lubricants in and contaminants out, ensuring the smooth and efficient operation of your Wrangler's rear differential and axle shafts.
A failing axle seal can lead to significant damage, costly repairs, and a compromised driving experience. Understanding their function, common issues, and maintenance is paramount for any Jeep Wrangler owner looking to preserve their vehicle's legendary performance and longevity.
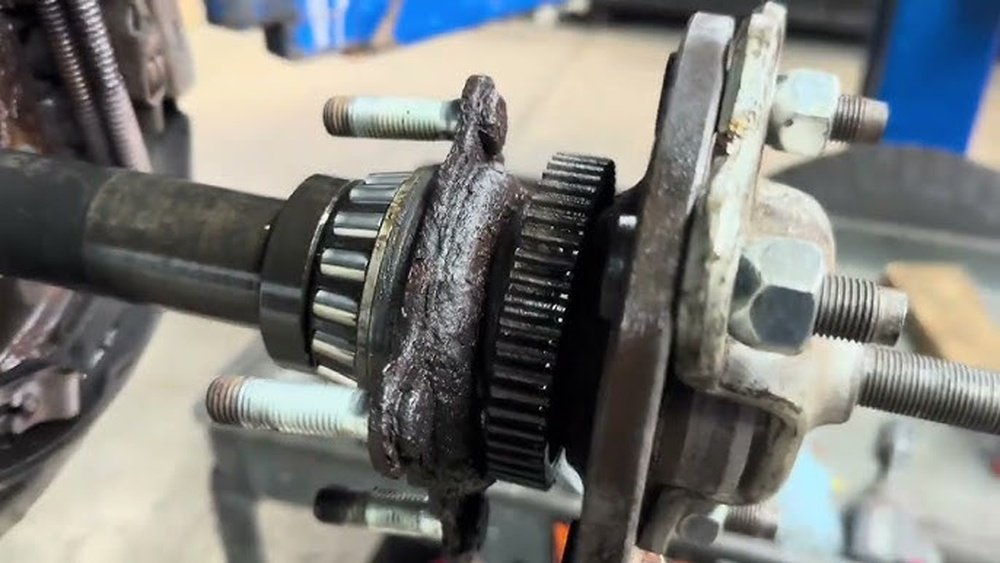
Key Takeaways
- Functionality: Rear axle seals prevent differential fluid from leaking out and keep dirt, water, and debris from entering the axle housing.
- Importance: Properly functioning seals are crucial for lubricating and cooling axle components, preventing premature wear and catastrophic failure.
- Common Issues: Leaks, wear from age and mileage, damage from debris, and improper installation are primary causes of seal failure.
- Symptoms of Failure: Low differential fluid, visible leaks, whining or humming noises, burning oil smell, and reduced performance are indicators of a problem.
- Maintenance: Regular inspection of differential fluid levels and a visual check for leaks are essential preventive measures.
- Replacement: Replacing rear axle seals is a moderately complex DIY task or a standard repair for a professional mechanic, often done concurrently with brake work or differential fluid changes.
- Types: Different Wrangler models and axle configurations may require specific seal types.
Understanding The Jeep Wrangler Rear Axle Seal
The rear axle seal on a Jeep Wrangler is more than just a rubber gasket; it’s a critical barrier that safeguards the integrity of the entire rear differential and axle assembly. This assembly is a complex arrangement of gears, bearings, and shafts that work together to transfer power from the transmission to the rear wheels, allowing your Jeep to move. The differential, specifically, allows the rear wheels to rotate at different speeds when turning, a crucial function for stability and maneuverability.
The Differential’s Lifeblood: Lubrication
Inside the differential housing is a substantial amount of specialized gear oil, often referred to as differential fluid. This fluid serves several vital purposes:
- Lubrication: It coats all moving metal parts, reducing friction and preventing wear between the gears, bearings, and shafts.
- Cooling: As gears mesh and rotate at high speeds, they generate heat. The circulating differential fluid absorbs this heat and dissipates it, preventing overheating and component damage.
- Corrosion Prevention: The fluid contains additives that protect the metal components from rust and corrosion.
Without adequate lubrication, the metal-on-metal contact would quickly lead to excessive heat, rapid wear, and ultimately, catastrophic failure of the differential components.
The Seal’s Critical Role: Barrier Function
This is where the axle seal comes into play. There are typically two main types of seals in a rear axle assembly:
- Inner Axle Seal (Pinion Seal): Located at the very front of the differential housing, where the pinion shaft (connected to the driveshaft) enters the housing. Its job is to prevent differential fluid from leaking out around the pinion shaft and to keep external contaminants from entering at this critical point.
- Outer Axle Seals (Wheel Seals or Axle Shaft Seals): Situated at the point where the axle shafts exit the axle housing and connect to the wheel hub or brake assembly. These seals prevent differential fluid from leaking out along the axle shafts and, crucially, keep water, mud, dust, and other road debris from entering the axle housing.
The outer seals are particularly important for off-road vehicles like the Wrangler, which are frequently exposed to harsh environments. Water ingress can contaminate the differential fluid, turning it into a gritty, abrasive slurry that accelerates wear on bearings and gears.
Dirt and mud can also compromise the lubricating properties of the oil.
Why They Matter For Wrangler Owners
For Jeep Wrangler owners, the integrity of these seals is directly linked to the vehicle’s legendary off-road prowess and overall reliability. A leaking axle seal can lead to:
- Reduced Lubrication: Low fluid levels mean components aren’t properly lubricated, leading to increased friction, heat, and wear.
- Contamination: External debris entering the axle housing acts like sandpaper, grinding away at bearings and gear teeth.
- Component Damage: Over time, leaks and contamination can cause significant damage to axle bearings, gears, and even the axle shafts themselves.
- Costly Repairs: Replacing a failed differential or axle assembly is substantially more expensive than replacing a worn-out seal.
- Compromised Performance: A damaged axle can affect drivetrain performance, leading to noises, vibrations, and a loss of power.
Therefore, understanding the function of these seals and recognizing the signs of their failure is a vital aspect of maintaining any Jeep Wrangler.
Signs And Symptoms Of A Failing Rear Axle Seal
Recognizing the early signs of a failing rear axle seal on your Jeep Wrangler can save you a significant amount of money and prevent more severe damage. These seals often degrade over time due to heat, age, mileage, and exposure to harsh elements, but sometimes they can fail more abruptly due to physical damage. Paying attention to your Jeep’s behavior and performing regular checks can help you catch problems before they escalate.
Visible Fluid Leaks
The most obvious indicator of a failing axle seal is a visible fluid leak.
- Pinion Seal Leaks: These typically appear as oil stains on the front of the differential housing, near where the driveshaft connects. You might notice drips on the garage floor or a greasy film on the differential itself.
- Wheel Seal Leaks: These are often more noticeable. You might see oil slinging outward from the wheel hub area, especially after driving. This can coat the inside of your wheels, the brake components, and even the frame rails. A tell-tale sign is grease on the brake shoes or pads, which can severely compromise braking performance.
Low Differential Fluid Levels
As seals begin to fail, differential fluid will gradually escape. If you regularly check your differential fluid levels (a good practice, especially before and after off-roading), you may notice a consistent drop in the oil level over time. Always use the correct type of fluid specified for your Jeep Wrangler model and axle. For example, many Jeep differentials require GL-5 gear oil, and some may also need friction modifiers for limited-slip differentials.
Unusual Noises From The Rear Axle
A failing axle seal can sometimes be accompanied by auditory clues.
- Whining or Humming: As lubrication diminishes due to a leak, the gears and bearings within the differential can start to make noise. This is often described as a whining, humming, or groaning sound that may change with vehicle speed or acceleration.
- Grinding or Clicking: In more severe cases, especially if contamination has occurred, you might hear grinding or clicking sounds, indicating that metal components are making contact without proper lubrication or that bearings are failing.
Burning Oil Smell
When differential fluid leaks onto hot exhaust components, it can produce a distinct burning oil smell. This is particularly common if the leak is significant and fluid is dripping onto the exhaust pipes or catalytic converter. While other sources can cause a burning oil smell, a leak from the rear axle seals is a distinct possibility for Wrangler owners.
Reduced Drivetrain Performance And Handling
While less common as an initial symptom, a severely compromised axle due to long-term seal failure can impact performance.
- Vibrations: Worn bearings or damaged gears can cause vibrations that you might feel through the steering wheel or the seat.
- Sticking or Binding: In extreme cases of lubrication loss, the differential might not operate smoothly, leading to a feeling of binding or resistance when turning.
Contaminated Differential Fluid
If you’re able to inspect the differential fluid directly (by draining a small amount or during a fluid change), you might notice signs of contamination.
- Milky or Cloudy Appearance: This indicates the presence of water in the fluid. Water emulsifies with the oil, creating a milky substance that drastically reduces its lubricating properties and promotes corrosion.
- Gritty Texture: If dirt or debris has entered the housing, the fluid might feel gritty when rubbed between your fingers.
Pro Tip: Regularly inspect your differential fluid level and condition, especially after encountering deep water crossings or driving through muddy conditions. A simple visual check can prevent major issues.
Types Of Rear Axle Seals And Their Applications In Jeep Wranglers
Jeep Wranglers have utilized various axle configurations throughout their production history, and the specific type of rear axle seal required can vary. Understanding these differences is crucial for ensuring you purchase the correct replacement part.
The primary distinction often lies in the type of rear axle installed in your Wrangler model.
Common Rear Axle Types In Jeep Wranglers
- Dana 35: This was a common rear axle in earlier Wrangler models (YJ, TJ) and some base model JK Wranglers. It’s known for being a relatively lighter-duty axle.
- Dana 44: Often found in more performance-oriented trims like the Rubicon (TJ, JK, JL) and some other models, the Dana 44 is a stronger, heavier-duty axle designed for more demanding off-road use.
- Mopar/Chrysler 8.25: Another axle found in some XJ Cherokees and some TJ Wranglers, offering a step up in strength from the Dana 35.
- JL Rubicon Rear Axle (Dana M200/M210): Newer JL Wranglers, especially Rubicon models, feature updated Dana axles with different internal components and seal designs compared to older generations.
Identifying Your Axle And Seal Type
The first step in identifying the correct seal is to know which rear axle your Jeep Wrangler is equipped with. You can usually find this information:
- Owner’s Manual: Your vehicle’s owner’s manual often specifies the axle type.
- Vehicle Identification Number (VIN) Decoder: Online VIN decoders can sometimes provide details about the original axle configuration.
- Physical Inspection: Looking for markings on the axle housing itself or consulting a Jeep specialist can help.
- Consulting a Parts Specialist: Providing your Jeep’s year, model, trim level, and any known modifications to a reputable auto parts store or dealership can help them identify the correct seal.
Types Of Seals
Within these axle types, the seals themselves can be categorized by their function and design:
- Pinion Seal: This seal is specific to the pinion shaft that enters the differential housing. It must withstand rotational forces and the pressure of the gear oil. Its dimensions and the lip design are critical for a proper seal against the pinion shaft yoke.
- Wheel Seal (Axle Shaft Seal): These seals are pressed into the axle housing end where the axle shaft exits. They prevent gear oil from leaking out along the shaft and keep contaminants from entering. The design of these seals can vary significantly based on the axle housing’s internal structure and the presence of features like ABS sensors or locking hubs (though locking hubs are rare on stock Wranglers).
Seal Material And Design Considerations
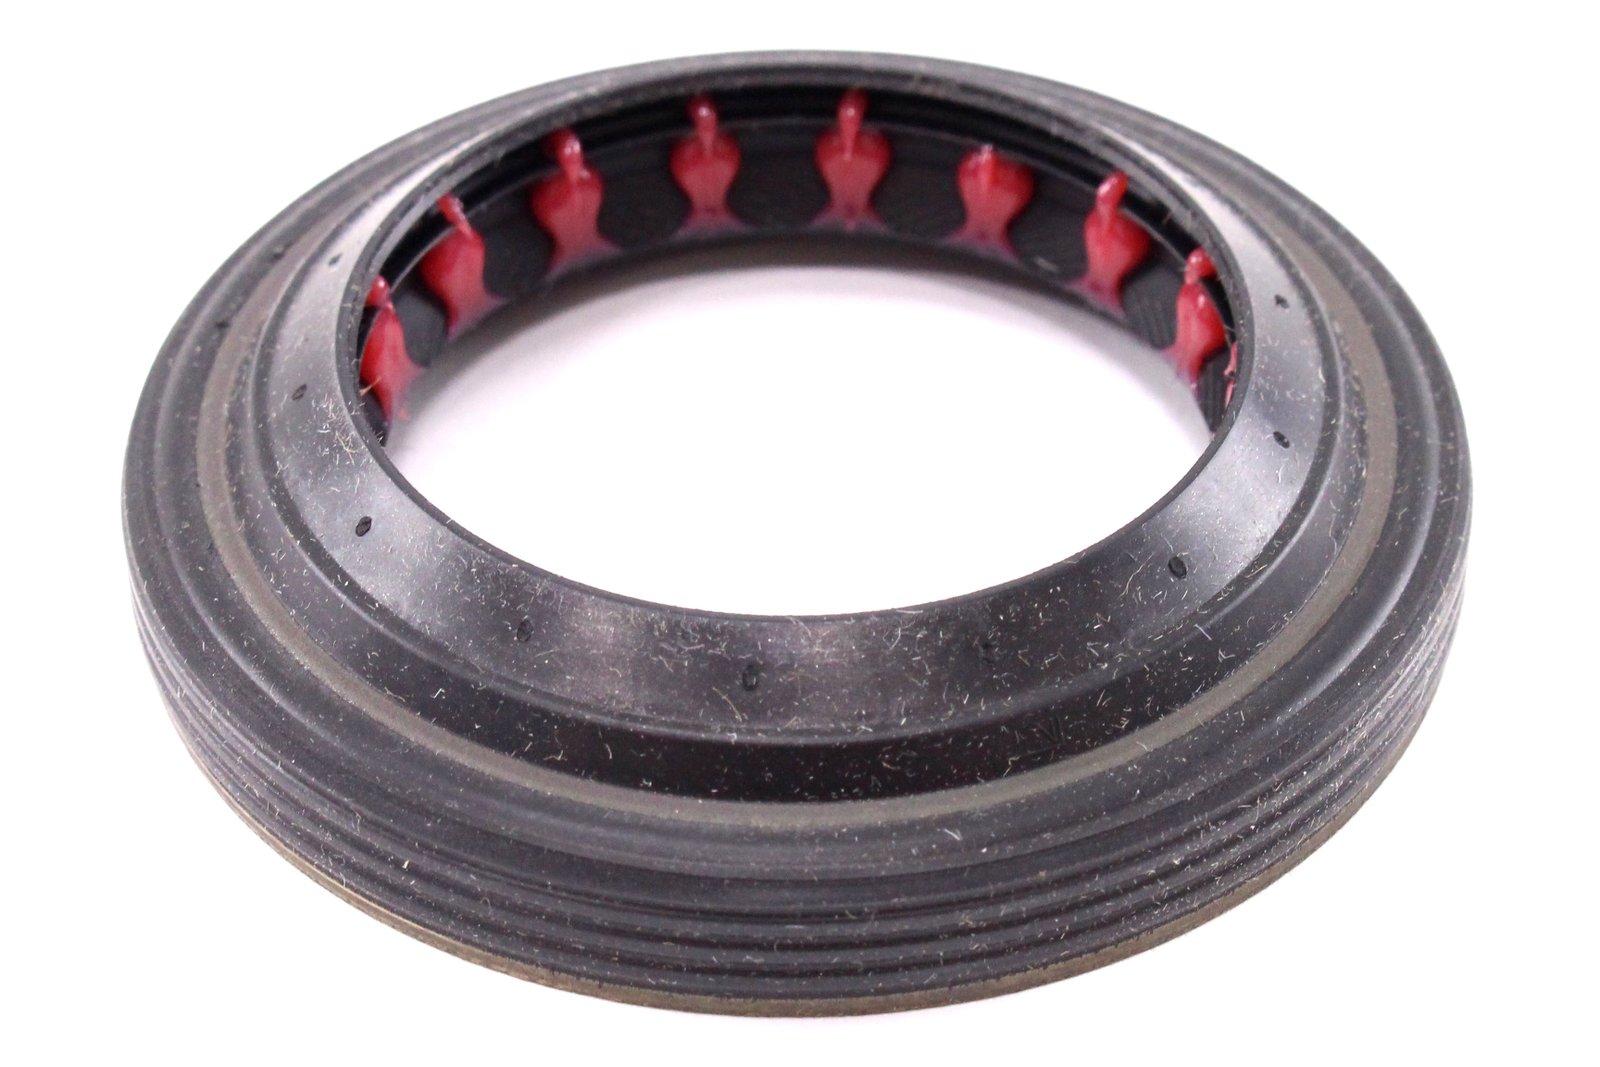
- Material: Most axle seals are made from nitrile rubber (NBR) or Viton. Nitrile is common and cost-effective, offering good resistance to oils and moderate temperatures. Viton is a higher-performance fluoroelastomer that offers superior resistance to heat and aggressive fluids, often preferred for heavy-duty applications or areas with higher operating temperatures.
- Lip Design: Seals can have single or double lips. A double-lip seal typically has one lip to retain oil and a second, smaller lip designed to keep contaminants out, offering enhanced protection.
- Metal Casing: The rubber seal is usually bonded to a metal casing, which provides rigidity and ensures a tight fit within the axle housing or on the shaft.
Specific Examples For Wrangler Models
- Wrangler TJ (1997-2006): Often equipped with Dana 35 or Dana 44 rear axles. Pinion seals and wheel seals for these axles are readily available but differ between the two axle types. Rubicon models with the Dana 44 will have specific seals.
- Wrangler JK (2007-2018): Primarily uses Dana 30 (front) and Dana 35 or Dana 44 (rear) axles. Again, the specific seal depends on the rear axle variant.
- Wrangler JL (2018-Present): Features updated Dana axles (e.g., M200, M210). The pinion seal and wheel seals for JL models are distinct from earlier generations. Some JL models, particularly the Rubicon, might have slightly different axle components requiring specific seals.
Important Note: Always verify the exact axle type and consult a reliable parts catalog or specialist to ensure you are ordering the correct Jeep Wrangler rear axle seal. Using the wrong seal can lead to immediate failure and further damage. If you’re unsure, it’s best to have a professional mechanic identify the part.
Replacing Jeep Wrangler Rear Axle Seals: A Step-by-step Guide
Replacing rear axle seals on a Jeep Wrangler is a job that falls into the moderately difficult DIY category. It requires some mechanical aptitude, the right tools, and patience. If you’re comfortable working on your vehicle’s drivetrain and brakes, you can tackle this. However, if you lack experience, it’s highly recommended to have this service performed by a qualified mechanic to avoid costly mistakes. This guide outlines the general process for replacing the wheel seals (axle shaft seals), which are more commonly replaced by DIYers than pinion seals.
Disclaimer: This guide provides general information. Always consult a service manual specific to your Jeep Wrangler model year and axle type for precise procedures and torque specifications. Safety is paramount; always use jack stands and ensure the vehicle is securely supported.
Tools And Materials You’ll Likely Need:
- Jack and Jack Stands
- Lug Wrench
- Socket Set and Wrenches (Metric and/or SAE, depending on your Wrangler)
- Pry Bar
- Hammer (including a dead blow or rubber mallet)
- Brake Cleaner
- Rags and Shop Towels
- Differential Fluid (correct type and quantity for your Jeep)
- Gasket Scraper (if dropping the differential cover)
- Torque Wrench
- Wheel Seal Puller/Installer Tool (highly recommended for proper installation)
- New Rear Axle Wheel Seals (ensure you have the correct part number)
- New Differential Cover Gasket or Sealant (if applicable)
- Gloves and Safety Glasses
Step-by-step Replacement Process (wheel Seals)
- Prepare the Vehicle:
- Park your Wrangler on a level surface.
- Engage the parking brake and block the front wheels.
- Loosen the lug nuts on the rear wheels.
- Safely lift the rear of the Jeep using a jack and support it securely with jack stands placed on the axle housing or frame rails (consult your manual for proper jack stand placement).
- Remove the rear wheels.
- Access the Axle Shafts:
- Drain Differential Fluid (Recommended): While not always strictly necessary for wheel seal replacement if you’re careful, draining the differential fluid makes the job much cleaner and prevents fluid loss. Place a suitable drain pan underneath the differential housing. Remove the differential cover bolts, leaving a few at the top to support the cover. Gently pry the cover loose to allow fluid to drain. Once drained, remove the remaining bolts and carefully remove the differential cover.
- Clean the Differential: Thoroughly clean the inside of the differential housing with rags and brake cleaner to remove old fluid and debris.
- Remove the Differential Lock Pin: Locate the small pin that holds the differential gears in place. You’ll need to remove this pin using a punch and hammer, then slide out the cross shaft that the pin was securing.
- Remove the Axle Shafts: Carefully slide the axle shafts out of the axle housing. You may need to gently wiggle them or use a pry bar carefully. Be mindful of the splines where they engage with the differential gears.
- Remove the Old Wheel Seal:
- With the axle shaft removed, you can now access the old wheel seal pressed into the end of the axle housing.
- Using a seal puller tool or a strong pry bar, carefully work the old seal out of its bore. Be cautious not to scratch or damage the sealing surface inside the axle housing, as this can lead to new leaks. If using a pry bar, insert it behind the seal’s metal casing and lever it out gradually.
- Install the New Wheel Seal:
- Clean the seal bore in the axle housing thoroughly.
- Lubricate the new seal’s lips and the outer edge of its metal casing with a bit of clean differential fluid or appropriate grease.
- Carefully align the new seal with the bore.
- Using a proper wheel seal installer tool or a socket that matches the seal’s outer diameter and a hammer, gently tap the seal into place. Work around the seal, tapping evenly until it is fully seated and flush with the housing end. Never hammer directly on the seal’s lip, as this can damage it. Ensure it’s installed straight and not at an angle.
- Reassemble the Axle:
- Reinstall Axle Shafts: Carefully slide the axle shafts back into the housing, ensuring the splines engage correctly with the differential gears.
- Reinstall Differential Cross Shaft and Pin: Slide the cross shaft back into place and secure it with the retaining pin.
- Reinstall Differential Cover: Clean the mating surfaces of the differential housing and the cover. Apply a bead of RTV sealant or install a new gasket as per your service manual’s recommendation. Reinstall the differential cover bolts and torque them to the manufacturer’s specifications in the correct sequence.
- Refill Differential Fluid:
- Once the cover is sealed, add the correct amount and type of differential fluid through the fill plug hole until it reaches the level specified in your owner’s manual (usually level with the bottom of the fill hole).
- Reinstall the fill plug and torque it to specification.
- Final Steps:
- Reinstall the rear wheels and hand-tighten the lug nuts.
- Carefully lower the Jeep off the jack stands.
- Torque the lug nuts to the manufacturer’s specifications in a star pattern.
- Test Drive: Take your Wrangler for a short test drive, listening for any unusual noises and checking for leaks around the differential and wheels.
Replacing the Pinion Seal: This process is more involved as it requires removing the driveshaft, the pinion yoke, and often requires special tools to maintain proper pinion bearing preload. It’s generally considered a job best left to professionals unless you have specific experience.
Example: A common scenario is replacing the axle seals when performing a brake job on a Jeep Wrangler TJ. Since the rear drum brakes need to be removed to access the axle shafts, it’s an opportune time to inspect and replace worn wheel seals, preventing future fluid leaks that could contaminate the brakes.
Maintenance And Prevention For Rear Axle Seals
Proactive maintenance and preventative measures are key to extending the life of your Jeep Wrangler’s rear axle seals and avoiding costly repairs. While seals are wear items and will eventually need replacement, consistent care can significantly delay this need and prevent secondary damage.
Regular Inspection Of Differential Fluid
This is arguably the most crucial aspect of preventative maintenance for your axle seals.
- Check Fluid Level: Make it a habit to check your differential fluid level regularly, especially if you frequently engage in off-roading, water crossings, or if your Jeep is older. Low fluid levels are often the first sign of a leak, which could be from a failing seal.
- Inspect Fluid Condition: When checking the level, also look at the fluid’s condition. Milky or cloudy fluid indicates water contamination, which can be caused by a compromised seal. Gritty or dark, burnt-smelling fluid suggests internal wear or overheating, which could be exacerbated by poor lubrication due to a leak.
- Frequency: Aim to check at least every oil change, and more frequently if you put your Jeep through demanding conditions.
Visual Inspection For Leaks
Periodically perform a visual inspection of the rear axle area.
- Look for Wet Spots: Check around the differential housing (especially near the pinion seal) and at the ends of the axle tubes where the axle shafts exit. Look for any signs of wetness, grease, or dirt accumulation that suggests fluid leakage.
- Inspect Wheels and Brakes: Examine the inside of your rear wheels and brake components for any oily residue. This is a clear indicator of a leaking wheel seal.
- Underbody Check: After driving, check your usual parking spot for any fresh fluid spots.
Driving Habits And Environmental Considerations
Your driving habits and the environment your Wrangler operates in play a significant role in seal longevity.
- Avoid Aggressive Driving: While Wranglers are built for performance, excessively aggressive acceleration and braking can put extra stress on the entire drivetrain, including seals.
- Mindful Water Crossings: When driving through water, especially deep water, be mindful of the potential for water to be forced past seals. Avoid high-speed crossings that can create a pressure wave. After a deep water crossing, it’s a good idea to inspect your seals and consider flushing and changing your differential fluid sooner rather than later.
- Mud and Debris: Driving through thick