Jeep Wrangler Jk Front Lower Control Arm Installation: A Step-by-step Guide
The Jeep Wrangler JK is an icon for off-road enthusiasts. Its rugged design and legendary capability come from a robust suspension system.
The front lower control arms are crucial components. They connect the front axle to the Jeep's frame, controlling wheel articulation, alignment, and the overall ride quality.
When these arms wear out, or when you upgrade your suspension with a lift kit, replacing them becomes necessary. This guide will walk you through the Jeep Wrangler JK front lower control arm install process, step by step.
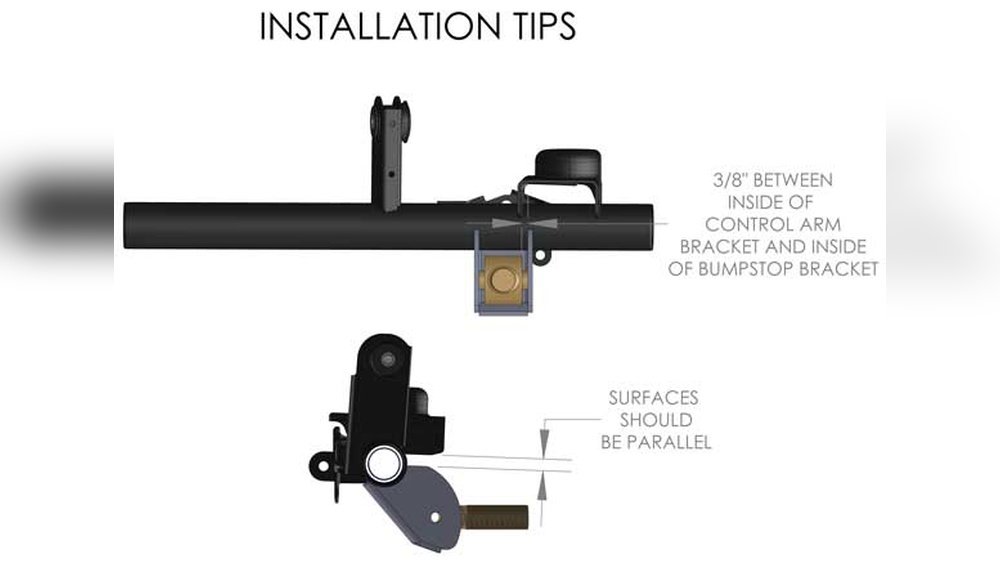
Whether you're a seasoned mechanic or a DIY enthusiast, following these instructions carefully will help you complete the job safely and effectively.
Replacing control arms might seem daunting, but with the right tools, patience, and a clear understanding of the process, it’s a manageable task. These arms are subject to significant stress, especially on modified Jeeps that see regular off-road action. Signs of worn control arms include clunking noises, wandering steering, uneven tire wear, and a feeling of looseness in the front end. Upgrading to heavy-duty control arms can also improve your Jeep’s handling and durability, especially after adding a lift. This guide aims to provide all the information you need, from gathering tools to the final torque specifications.
Tools And Materials You’ll Need
Before you start, ensure you have all the necessary tools and materials. This will save you time and frustration during the installation.
Having everything ready beforehand is key to a smooth workflow.
- New Front Lower Control Arms: Ensure they are compatible with your specific Jeep Wrangler JK model year.
- Jack and Jack Stands: High-quality, stable jack stands are essential for safety. Never work under a vehicle supported only by a jack.
- Socket Set: Metric sockets, including deep sockets, are required. Common sizes needed are 18mm, 19mm, 21mm, and 24mm.
- Wrench Set: A good set of metric wrenches will be useful for holding nuts while tightening bolts.
- Torque Wrench: Crucial for tightening bolts to the manufacturer’s specifications. This ensures the components are secure and won’t loosen.
- Breaker Bar: For loosening stubborn bolts.
- Pry Bar: May be needed to help align bolt holes.
- Wire Brush: For cleaning bolt threads and mounting points.
- Penetrating Oil (like PB Blaster or WD-40): To help loosen rusted bolts.
- Gloves and Safety Glasses: Always protect your hands and eyes.
- Wheel Chocks: To prevent the Jeep from rolling.
- Optional: Impact Wrench: Can speed up bolt removal and installation but use with caution.
- Optional: Grease: For lubricating bushings if required by your new control arms.
Preparing Your Jeep Wrangler Jk
Safety is paramount. Proper preparation ensures you can work efficiently and without risk.
- Park on a Level Surface: Find a flat, stable area to work. This is critical for safely lifting the Jeep and for accurate measurements if needed.
- Engage Parking Brake and Chock Wheels: Firmly set the parking brake and place wheel chocks behind the rear wheels. This adds an extra layer of security against rolling.
- Loosen Lug Nuts: Before lifting the Jeep, slightly loosen the lug nuts on the front wheels. Just a quarter to half a turn is enough. They will be much harder to loosen once the wheel is off the ground.
- Locate Front Lower Control Arm Bolts: Identify the bolts connecting the lower control arms to the frame side and the axle side. There are typically two bolts per arm: one at the frame mount and one at the axle mount.
Lifting And Supporting The Jeep
Safely lifting and supporting your JK is non-negotiable. This provides the necessary clearance to work on the control arms and ensures your safety.
- Jack Up the Front of the Jeep: Using your jack, lift the front of the Jeep at the designated jack points. Consult your owner’s manual for the correct locations. Lift it high enough to comfortably place your jack stands.
- Position Jack Stands: Place the jack stands securely under the frame rails or designated support points. Ensure they are stable and at the correct height.
- Lower the Jeep Onto Jack Stands: Slowly lower the Jeep until it rests firmly on the jack stands. Never rely solely on the jack. Give the Jeep a gentle push to ensure it’s stable.
- Remove Front Wheels: Now that the Jeep is safely supported, fully remove the lug nuts and take off the front wheels. This will give you clear access to the control arms and their mounting points.
Removing The Old Front Lower Control Arms
This is often the most challenging part due to rust and seized bolts. Patience and penetrating oil are your best friends here.
- Apply Penetrating Oil: Generously spray penetrating oil onto all control arm bolts and nuts. Let it soak for at least 15-30 minutes, or even longer if possible. Reapply if necessary.
- Loosen Frame-Side Bolts: Use your socket set and breaker bar to loosen the bolt connecting the control arm to the frame mount. These can be very tight. If the bolt head spins but the nut on the other side also spins, you might need a wrench to hold the nut in place.
- Loosen Axle-Side Bolts: Next, tackle the bolt connecting the control arm to the axle mount. These are also often seized. If the bolt head is accessible, use your socket and breaker bar. If the nut is on the other side, use a wrench to hold it.
- Remove Bolts: Once loosened, fully remove the bolts. You might need to tap them out with a hammer or use a pry bar to help separate the control arm from its mounting points.
- Repeat for the Other Side: Follow the same steps to remove the passenger side lower control arm.
Pro Tip: If bolts are severely rusted and refuse to budge, you might consider cutting them off with a reciprocating saw or angle grinder. Be extremely careful if you choose this method, as it can damage surrounding components if not done precisely. Always wear appropriate safety gear, including a face shield.
Installing The New Front Lower Control Arms
With the old arms removed, it’s time to install the new ones. This process is essentially the reverse of removal, but attention to detail is key for proper alignment and secure fitment.
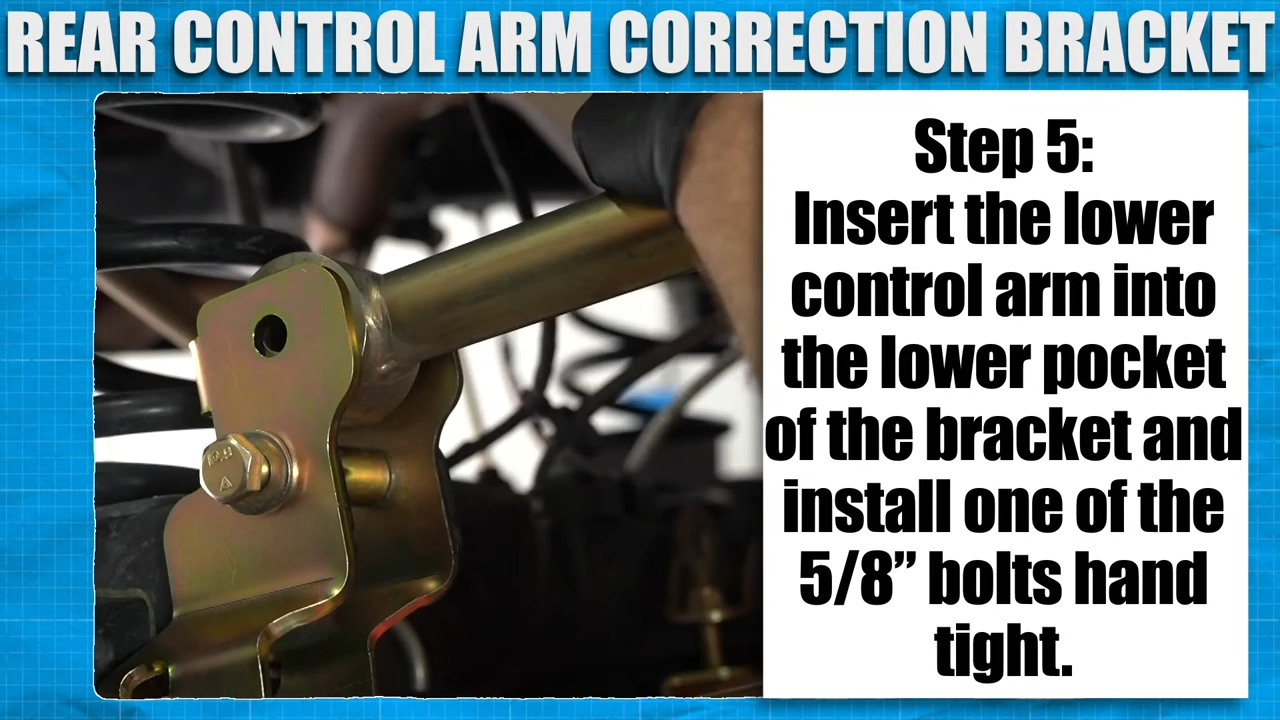
- Clean Mounting Points: Before installing the new arms, thoroughly clean the frame and axle mounting brackets using a wire brush. Remove any rust, dirt, or old grease. This ensures the new arms seat properly and the bolts thread smoothly.
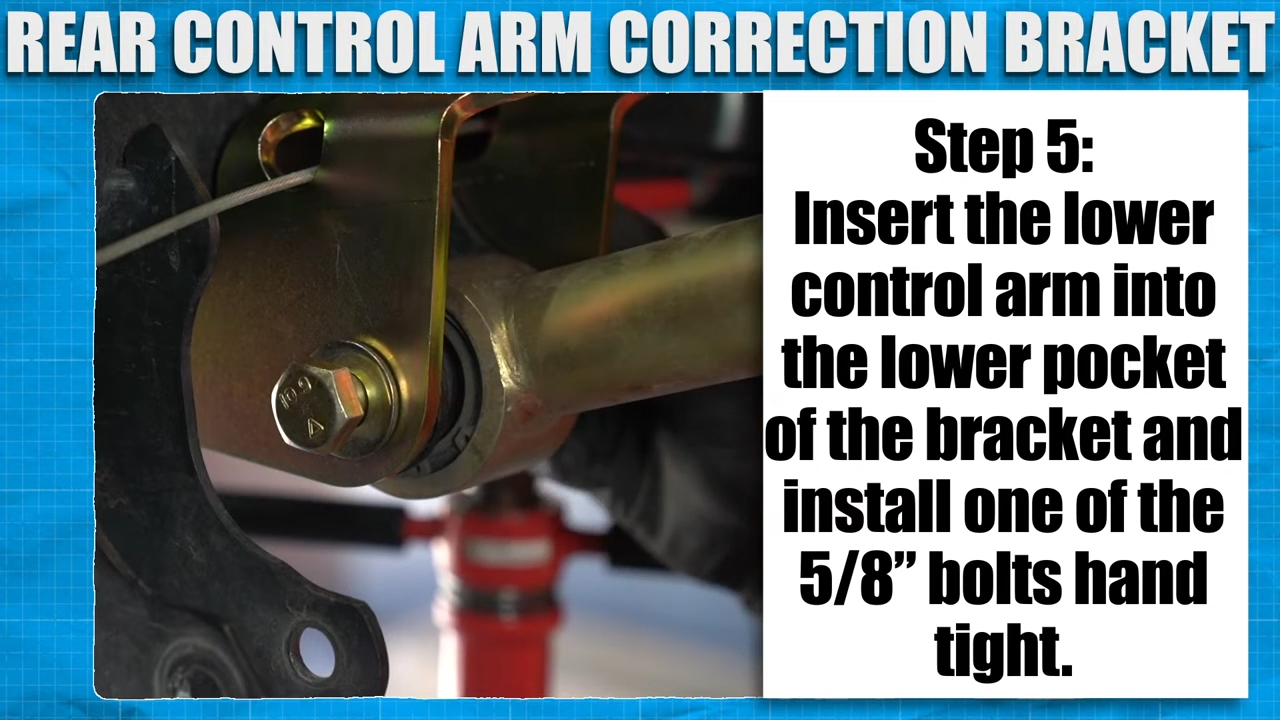
- Position the New Control Arm: Align the new lower control arm with its mounting points on the axle and frame. You might need to use a pry bar to help manipulate the arm into the correct position, especially at the axle mount.
- Install Axle-Side Bolt: Insert the bolt through the axle mount and the control arm. Loosely thread the nut. Do not tighten fully yet.
- Install Frame-Side Bolt: Align the other end of the control arm with the frame mount and insert the bolt. Loosely thread the nut. Do not tighten fully yet.
- Repeat for the Other Side: Install the second lower control arm, again leaving all bolts slightly loose.
- Tighten Bolts (Initial): Once both control arms are in place with their bolts loosely threaded, start tightening them. Tighten them enough so that the control arms are snug against the mounting brackets, but still allow for some movement. This is important for alignment.
Torquing The Control Arm Bolts
This is a critical step. Incorrect torque can lead to loose components, poor handling, or even failure. Always use a torque wrench.
The exact torque specifications can vary slightly depending on the aftermarket control arm manufacturer and your specific JK model year. Always refer to the installation instructions provided with your new control arms and the official Jeep service manual for your vehicle.
However, here are the generally accepted torque specifications for a stock Jeep Wrangler JK front lower control arms:
- Frame-Side Bolts: 125 lb-ft (169 Nm)
- Axle-Side Bolts: 125 lb-ft (169 Nm)
Important Considerations for Torquing:
- Torque on Ground: The final torque on control arm bolts should ideally be performed with the Jeep’s suspension loaded, meaning the wheels are on the ground and supporting the vehicle’s weight. This ensures the bushings aren’t pre-loaded, which can lead to premature wear and affect alignment. If you are working on a lift that allows suspension droop, you’ll need to either lower the vehicle onto the ground or use a method to simulate the loaded suspension height before torquing.
- Clean Threads: Ensure all bolt threads are clean and free of debris before torquing. You can apply a small amount of anti-seize compound to the threads for easier future removal, but check if the control arm manufacturer recommends against it.
- Double Check: After torquing, it’s good practice to double-check each bolt to ensure it met the specified torque.
Lowering The Jeep And Final Checks
Once the control arms are torqued to specification, you can safely lower the vehicle and perform final checks.
- Raise the Jeep Off Jack Stands: Use your jack to lift the front of the Jeep slightly, just enough to remove the jack stands.
- Lower the Jeep Completely: Slowly lower the Jeep back down to the ground.
- Install Front Wheels: Place the front wheels back onto the hubs and hand-tighten the lug nuts.
- Torque Lug Nuts: Using your torque wrench, tighten the lug nuts in a star pattern to the manufacturer’s specified torque (typically around 100-120 lb-ft for a JK).
- Final Inspection: Walk around the Jeep and visually inspect the newly installed control arms and all related hardware. Ensure everything looks properly installed and secure. Check for any leaks or unusual noises.
- Test Drive: Take your Jeep for a slow, careful test drive in a safe area. Listen for any strange sounds and pay attention to how the steering feels. Gradually increase speed and perform gentle turns.
Alignment After Control Arm Installation
Replacing control arms, especially if you’ve also installed a lift kit, will almost certainly affect your Jeep’s wheel alignment. It is highly recommended to get a professional alignment after installing new control arms.
An alignment ensures that your wheels are pointing in the correct direction, which is crucial for:
- Safe Handling: Proper alignment prevents the vehicle from pulling to one side.
- Even Tire Wear: Misalignment causes tires to wear out quickly and unevenly.
- Optimal Performance: Correct alignment contributes to better fuel efficiency and a more comfortable ride.
A qualified alignment shop will adjust your caster, camber, and toe settings to factory specifications or to suit your specific modifications, such as a lift kit.
When To Consider Upgrading Control Arms
While this guide focuses on replacing worn-out control arms, many JK owners upgrade them proactively, especially when installing a lift kit. Here’s why and what to look for:
- Lift Kits: Most lift kits for the JK require longer or adjustable control arms to correct suspension geometry. Stock arms are often too short for lifts over 2.5-3 inches, leading to poor caster angles and compromised handling.
- Off-Road Durability: Aftermarket control arms are typically made from stronger materials like heavier-gauge steel tubing and feature high-quality bushings (like polyurethane or Johnny Joints). This makes them more resistant to bending or breaking during aggressive off-road use.
- Adjustability: Adjustable control arms allow for fine-tuning of caster and pinion angles, which is essential for optimizing suspension performance and driveshaft angles, especially with significant lift heights.
Here’s a quick comparison of common control arm types:
| Feature | Stock Control Arms | Fixed Aftermarket Control Arms | Adjustable Aftermarket Control Arms |
|---|---|---|---|
| **Material** | Stamped Steel | Heavy-gauge Steel Tubing | Heavy-gauge Steel Tubing |
| **Durability** | Moderate | High | Very High |
| **Adjustability** | None | None | Yes (Caster, Pinion Angle) |
| **Lift Kit Use** | Limited (up to ~2.5″ with some compromise) | Good for moderate lifts (2.5″-4″) | Best for moderate to extreme lifts (3″+) |
| **Alignment** | Requires standard alignment | May require alignment adjustments | Crucial for proper alignment |
| **Cost** | Lowest | Moderate | Highest |
When choosing aftermarket control arms, consider the type of driving you do. For mild off-roading and daily driving, heavy-duty fixed arms might suffice.
For serious off-roading and larger lifts, adjustable arms offer the best performance and tuning capabilities. Always ensure the bushings are of good quality; they significantly impact ride comfort and durability.
Common Mistakes To Avoid
Even with a detailed guide, mistakes can happen. Being aware of common pitfalls can help you avoid them.
- Not Safely Supporting the Vehicle: This is the most dangerous mistake. Always use properly rated jack stands and ensure the vehicle is stable before getting underneath.
- Not Using a Torque Wrench: Guessing bolt tightness is a recipe for disaster. Always torque critical components like control arm bolts to the manufacturer’s specifications.
- Forgetting About Alignment: Skipping the post-installation alignment is a common and costly mistake that leads to poor driving dynamics and premature tire wear.
- Not Cleaning Mounting Points: Installing new parts onto dirty or rusted surfaces can lead to improper fitment and potential issues down the line.
- Over-Tightening or Under-Tightening Bolts: Both can cause serious problems. Over-tightening can strip threads or damage bushings, while under-tightening can lead to parts loosening.
- Not Letting Penetrating Oil Work: Rushing the process and not allowing penetrating oil sufficient time to work on seized bolts will only lead to frustration.
Frequently Asked Questions
Why Do My New Control Arms Make Noise?
Noise after installing new control arms can stem from several issues. First, ensure all bolts are torqued to the correct specification.
Loose bolts are a primary cause of clunking or rattling. Second, check the bushings.
If they are not seated correctly or if the wrong type of lubricant was used (or none at all, if