Jeep Wrangler Front Bumper Applique Installation Guide For Easy Upgrades
Upgrading your Jeep Wrangler’s exterior is a popular way to personalize the iconic vehicle and enhance its rugged appeal. Among the many customization options, a front bumper applique offers a subtle yet impactful change.
These appliqués, often made from durable materials like textured plastic or vinyl, are designed to add a unique look to your stock bumper, providing a custom appearance without the need for a full bumper replacement.
Whether you’re aiming for a more aggressive stance, a touch of color, or simply a way to protect your original bumper from minor scuffs, installing a front bumper applique is a straightforward project that most Jeep owners can tackle themselves.
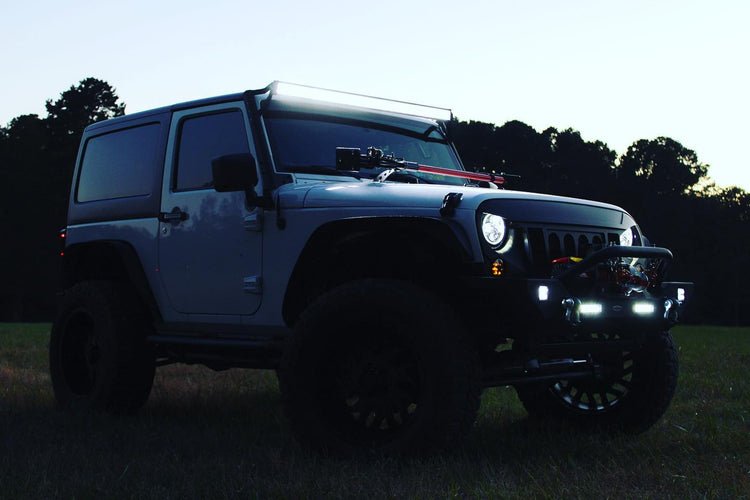
This guide will walk you through the entire process, from choosing the right applique to completing the installation with confidence.
The appeal of a front bumper applique lies in its simplicity and cost-effectiveness. Unlike a complete aftermarket bumper, which can cost hundreds or even thousands of dollars and often requires professional installation, an applique is an affordable accessory.
It allows you to achieve a custom look that stands out from the crowd, mirroring the individuality that so many Jeep owners cherish.
Many aftermarket options are designed to complement the aggressive styling of the Wrangler, adding flair to the front end. This guide is designed to be your comprehensive resource, breaking down each step into easy-to-understand instructions, ensuring a smooth and successful installation for your Jeep Wrangler.
Understanding Jeep Wrangler Front Bumper Appliques
Before diving into the installation, it’s crucial to understand what a front bumper applique is and the different types available. Essentially, these are decorative or protective panels that adhere to the factory front bumper.
They are not structural components and do not affect the vehicle’s safety features.
Their primary purpose is aesthetic enhancement and minor protection.
Types Of Front Bumper Appliques
Front bumper appliqués come in various styles and materials, each offering a different look and feel. The most common types include:
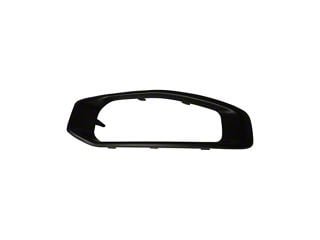
- Textured Plastic Appliques: These are often molded from durable ABS plastic and feature a textured finish, similar to the factory plastic components on many Wranglers. They are designed to mimic the look of more aggressive aftermarket bumpers, adding a rugged aesthetic. These are typically black and can sometimes be painted to match your Jeep’s color scheme, though most owners prefer the contrasting texture.
- Vinyl Decals/Wraps: These are essentially high-quality stickers made from durable automotive-grade vinyl. They can come in a wide range of colors, finishes (like matte, gloss, carbon fiber, or brushed metal), and patterns. Vinyl appliqués are a more budget-friendly option and offer immense customization possibilities. They are also easier to remove if you decide to change the look later.
- Chrome or Metallic Finish Appliques: For those seeking a more polished or flashy look, chrome or metallic finish appliqués are available. These are usually made from plastic with a chrome plating or a metallic-look vinyl wrap. They add a touch of shine to the front of your Wrangler.
- Custom Design Appliques: Some manufacturers offer appliqués with unique designs, such as simulated vents, grilles, or even custom graphics. These allow for a highly personalized look.
When selecting an applique, consider the material’s durability, UV resistance (to prevent fading), and how well it matches your desired aesthetic. Ensure the product is specifically designed for your Jeep Wrangler model year, as bumper designs can vary slightly between generations.
Benefits Of Installing An Applique
Installing a front bumper applique offers several advantages:
- Aesthetic Enhancement: It’s a simple way to give your Wrangler a more aggressive, custom, or unique look.
- Cost-Effective Customization: Significantly cheaper than a full bumper replacement.
- Minor Protection: Can shield the factory bumper from minor scratches, dings, and road debris.
- Easy Installation: Most appliqués are designed for DIY installation with basic tools.
- Reversibility: Most can be removed without damaging the original bumper, especially vinyl options.

Preparing For Installation
Proper preparation is key to a successful and lasting installation. This stage involves gathering your tools, cleaning the bumper thoroughly, and understanding the specific instructions that come with your chosen applique.
Essential Tools And Materials
While the specific tools might vary slightly depending on the applique type, a general list includes:
- The Front Bumper Applique Kit: Ensure all pieces are present as per the manufacturer’s instructions.
- Mild Soap and Water: For initial cleaning.
- Isopropyl Alcohol (Rubbing Alcohol): Crucial for final surface preparation to ensure strong adhesion.
- Clean Microfiber Cloths or Lint-Free Towels: For cleaning and drying. You’ll need several.
- Masking Tape or Painter’s Tape: To help with precise positioning and alignment.
- Heat Gun or Hair Dryer (Optional but Recommended for Vinyl): To make vinyl more pliable and aid in conforming to curves.
- Scissors or a Utility Knife (For Vinyl): For trimming excess material if needed.
- Gloves (Optional): To keep the bumper surface free of oils from your hands.
- Manufacturer’s Instructions: Always refer to the specific guide that came with your product.
Cleaning The Bumper Surface
This is arguably the most critical step. The applique will only adhere properly if the surface is perfectly clean and free of any contaminants.
- Initial Wash: Start by washing the front bumper with mild soap and water. This removes dirt, mud, salt, and road grime. Rinse thoroughly.
- Drying: Dry the bumper completely with clean microfiber cloths. Ensure no water remains, especially in crevices.
- Degreasing: This is where isopropyl alcohol comes in. Dampen a clean microfiber cloth with isopropyl alcohol and wipe down the entire area of the bumper where the applique will be applied. Work in small sections. The alcohol evaporates quickly, leaving a clean, residue-free surface.
- Inspect: After cleaning with alcohol, inspect the surface for any remaining dirt, wax, or polish residue. If you find any, repeat the alcohol cleaning process. Never skip this degreasing step, as it directly impacts the longevity of the installation.
Understanding Manufacturer Instructions
Every applique kit is slightly different. Some may involve screws, clips, or specific alignment guides. Always read the manufacturer’s instructions thoroughly before starting. Pay attention to:
- Placement and Alignment: How to position the applique correctly.
- Adhesive Application: Whether it’s pre-applied or needs to be applied during installation.
- Temperature Recommendations: Some adhesives work best within a certain temperature range.
- Curing Time: How long the adhesive needs to set before exposing the vehicle to harsh conditions.
Installation Steps For Plastic Appliques
Plastic appliqués are generally more rigid and often attach using pre-applied automotive-grade adhesive tape or sometimes with clips and fasteners.
Step 1: Dry Fit And Positioning
Before peeling off any backing, place the applique onto the bumper in its intended position. This allows you to visualize the final look and check for proper alignment.
Use masking tape to temporarily secure the applique in place. This is crucial for ensuring symmetry and correct placement, especially if the applique has multiple pieces or specific angles.
Step 2: Mark Alignment Points
Once you’re satisfied with the positioning, use masking tape to create alignment guides on both the bumper and the applique. You can mark the edges or specific features that need to line up.
This will help you reapply the applique accurately after removing the backing.
Step 3: Apply Adhesive Promoter (if Included)
Some kits may include an adhesion promoter. This is a chemical solution that enhances the bond between the adhesive on the applique and the bumper surface.
If provided, apply it to the bumper surface according to the manufacturer’s instructions, usually after cleaning with alcohol.
Allow it to dry completely.
Step 4: Peel And Stick
Carefully peel back a small section of the adhesive backing from one edge of the applique. Do not remove the entire backing at once. Align the exposed adhesive edge with your alignment marks on the bumper. Once aligned, press down firmly along the edge.
Step 5: Gradual Application And Pressure
Slowly peel away the rest of the backing while simultaneously pressing the applique firmly onto the bumper. Work from the center outwards, smoothing out any potential air bubbles as you go.
Apply consistent, firm pressure across the entire surface of the applique for at least 30 seconds.
This ensures the adhesive makes full contact.
Step 6: Secure And Inspect
Once the applique is fully in place, remove the masking tape. Inspect the edges to ensure they are firmly adhered.
If any edges seem loose, apply additional pressure. Some installers recommend using painter’s tape to hold down the edges for a few hours after installation to ensure a strong initial bond, especially if the applique has curves.
Step 7: Curing
Allow the adhesive to cure for the period recommended by the manufacturer, typically 24-72 hours. During this time, avoid washing the vehicle or exposing it to extreme temperatures or harsh conditions.
Installation Steps For Vinyl Appliques
Vinyl appliqués are more flexible and often require a bit more technique, especially when dealing with curved surfaces. A heat gun or hair dryer is often beneficial here.
Step 1: Clean And Prepare
Follow the same meticulous cleaning and degreasing steps outlined earlier using soap, water, and isopropyl alcohol. A perfectly clean surface is non-negotiable for vinyl adhesion.
Step 2: Measure And Cut (if Necessary)
If your vinyl applique came as a large sheet that needs trimming, carefully measure and cut it to size according to the instructions. Use sharp scissors or a utility knife for clean cuts.
For pre-cut kits, this step is usually not needed.
Step 3: Position And Align
Place the vinyl applique onto the bumper without removing the backing. Use masking tape to hold it in the desired position.
Ensure it is centered and aligned correctly. Take your time here, as repositioning vinyl can be tricky once the adhesive starts to bond.
Step 4: Apply Heat (optional But Recommended)
Gently warm the vinyl with a heat gun or hair dryer on a low setting. Move the heat source constantly to avoid overheating any single spot.
Warming the vinyl makes it more pliable and easier to stretch and conform to the bumper’s contours, reducing the chances of wrinkles or air bubbles.
Do not make it excessively hot, just warm enough to be flexible.
Step 5: Peel And Apply (section By Section)
Peel back a small portion of the vinyl’s backing paper. Begin applying the vinyl to the bumper, starting from the center and working outwards.
Use a squeegee (often provided with vinyl kits) or a credit card wrapped in a soft cloth to smooth the vinyl down, pushing out any air bubbles as you go.
Step 6: Stretching And Conforming
As you apply the vinyl, you may need to gently stretch it to conform to curved areas. Use the heat gun sparingly if needed to maintain flexibility.
Be careful not to overstretch, as this can thin the vinyl and weaken the adhesive.
Work slowly and deliberately.
Step 7: Trim Excess Material
If there’s any excess vinyl extending beyond the bumper’s edge, carefully trim it with a sharp utility knife. Ensure you’re cutting only the vinyl and not damaging the bumper underneath.
Trimming is often best done after the vinyl has been applied and smoothed.
Step 8: Final Squeegee And Heat
Once the entire applique is applied, go over it again with the squeegee, applying firm pressure to ensure all edges are sealed and there are no trapped air bubbles. A final, light application of heat to the edges can help them adhere even better.
Step 9: Curing For Vinyl
Vinyl adhesives typically need time to fully bond. Avoid washing the vehicle for at least 48 hours.
Keep the vehicle in a moderate temperature environment during this curing period if possible.
Common Mistakes And How To Avoid Them
Even with a straightforward installation, certain pitfalls can lead to a less-than-perfect result. Being aware of these common mistakes can help you achieve a professional finish.
- Insufficient Cleaning: This is the number one reason for premature peeling or bubbling. Pro Tip: Always use isopropyl alcohol for a final degreasing wipe-down. Even if the bumper looks clean, oils and residues can be invisible.
- Rushing the Process: Taking shortcuts, especially during the cleaning and positioning stages, will likely lead to frustration and a poor outcome. Example: Trying to apply the applique in one go without peeling the backing gradually often results in wrinkles and trapped air.
- Overstretching Vinyl: While some stretching is necessary for curves, overdoing it can thin the vinyl, make the color look distorted, and weaken the adhesive. Apply heat gently and stretch only as much as needed.
- Ignoring Manufacturer Instructions: Each product is designed differently. Assuming all appliqués are installed the same way can lead to errors. Always read the specific guide provided with your kit.
- Installing in Extreme Temperatures: Extremely cold temperatures can make adhesives brittle and difficult to work with, while extreme heat can cause adhesives to become too soft and stringy. Moderate temperatures (around 60-80°F or 15-27°C) are usually ideal.
- Touching the Adhesive: Once the backing is removed, try not to touch the exposed adhesive surface with your fingers. Skin oils can interfere with the bond.
Maintaining Your Applique
Proper care will ensure your front bumper applique looks great for years to come. The maintenance requirements depend largely on the material.
For Plastic Appliques
- Washing: Clean with mild soap and water. Avoid abrasive cleaners or harsh chemicals, as they can damage the finish.
- Waxing: Most plastic appliqués can be waxed, but check the manufacturer’s recommendations. Use a non-abrasive wax.
- Protection: While designed for durability, avoid high-pressure washing directly at the edges of the applique, as this can potentially lift them over time.
For Vinyl Appliques
- Washing: Use a pH-neutral car wash soap and plenty of water. Avoid automatic car washes with harsh brushes, as they can snag and lift the vinyl edges. Hand washing is best.
- Drying: Gently pat the area dry with a microfiber towel. Avoid rubbing vigorously.
- Polishing/Waxing: Generally, vinyl does not need waxing. If you want to add protection, use a dedicated vinyl protectant spray. Avoid traditional waxes or polishes, as they can contain petroleum distillates that may damage the vinyl.
- Minor Repairs: Small nicks or tears in vinyl can sometimes be repaired with a vinyl repair kit, though replacement is often the best option for significant damage.
Comparing Applique Materials: Plastic Vs. Vinyl
Choosing between a plastic and a vinyl applique often comes down to your priorities: aesthetic preference, budget, and desired longevity. Here’s a quick comparison:
| Feature | Textured Plastic Appliques | Vinyl Appliques |
|---|