Jeep Wrangler Door Handle Install: Easy Steps For Stylish Upgrades
Your Jeep Wrangler is more than just a vehicle; it's a statement. It’s a symbol of adventure, freedom, and a lifestyle that craves the open road and challenging trails.
While the Wrangler is iconic in its stock form, many owners look for ways to personalize their ride and enhance its already rugged appeal. One of the most straightforward yet impactful ways to do this is by upgrading the door handles.
Swapping out your factory handles for aftermarket ones can instantly change the look of your Jeep, giving it a tougher, more customized appearance.
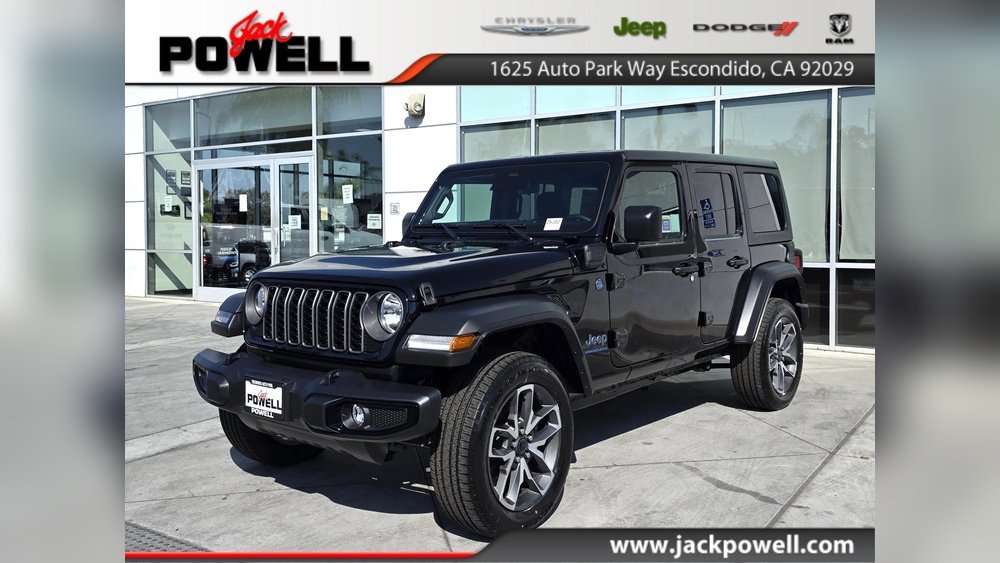
This guide will walk you through the easy steps for installing new Jeep Wrangler door handles, making a stylish upgrade accessible even for those with minimal mechanical experience.
The appeal of custom door handles goes beyond just aesthetics. Many aftermarket options offer improved grip, increased durability, or a unique finish that complements other accessories you might have added.
Whether you're aiming for a sleek, stealthy look with blacked-out handles or a bold statement with chrome or colored accents, the process is surprisingly simple.
We’ll cover everything from choosing the right handles for your specific Wrangler model to the actual installation process, ensuring you can complete this modification confidently and efficiently. Get ready to give your Jeep a fresh, personalized touch that stands out from the crowd.
Why Upgrade Your Jeep Wrangler Door Handles?
The decision to upgrade your Jeep Wrangler door handles might seem minor, but it offers several compelling benefits that contribute to both the vehicle’s appearance and its functionality. Beyond simply changing the look, these upgrades can enhance your ownership experience in tangible ways.
Enhancing The Aesthetic Appeal
This is often the primary driver for most Wrangler owners. The factory door handles, while functional, are typically made of plastic and can look a bit plain. Aftermarket options come in a vast array of styles, materials, and finishes:
- Materials: You can find handles made from durable aluminum, steel, or even carbon fiber. These materials often have a more substantial feel and a premium look compared to plastic.
- Finishes: From matte black and satin silver to chrome, brushed nickel, and even vibrant colors like red or blue, the finish can dramatically alter your Jeep’s profile. A matte black finish can give a rugged, stealthy look, while chrome adds a touch of classic shine.
- Designs: Some handles feature aggressive textures for better grip, integrated steps for easier entry, or unique shapes that set your Wrangler apart.
These visual changes can tie together with other aftermarket accessories, such as wheels, grilles, or fender flares, creating a cohesive and personalized aesthetic that truly reflects your style.
Improving Durability And Functionality
Beyond looks, upgraded door handles can offer practical advantages:
- Increased Strength: Metal handles are generally much stronger than their plastic counterparts. This can be particularly beneficial for off-roading, where doors might be subjected to more stress or accidental impacts. They are less likely to crack or break under pressure.
- Better Grip: Many aftermarket handles are designed with ergonomics in mind. Features like textured surfaces or contoured shapes can provide a more secure grip, which is especially helpful when your hands are wet, muddy, or gloved. This can make opening and closing doors easier and more comfortable.
- Protection: Some handles come with protective covers that can shield your original paint from scratches and scuffs, especially in the area around the handle where keys or other items might make contact.
In my experience, the tactile difference alone makes the upgrade worthwhile. The solid feel of a metal handle compared to a lightweight plastic one provides a subtle but constant reminder of the quality upgrade you’ve made.
Ease Of Installation
One of the most attractive aspects of replacing Jeep Wrangler door handles is the simplicity of the installation process. For most models, this is a DIY-friendly project that requires minimal tools and can often be completed in under an hour. This accessibility means you can achieve a significant visual transformation without needing to visit a professional mechanic or spend a lot on labor.

Types Of Jeep Wrangler Door Handles
When you start looking for replacement door handles, you’ll notice a variety of types available, each offering different aesthetics and functionalities. Understanding these options will help you choose the best fit for your needs and your Wrangler’s style.
Factory-style Replacements
These handles are designed to look and function almost identically to your original Jeep Wrangler door handles. They are typically made from durable plastic or coated metal and are a good option if you’re looking for a straightforward replacement due to a broken or damaged handle, or if you simply want a fresh, factory look without venturing into drastically different designs.
- Pros: Easy installation, maintains original look, often more affordable.
- Cons: Limited aesthetic customization, may not offer improved functionality or durability over stock.
Aftermarket Performance Handles
This category encompasses a wide range of designs focused on enhancing both appearance and performance. They are often made from robust materials like billet aluminum or steel and come in various finishes and styles.
- Billet Aluminum Handles: Machined from solid blocks of aluminum, these handles are known for their strength, light weight, and precise fit. They often feature a smooth, clean look or can be found with intricate machined patterns. Finishes typically include polished, brushed, or anodized options.
- Steel Handles: For maximum durability, steel handles are a popular choice. They can withstand significant impact and wear, making them ideal for serious off-roaders. These often have a more rugged, industrial appearance.
- Textured Grip Handles: Many aftermarket handles incorporate textured surfaces, such as knurling or rubber inserts, to provide a superior grip, even in challenging conditions. This is a significant functional upgrade, especially if you frequently wear gloves or encounter mud and water.
Specialty And Custom Handles
Beyond the common types, you’ll find more unique options:
- Grab Handles: Some kits include integrated grab handles that attach near the door handle area, providing an extra point of contact for easier entry and exit, especially for passengers in the rear seats or when climbing into a lifted Jeep.
- Colored Handles: For those who want to add a pop of color, handles are available in various paint-matched or accent colors to complement your Jeep’s paint scheme or other accessories.
- Locking Handles: Some premium options may include integrated locking mechanisms for added security, though this is less common for simple handle replacements and more often seen in full door systems.
When choosing, consider your Wrangler’s model year and door type (e.g., 2-door vs. 4-door, hardtop vs. softop). While many handles are cross-compatible, it’s always best to verify fitment before purchasing.
Tools And Materials Needed
Fortunately, installing new Jeep Wrangler door handles is a project that requires very few specialized tools. Most of the items you’ll need are likely already in your home toolbox.
Having the right tools makes the process smoother and prevents damage to your Jeep.
Here’s a breakdown of what you’ll typically need:
- Socket Set or Wrench Set: The most crucial tool. You’ll likely need a few common socket sizes, often ranging from 8mm to 13mm. Your new handles might come with specific hardware, so check the included instructions to confirm the exact sizes.
- Screwdriver Set: A Phillips head screwdriver is usually required, and sometimes a flathead is needed for prying or loosening trim pieces.
- Trim Removal Tools: While not strictly necessary, plastic trim removal tools are highly recommended. They allow you to gently pry off interior door panels or trim pieces without scratching or damaging the plastic. Using a screwdriver for this can easily leave marks.
- Gloves: Work gloves can protect your hands from sharp edges on the handles or potential scrapes.
- Cleaning Supplies: A microfiber cloth and an all-purpose cleaner or rubbing alcohol are useful for cleaning the area around the handle before installing the new ones. This ensures a clean surface for any adhesive or for a better overall finish.
- New Door Handles: Of course, you’ll need your chosen set of aftermarket door handles. Ensure they are compatible with your specific Jeep Wrangler model and year.
- Installation Instructions: Always refer to the instructions provided by the manufacturer of your new door handles. While the general process is similar, specific models might have unique steps.
Pro Tip: Before you begin, lay out all your tools and the new handles. Check that all the hardware (screws, bolts, clips) included with the new handles is present. This prevents mid-installation surprises.
Step-by-step Installation Guide
Installing new Jeep Wrangler door handles is a relatively straightforward process, typically involving removing the interior door panel to access the handle mechanism. While the exact steps can vary slightly depending on your Wrangler’s year and model, the general procedure remains consistent.
Step 1: Prepare Your Workspace And Gather Tools
Before you start, ensure you have a clear, well-lit workspace. Park your Jeep on a level surface.
Gather all the tools and materials listed previously. It’s a good idea to have a container or magnetic tray to hold the screws and bolts you remove, preventing them from getting lost.
Step 2: Remove The Interior Door Panel
This is often the most time-consuming part, but it’s essential for accessing the door handle hardware.
- Locate and Remove Screws: Open the Jeep door. Look for screws around the edges of the door panel, often hidden behind small plastic caps or in the armrest area. Use your screwdriver to remove these.
- Pry Off Trim Pieces: Carefully use your trim removal tools to gently pry around the edges of the door panel. Start from a corner and work your way around. You’ll hear clips popping as they release. Be patient and avoid forcing it, as this can break the clips.
- Disconnect Wiring (If Necessary): Once the panel is loose, you might need to disconnect electrical connectors for power windows, locks, or speakers. Gently pull the connectors apart; don’t yank the wires.
- Lift Off the Panel: With all screws and clips released, you should be able to lift the door panel upwards and off the door frame. Set it aside in a safe place.
Step 3: Access And Remove The Old Door Handle
With the door panel removed, you’ll see the inner workings of the door.
- Locate the Handle Mechanism: Identify the existing door handle and its mounting points. You’ll typically see rods or cables connecting the handle to the latch mechanism.
- Remove Mounting Bolts/Nuts: There will be bolts or nuts holding the exterior door handle in place. Use your socket set to remove these. Keep track of which bolts go where, as they might be different lengths.
- Release the Handle: Once the fasteners are removed, you should be able to carefully pull the old handle away from the exterior of the door. You may need to gently maneuver the connecting rods or cables.
Step 4: Install The New Door Handle
This is where your stylish upgrade comes to life.
- Position the New Handle: Align the new door handle with the mounting holes on the exterior of the door.
- Connect Linkages: Reconnect the rods or cables to the new handle. Ensure they are securely attached and move freely without binding. This is crucial for the door to open and close correctly.
- Secure the Handle: From the inside of the door, install and tighten the new mounting bolts or nuts. Tighten them firmly, but avoid over-tightening, which could strip the threads or damage the new handle.
- Test the Mechanism: Before reattaching the door panel, manually operate the new handle and check that the door latch mechanism works smoothly. Open and close the door a few times to ensure everything functions correctly.
Step 5: Reinstall The Interior Door Panel
Reassembly is the reverse of removal.
- Reconnect Wiring: Reconnect any electrical connectors you disconnected earlier.
- Align the Panel: Position the door panel back onto the door frame, ensuring it aligns correctly with the clips and mounting points.
- Secure the Panel: Press down firmly around the edges of the panel to snap the clips back into place. Reinstall all the screws you removed in Step 2.
- Final Check: Open and close the door again, test the handle, power windows, and locks to confirm everything is working as expected.
Warning: If the door latch feels stiff or doesn’t operate correctly after installation, double-check the connection of the rods or cables to the new handle. Misalignment here is the most common cause of functional issues.
Common Pitfalls And How To Avoid Them
Even with a straightforward project like installing new door handles, there are a few common issues that can arise. Being aware of these potential pitfalls can save you time, frustration, and prevent damage to your Jeep.
1. Damaging Interior Trim Clips
- The Problem: The plastic clips that hold the interior door panel in place can be brittle, especially on older vehicles. Using excessive force or the wrong tool can easily break them, leading to a loose panel or the need to buy replacements.
- How to Avoid: Always use plastic trim removal tools. Start prying gently from the edges and listen for the clips releasing. Work your way around the panel systematically. If a clip feels stuck, try applying a little more pressure or finding the exact spot where it’s attached before forcing it.
2. Losing Small Hardware
- The Problem: Door panels and handle mechanisms involve numerous small screws, bolts, and nuts. It’s incredibly easy to drop one, especially in a garage or driveway, leading to a frantic search or a trip to the hardware store for replacements.
- How to Avoid: Use a magnetic parts tray or a small container to keep all removed hardware organized. Consider laying down a towel or drop cloth under the door to catch anything that might fall. If you’re working outside, a shallow pan can prevent screws from disappearing into the grass.
3. Incorrect Linkage Reconnection
- The Problem: The rods or cables that connect the interior handle mechanism to the exterior latch can be tricky. If they aren’t reconnected properly to the new handle, your door might not open, or the handle might feel loose or disconnected.
- How to Avoid: Take photos before you disconnect anything. Pay close attention to how the rods or cables are routed and attached. When installing the new handle, ensure each linkage is securely clipped or fastened in the correct position. Manually operate the handle and latch mechanism *before* reinstalling the door panel to confirm it works smoothly.
4. Over-tightening Fasteners
- The Problem: It’s tempting to tighten bolts and screws as much as possible, but over-tightening can strip threads in the door metal