When your Jeep Patriot needs some attention under the steering column, you might find yourself facing a specific type of fastener: the Torx screw. These star-shaped fasteners are common in automotive applications for their secure grip and resistance to cam-out (slipping).
If you're planning to remove the steering wheel on your Jeep Patriot, understanding the role of Torx screws and how to handle them is crucial.
This process, while not overly complex, requires the right tools and a methodical approach to ensure safety and prevent damage to your vehicle's electrical components and airbag system.

The steering wheel houses several important components, including the airbag module, horn wiring, and cruise control buttons. Accessing these requires careful disassembly, and the Torx screws are often the primary method of securing the steering wheel’s airbag cover or even the wheel itself to the steering column.
Knowing the correct Torx bit size is the first step in a successful removal. Without the proper tool, you risk stripping the screw head, which can turn a straightforward job into a frustrating ordeal.
This guide will walk you through the process of identifying and removing Torx screws related to steering wheel removal on a Jeep Patriot, offering insights and practical advice to help you complete the task efficiently and safely.
Understanding Torx Screws And Their Role In Steering Wheel Removal
Torx screws, also known as star drives, are characterized by their six-pointed star pattern. This design allows for a greater contact area between the screwdriver bit and the screw head compared to traditional Phillips or flathead screws. This increased surface area translates to better torque transfer and a reduced likelihood of the bit slipping out, or “camming out.” In automotive applications, especially within the sensitive area of the steering wheel, this secure fit is paramount.
Why Torx Screws In Steering Wheels?
The automotive industry favors Torx fasteners for several reasons. Their resistance to cam-out is a significant advantage during assembly and disassembly. This means that during manufacturing, power tools can apply high torque without stripping the screws. For mechanics and DIY enthusiasts, it means a more reliable connection that is less prone to damage if the correct bit is used.
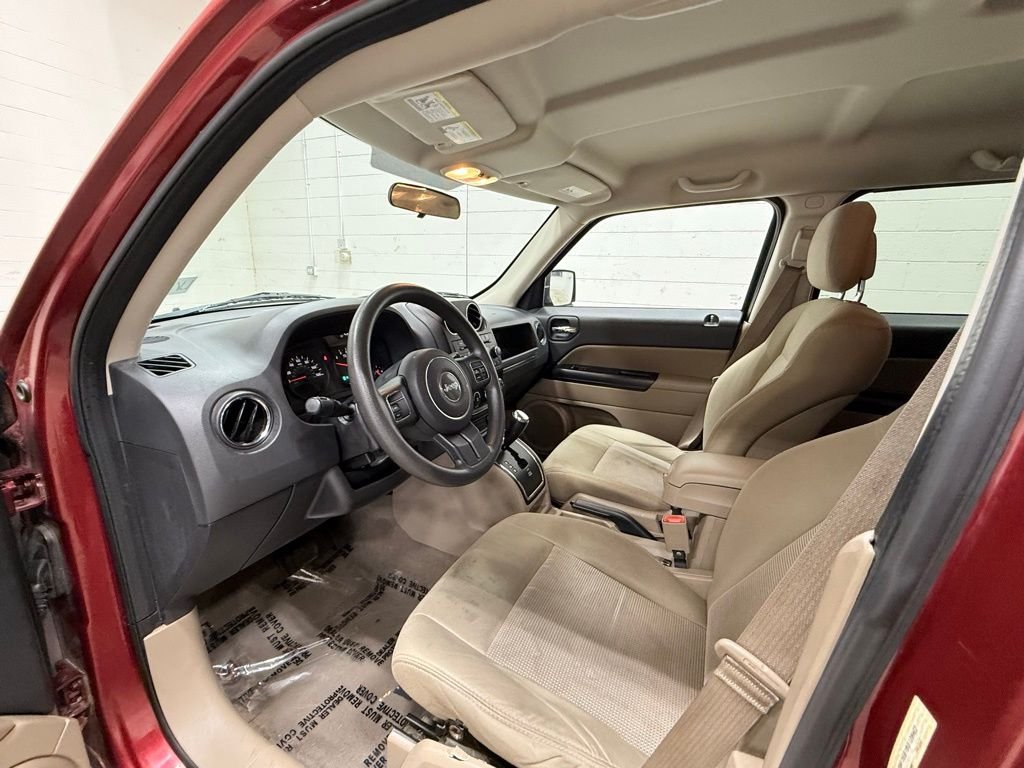
Within the steering wheel assembly of a Jeep Patriot, Torx screws typically secure the airbag module cover. This cover is often a plastic piece that hides the airbag and its associated wiring. Removing this cover is usually the first step before you can access the central nut that holds the steering wheel to the steering column. In some cases, Torx screws might also be used for other components attached to the steering wheel, like button modules.
Identifying The Correct Torx Bit Size
The most common Torx sizes encountered in automotive work are T10, T15, T20, T25, T27, T30, and T40. For the Jeep Patriot steering wheel, the specific Torx bit sizes can vary slightly depending on the year and trim level, but common sizes for accessing the airbag cover are often T20 or T25. It’s always best to visually inspect the screw head or consult your vehicle’s service manual if you’re unsure.
A Torx bit set is a worthwhile investment for anyone who plans to do their own car maintenance. These sets provide a range of sizes, ensuring you have the right tool for the job. Using a Torx bit that is too small will likely strip the screw head, while one that is too large won’t fit properly and can also cause damage. The bit should fit snugly into the star-shaped recess of the screw.
Safety First: Disconnecting The Battery
Before you even think about touching the steering wheel, especially when dealing with the airbag system, disconnecting the vehicle’s battery is a non-negotiable safety step. The airbag system is powered by the car’s electrical system, and even residual charge in capacitors can cause the airbag to deploy unexpectedly if you disturb the wiring while the battery is connected.
- Locate the battery: It’s usually under the hood, but in some vehicles, it might be in the trunk or under a seat.
- Identify the negative terminal: This is typically marked with a “-” symbol and often has a black cable.
- Loosen the clamp: Use a wrench (often 10mm or 13mm) to loosen the nut on the negative terminal clamp.
- Remove the cable: Gently pull the negative cable off the battery post. Tuck it away so it cannot accidentally make contact with the terminal.
- Wait: Allow at least 15-30 minutes for any residual power in the airbag system to dissipate. This waiting period is crucial for your safety.
Pro Tip: Always wear safety glasses when working on your vehicle, especially when dealing with components like airbags.
Step-by-step Guide To Removing The Jeep Patriot Steering Wheel
Removing the steering wheel on a Jeep Patriot involves several key steps, primarily focused on safely disengaging the airbag module and then releasing the wheel itself. The Torx screws play their part in gaining access to the central retaining nut.
Accessing The Airbag Module
The first major hurdle is typically removing the plastic cover that houses the airbag. This is where your Torx bits will come into play.
- Locate the Torx screws: On the back of the steering wheel, on either side of the steering column, you will usually find access holes. These holes are designed to allow you to insert a Torx bit to release the airbag module.
- Insert the correct Torx bit: Based on your vehicle, you’ll likely need a T20 or T25 Torx bit. Insert the bit into the access hole and engage the screw.
- Loosen the screws: Turn the Torx bit counter-clockwise to loosen the screws. You typically don’t need to remove them completely; loosening them about halfway or until the airbag module pops out slightly is often enough. There are usually two such screws, one on each side.
- Gently pull the airbag module: Once the screws are loosened, the airbag module should start to detach from the steering wheel. You may need to gently wiggle it or use a trim removal tool to help pry it loose. Be careful not to force it, as there are wires connecting it to the steering column.
- Disconnect the wiring: With the airbag module partially free, you’ll see electrical connectors. These usually have locking tabs that need to be carefully pressed to release them. There will be connectors for the airbag itself, and potentially for the horn and other steering wheel controls. Handle these wires with extreme care; they are delicate and critical for the airbag system’s function.
Warning: Never attempt to service or remove the airbag module if the battery is connected or if you haven’t waited the recommended dissipation time. Airbag deployment can cause severe injury.
Removing The Central Retaining Nut
Once the airbag module is safely disconnected and set aside, you can access the main nut holding the steering wheel to the steering column shaft.
- Identify the central nut: This is a large nut located in the center of the steering wheel, behind where the airbag module was. It’s often a 15mm or 16mm nut, but the size can vary.
- Position the steering wheel: For maximum leverage and to make removal easier, it’s best to center the steering wheel. You can do this by turning the steering wheel until the front wheels are pointing straight ahead. This also ensures the steering wheel is properly aligned when you reinstall it.
- Apply steady force: Use a socket wrench with the appropriate socket size to loosen the nut. Turn it counter-clockwise. This nut is usually torqued on quite tightly, so you might need a breaker bar for extra leverage.
- Be prepared for resistance: The steering wheel is splined onto the steering column shaft. It might be tight to pull off initially.
- Remove the nut: Once loosened, remove the nut completely. Keep it in a safe place, as you’ll need it for reinstallation.
Detaching The Steering Wheel
With the central nut removed, the steering wheel should now be free to slide off the steering column shaft.
- Gentle rocking motion: Try to gently rock the steering wheel side to side while pulling it towards you. The splines can sometimes create a tight fit.
- Using a steering wheel puller: If the wheel is particularly stubborn, you may need a steering wheel puller tool. This is a specialized tool that threads into holes on the steering wheel hub and uses a central bolt to press against the steering column shaft, forcing the wheel off. Never use excessive force or pry against the column itself, as this can cause significant damage. Renting or borrowing a puller is often the safest bet if you don’t have one.
- Careful removal: Once it breaks free, pull the steering wheel straight off the column. Be mindful of any wires that might still be attached or passing through the column.
Inspecting And Cleaning
With the steering wheel removed, this is a good opportunity to inspect the area for any debris, wear, or damage. Clean the steering column splines and the mating surface on the steering wheel hub.
This ensures a clean fit during reinstallation and helps prevent future issues.

Tools And Materials Needed
Having the right tools makes any DIY automotive job significantly easier and safer. For removing the steering wheel on a Jeep Patriot, particularly dealing with the Torx screws, a few specific items are essential.
Essential Tools
- Torx Bit Set: As mentioned, a set containing common sizes like T10 through T40 is highly recommended. For the Jeep Patriot steering wheel, you’ll likely need a T20 or T25 bit. It’s best to have a variety to ensure you have the correct fit.
- Socket Wrench Set: You’ll need sockets for the central retaining nut. A 15mm or 16mm socket is common, but verify for your specific model year. A ratchet handle and possibly a breaker bar for extra torque are also useful.
- Screwdrivers: While Torx bits are used for the main screws, you might encounter other fasteners or need a flathead screwdriver for prying or releasing electrical connectors.
- Trim Removal Tools: These plastic tools are invaluable for gently prying off plastic covers and trim pieces without scratching or damaging them.
- Safety Glasses: Essential eye protection for any automotive work.
- Gloves: To protect your hands and provide a better grip.
Optional But Recommended Tools
- Steering Wheel Puller: If the steering wheel is difficult to remove, this tool is a lifesaver. Ensure you get one compatible with your Jeep Patriot.
- Torque Wrench: Crucial for reinstalling the steering wheel and airbag module correctly. Over-tightening can damage components, while under-tightening can be dangerous.
- Work Light: To illuminate the often dimly lit areas under the steering column.
- Compressed Air: Useful for cleaning dust and debris from the steering column and wheel components.
Materials
- Replacement Parts (if applicable): If you are replacing the steering wheel or any associated components, ensure you have the correct parts before starting.
- Dielectric Grease: A small amount can be applied to electrical connector contacts to prevent corrosion and ensure a good connection.
Example: When I replaced the steering wheel on my old Dodge Neon, which shares some components with Jeeps, the Torx screws holding the airbag were T25. The central nut was 15mm. Without a proper Torx bit, I would have been stuck, but having a set made it a quick process.
Reinstallation Process: Putting It All Back Together
Reassembling the steering wheel and its components requires careful attention to detail, especially concerning the airbag system and torque specifications. The reverse of the removal process is generally followed, but with added emphasis on safety and proper tightening.
Reattaching The Steering Wheel
- Align the steering wheel: Carefully slide the steering wheel back onto the steering column shaft, ensuring the splines align correctly. It should only fit one way. Make sure it’s seated all the way down.
- Install the central nut: Thread the central retaining nut back onto the steering column.
- Tighten the nut: Use your socket wrench to tighten the nut. For critical safety components like the steering wheel, it’s vital to use a torque wrench. Consult your Jeep Patriot service manual for the specific torque specification. Typically, this nut is tightened to a high torque value (e.g., 40-60 ft-lbs or more), but always verify the exact spec for your vehicle.
Reconnecting The Airbag Module
This is the most critical step for safety.
- Reconnect wiring harnesses: Carefully plug the electrical connectors back into their respective sockets on the airbag module and steering column. Ensure each connector clicks securely into place. You should feel or hear a distinct “click” for most connectors, indicating they are locked.
- Inspect connections: Double-check that all wires are properly routed and not pinched.
- Position the airbag module: Gently align the airbag module back into its position on the steering wheel.
- Secure the Torx screws: Insert the Torx screws back into their access holes on the back of the steering wheel. Tighten them using your Torx bit. Again, use a torque wrench if specified in your service manual. While often less critical than the central nut, proper tightening prevents rattles and ensures the module stays secure.
Final Checks And Battery Reconnection
- Double-check everything: Before reconnecting the battery, visually inspect all connections and ensure no tools or parts are left behind in the work area.
- Reconnect the battery: Reattach the negative battery cable to the negative terminal post and tighten the clamp securely.
- Test functions: Start the vehicle. The airbag warning light on the dashboard should illuminate for a few seconds and then turn off. If it stays on, there’s an issue with the airbag system, and you should have it diagnosed immediately by a professional. Test the horn, cruise control, and any other steering wheel-mounted controls to ensure they are working correctly.
- Test steering: With the engine running, slowly turn the steering wheel from lock to lock to ensure smooth operation.
In my experience, the most common mistake during reinstallation is not waiting long enough after disconnecting the battery, or not properly seating the airbag connectors. These can lead to the airbag warning light staying on, or worse, a non-functional or unexpectedly deployed airbag.
Common Issues And Troubleshooting
Even with careful work, you might encounter some problems when removing or reinstalling a Jeep Patriot steering wheel, particularly concerning the Torx screws and associated components.
Stripped Torx Screw Heads
This is arguably the most common issue. It happens when the wrong size Torx bit is used, or when too much force is applied at an angle, causing the bit to slip and round off the edges of the screw