Jeep Headlight Lens Cleaning Method: Restoring Clarity And Safety
Dirty or cloudy headlight lenses are more than just an eyesore; they pose a significant safety risk. Dim headlights reduce your visibility at night and in poor weather conditions, making it harder to see the road ahead and for other drivers to see you.
For Jeep owners, especially those who take their vehicles off-road or use them in challenging environments, headlight lenses can quickly become covered in mud, grime, bugs, and road salt. Fortunately, restoring your Jeep's headlight lenses to a clear, bright state is achievable with the right cleaning methods.
This guide will walk you through effective ways to clean your Jeep's headlight lenses, from simple DIY solutions to more advanced restoration techniques.
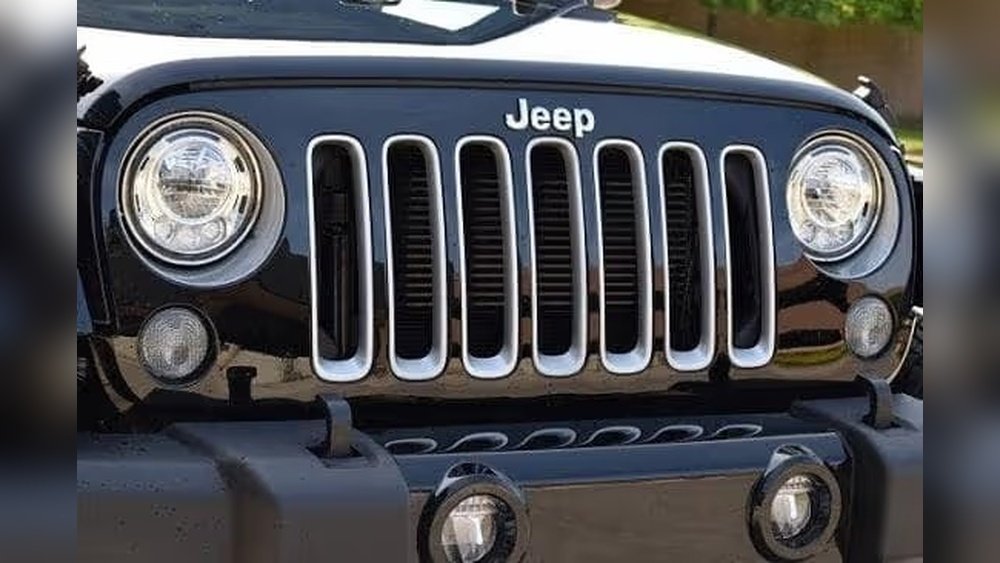
The accumulation of debris on your headlight lenses can significantly reduce light output. Studies have shown that heavily oxidized or yellowed headlights can reduce visibility by as much as 70%. This is a critical factor for anyone driving a Jeep, which is often used in conditions where visibility is already compromised. Restoring them not only improves your safety but also enhances the overall look of your vehicle.
Understanding Headlight Lens Degradation
Before diving into cleaning methods, it’s helpful to understand why headlight lenses degrade. Most modern headlights use polycarbonate plastic lenses, which are durable but susceptible to environmental damage. The primary culprits for degradation are:
- UV Radiation: Prolonged exposure to the sun’s ultraviolet rays breaks down the plastic, causing it to become hazy, yellow, and brittle.
- Oxidation: Air pollution and other environmental factors can react with the plastic, leading to a cloudy appearance.
- Scratches and Abrasion: Road debris, car washes, and even improper cleaning can cause small scratches on the lens surface. These scratches trap dirt and moisture, further contributing to haziness.
- Chemical Exposure: Road salt, bug splatter, and harsh cleaning chemicals can also damage the lens coating.
Jeep owners often face unique challenges. Off-roading can expose headlights to mud, rocks, and abrasive dust.
Even regular driving in areas with heavy pollution or salt usage can accelerate the degradation process.

Simple Cleaning For Light Grime And Dirt
For headlights that are only lightly dirty or dusty, a simple cleaning routine can often suffice. This method is quick, easy, and uses common household items.
Materials You’ll Need
- Clean microfiber cloths (at least two)
- Mild car wash soap or dish soap
- Bucket of water
- Optional: Spray bottle with water
Step-by-step Cleaning Process
- Rinse the Headlights: Start by rinsing the headlight lenses thoroughly with water. This removes loose dirt and debris, preventing them from scratching the lens during the washing process. A hose or a spray bottle can be used for this.
- Prepare the Soapy Water: Mix a small amount of mild car wash soap or dish soap with water in your bucket. You want a gentle cleaning solution, not something harsh that could damage the plastic.
- Wash the Lenses: Dip a clean microfiber cloth into the soapy water. Gently wipe down the headlight lenses, using a circular motion. Ensure you cover the entire surface.
- Rinse Again: Rinse the lenses thoroughly with clean water to remove all soap residue.
- Dry the Lenses: Use a separate, dry microfiber cloth to dry the headlight lenses completely. Avoid letting them air dry, as this can leave water spots.
Pro Tip: Always use microfiber cloths. Paper towels or rough rags can leave fine scratches on the plastic, which will worsen over time.
This basic cleaning method is excellent for regular maintenance. Doing this every few weeks can help prevent the buildup of grime that leads to more significant issues.
Advanced Cleaning And Restoration For Hazy And Yellowed Lenses
When simple washing isn’t enough, and your Jeep’s headlights have started to look hazy, yellow, or cloudy, you’ll need to move to more advanced cleaning and restoration techniques. These methods involve removing the oxidized layer of plastic.
Method 1: Using A Plastic Headlight Restoration Kit
Plastic headlight restoration kits are widely available at auto parts stores and online. They typically contain a series of abrasive pads or compounds designed to remove oxidation and a sealant to protect the newly cleaned surface.
Materials You’ll Need
- A reputable plastic headlight restoration kit (e.g., 3M, Meguiar’s, Sylvania)
- Masking tape
- Clean microfiber cloths
- Water
Step-by-step Kit Application
- Clean the Lenses: Start by thoroughly washing and drying the headlight lenses as described in the simple cleaning method. This removes any loose dirt that could interfere with the restoration process.
- Mask the Surrounding Area: Use masking tape to carefully cover the paint and trim around the headlight lenses. This is crucial to prevent accidental scratching or damage to your Jeep’s bodywork.
- Follow Kit Instructions: Each kit will have specific instructions, but most involve a sequence of abrasive steps. This might include:
- Wetting the lens with water.
- Using abrasive pads (often numbered or color-coded) in a specific order, usually starting with a coarser grit and progressing to finer grits. You’ll typically rub these pads over the lens surface in a consistent pattern (e.g., horizontal, then vertical).
- Rinsing the lens between abrasive steps to remove debris and check your progress.
- Apply the Polishing Compound: After the abrasive steps, the lens will likely look clearer but may still be slightly dull. Use the polishing compound included in the kit to restore shine. Apply it with a clean cloth and buff the lens.
- Apply the UV Protectant/Sealant: This is a critical step. The kit will include a sealant or UV protectant. Apply this evenly over the cleaned lens according to the instructions. This coating protects the newly exposed plastic from future UV damage and oxidation. Allow it to cure fully as directed by the kit.
- Remove Masking Tape: Once the sealant is dry, carefully remove the masking tape.
Pro Tip: Don’t rush the abrasive steps. Ensure you thoroughly work each grit of sandpaper or abrasive pad over the entire lens surface. In my experience, inconsistent application here is a common reason for incomplete restoration.
Method 2: Using Household Items (toothpaste, Baking Soda)
For those on a budget or who prefer DIY solutions, common household items can also be effective for mild to moderate haziness. These methods rely on the abrasive properties of substances like toothpaste and baking soda.
Option A: Toothpaste Method
Toothpaste contains mild abrasives that can polish away light oxidation. It’s best suited for headlights that are only slightly yellowed or hazy.
Materials You’ll Need
- White, non-gel toothpaste (avoid colored or gritty varieties)
- Clean microfiber cloths (several)
- Water
- Masking tape
Step-by-step Toothpaste Cleaning
- Clean and Mask: Wash and dry the headlights. Mask off the surrounding paintwork.
- Apply Toothpaste: Squeeze a generous amount of toothpaste directly onto the headlight lens.
- Polish: Using a clean microfiber cloth, rub the toothpaste into the lens in a circular motion. Apply firm pressure. You should start to see the haze lifting.
- Rinse and Repeat: Rinse the lens thoroughly with water. Inspect the results. If haziness remains, repeat the polishing step. You might need to do this several times for noticeable improvement.
- Seal (Optional but Recommended): After cleaning, the lens is more vulnerable. Consider applying a thin layer of car wax or a dedicated UV sealant to offer some protection.
Option B: Baking Soda Paste Method
Baking soda is another mild abrasive that can work wonders.
Materials You’ll Need
- Baking soda
- Water
- Clean microfiber cloths (several)
- Masking tape
Step-by-step Baking Soda Cleaning
- Clean and Mask: Wash and dry the headlights, and mask off the surrounding area.
- Make the Paste: Mix baking soda with a small amount of water to create a thick paste, similar in consistency to toothpaste.
- Apply and Polish: Apply the paste to the headlight lenses. Use a damp microfiber cloth to rub the paste into the lenses in a circular motion. Apply firm pressure.
- Rinse and Repeat: Rinse the lenses well. If needed, repeat the application and polishing process until the desired clarity is achieved.
- Seal: As with the toothpaste method, applying a layer of car wax or UV sealant afterward is highly recommended.
Warning: While these household methods can be effective for minor issues, they are less aggressive than dedicated restoration kits. If your headlights are severely yellowed or pitted, these methods may not yield satisfactory results and could require multiple applications.

More Aggressive Restoration Techniques (when Kits Fail)
Sometimes, even the best kits can struggle with extremely degraded headlights. In these cases, a more hands-on approach involving wet sanding might be necessary. This method requires more care and precision.
Materials You’ll Need
- Assorted grit wet/dry sandpaper (e.g., 800, 1000, 1500, 2000, 2500 grit)
- A sanding block or firm backing pad
- Water spray bottle
- Masking tape
- Plastic headlight restoration kit (for polishing and sealing) or a separate polishing compound and UV sealant
- Clean microfiber cloths
Step-by-step Wet Sanding Process
- Clean and Mask Thoroughly: Wash and dry the headlights. Mask off all surrounding paint and trim meticulously. This is even more critical with wet sanding.
- Start with Coarse Grit: Begin with the lowest grit sandpaper (e.g., 800 grit). Wet the headlight lens and the sandpaper. Gently sand the lens in one direction (e.g., horizontal strokes). Use light to moderate pressure. The goal is to remove the oxidized layer.
- Rinse and Inspect: Rinse the lens and check your progress. The lens will look very hazy and dull after this step, which is normal.
- Progress to Finer Grits: Move to the next grit (e.g., 1000 grit). Wet the lens and sandpaper. Sand in the opposite direction (e.g., vertical strokes). Continue this process, moving through progressively finer grits (1500, 2000, 2500). Always wet the surface and sandpaper, and alternate sanding directions with each grit.
- Final Rinse and Polish: After the finest grit, rinse the lens thoroughly. It should be significantly clearer. Now, use a plastic headlight restoration kit’s polishing compound or a separate automotive polishing compound with a microfiber cloth to buff out the sanding marks and restore clarity and shine.
- Apply UV Sealant: This is non-negotiable after wet sanding. The exposed polycarbonate is highly vulnerable. Apply a high-quality UV sealant or clear coat specifically designed for plastic headlights. Allow it to cure fully.
Example: If you’re restoring headlights on a Jeep Wrangler that spends a lot of time on dusty trails, you might find that even after wet sanding, light scratches from fine dust remain. A good quality polish will help remove these before sealing.
Important Note: Wet sanding removes a layer of plastic. If your headlights have deep pits or cracks, this method may not be suitable. Always consult a professional if you’re unsure.
Protecting Your Newly Cleaned Headlights
Once you’ve restored your Jeep’s headlights, the work isn’t entirely done. The clear coat on new headlights is designed to protect them from UV damage, but this coating degrades over time. Applying a protective layer after cleaning or restoration is crucial to maintain clarity and prevent rapid re-yellowing.
Options For Protection
- Dedicated UV Sealants/Coatings: These are specifically formulated to bond with polycarbonate plastic and provide long-lasting UV protection. Many headlight restoration kits include these. If yours doesn’t, you can purchase them separately. They are often applied like a clear coat and require curing time.
- Car Wax: A good quality car wax can offer temporary protection. It’s not as durable as dedicated sealants, so you’ll need to reapply it more frequently (e.g., every few months). It’s a quick and easy way to add a layer of defense.
- Paint Protection Film (PPF): For the ultimate protection, consider having a clear PPF applied to your headlights. This is a durable film that guards against UV rays, minor scratches, and impacts. It’s a more expensive option but offers the best long-term defense.
Pro Tip: After applying any sealant or wax, allow it to cure fully before exposing the headlights to heavy rain or washing. Check the product’s instructions for specific curing times.

When To Consider Replacement
While cleaning and restoration can work wonders, there are times when replacement is the better option.
- Deep Pitting or Cracking: If the plastic is deeply pitted, cracked, or has significant internal damage, cleaning and restoration may not be effective or can even worsen the damage.
- Severe Yellowing That Won’t Budge: If you’ve tried multiple restoration methods and the headlights remain significantly yellowed or hazy, the plastic may be too degraded.
- Internal Condensation: If you notice water or condensation *inside* the headlight assembly, this indicates a seal failure. Cleaning the exterior lens won’t fix this.
- Cost vs. Benefit: Sometimes, the effort and cost of multiple restoration attempts can approach the cost of new, quality aftermarket headlights or even OEM replacements.
If you decide to replace your Jeep’s headlights, ensure you purchase high-quality units. Cheap aftermarket headlights can sometimes have poor fitment or inferior lens materials that degrade quickly.
Frequently Asked Questions
What Is The Best Way To Clean Jeep Headlights?
The best method depends on the condition of your headlights. For light dirt, a simple wash with car soap and water using microfiber cloths is sufficient. For hazy or yellowed lenses, a dedicated plastic headlight restoration kit is usually the most effective and straightforward solution. For severely degraded lenses, wet sanding followed by polishing and sealing might be necessary.
How Often Should I Clean My Jeep’s Headlights?
It’s a good idea to clean your headlights regularly as part of your routine car washes, especially if you drive in dusty, muddy, or salty conditions. For restoration, the frequency depends on the severity of degradation and the type of protection applied afterward. If you apply a good UV sealant, you might only need to reapply it every 6-12 months.
Can Toothpaste Really Clean Headlights?
Yes, white, non-gel toothpaste can work as a mild abrasive to polish away light oxidation and haziness from plastic headlight lenses. It’s a