When your Jeep's headlights are not pointing correctly, it's more than just an annoyance. It can be a safety hazard for you and other drivers.
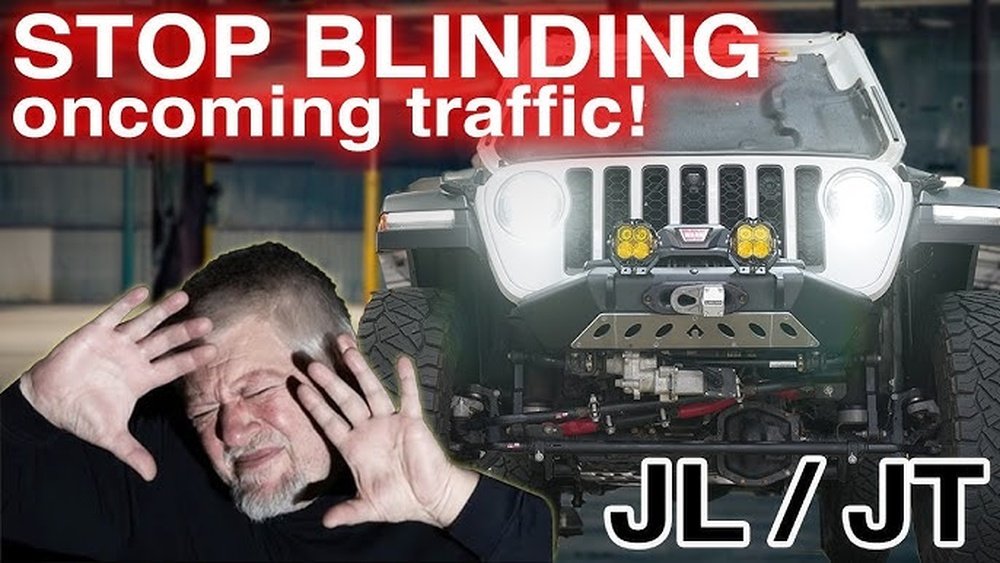
Headlights that are too low make it hard to see the road ahead at night, increasing the risk of accidents. Headlights that are too high can blind oncoming drivers, leading to dangerous situations.
Fortunately, adjusting your Jeep's headlights is a manageable DIY task that doesn't require specialized tools or mechanical expertise. This guide will walk you through the steps to properly adjust your Jeep's headlights, ensuring optimal visibility and road safety.
We'll cover what you need, how to prepare, the adjustment process itself, and some common issues you might encounter.
Understanding Jeep Headlight Adjustment
Before diving into the adjustment process, it’s important to understand *why* headlights need adjustment and what the correct aiming point is. Over time, due to vibrations from driving, minor impacts, or even just wear and tear, headlight aim can drift.
This is especially true for older vehicles or those that have experienced rough terrain, common for many Jeep owners.
Why Proper Aim Matters
The primary goal of headlight adjustment is to maximize visibility for the driver while minimizing glare for others. Modern headlights are designed with specific beam patterns. When correctly aimed, the beam should illuminate the road surface effectively for a significant distance ahead, including the sides of the road, without shining directly into the eyes of drivers approaching from the opposite direction or those ahead of you.
According to the National Highway Traffic Safety Administration (NHTSA), improperly aimed headlights are a significant contributing factor to nighttime driving accidents. While specific statistics for Jeep vehicles are not readily available, the general principle applies universally. A study by AAA found that many vehicles on the road have misaimed headlights, highlighting this as a widespread issue.
The Ideal Beam Pattern
A properly aimed headlight beam typically has a sharp cutoff for the high part of the beam. This cutoff should be slightly angled downwards from left to right. The low beams should illuminate the road ahead for about 150-200 feet, with the brightest part of the beam focused on the road surface itself, not in the air. The high beams, when engaged, should extend this illumination much further.
The exact specifications for headlight aim can vary slightly by vehicle model and the type of headlight installed (halogen, LED, HID). However, the general principle of a downward-sloping cutoff and focused road illumination remains constant.
Tools And Preparation
Gathering the right tools and preparing your Jeep are crucial steps before you start adjusting the headlights. This ensures a smoother and more accurate process.
Essential Tools
You won’t need a complex array of tools for this task. Most adjustments can be made with just a few common items:
- Screwdriver or Socket Wrench: The adjustment screws on Jeep headlights are typically accessible with a Phillips head screwdriver or a socket wrench (often 8mm or 10mm). Check your specific Jeep model to confirm the size.
- Measuring Tape: A standard tape measure is needed to mark reference points on a wall.
- Masking Tape: This will be used to mark the reference points on the wall.
- Level Surface: A flat, level area is essential for accurate aiming.
- Gloves and Safety Glasses: It’s always a good idea to protect your hands and eyes, especially when working around vehicle components.
- Owner’s Manual: Your Jeep’s owner’s manual is the best source for specific information regarding your model’s headlight adjustment points and procedures.
Preparing Your Jeep And The Adjustment Area
Proper preparation ensures that your adjustments are made on a level playing field and that your Jeep is in the correct state for measurement.
- Find a Level Surface: Locate a flat, level area. A garage floor or a quiet, empty parking lot is ideal. Ensure there are no inclines or declines.
- Park Near a Wall: Park your Jeep directly facing a flat vertical wall. This wall will serve as your aiming surface. Ensure there is enough space behind your Jeep to move it forward and backward if needed.
- Measure Wheelbase: Measure the distance from the center of your front wheel to the wall. Record this measurement.
- Measure Headlight Height: With the Jeep parked on the level surface and facing the wall, measure the distance from the ground to the center of each headlight bulb. Record these measurements. For example, if the center of the bulb is 40 inches from the ground, note “40 inches.”
- Mark Reference Points: Using masking tape, mark the center of each headlight on the wall. These marks should be at the exact height you just measured from the ground to the center of the headlight bulb.
- Mark the Aiming Lines: This is a critical step for accuracy.
- Horizontal Lines: Measure the distance between the centers of your two headlights (e.g., if your headlights are 40 inches apart, mark two points 40 inches apart on the wall at the same height as the headlight centers).
- Vertical Lines: From the center of each headlight mark, draw a vertical line downwards on the wall. The ideal aim point for low beams is typically 2 inches below the center of the headlight for every 25 feet of distance. A simpler, common method is to aim the *hot spot* of the low beam just below the horizontal line you marked at headlight height. For most Jeeps, the aim point should be around 4 inches below the center of the headlight at the wall, assuming the wall is about 25 feet away. So, mark a point on the vertical line, 4 inches below the horizontal headlight center mark.
- Check Tire Pressure: Ensure your tires are inflated to the recommended pressure. Incorrect tire pressure can alter the vehicle’s ride height and affect headlight aim.
- Check Vehicle Load: For the most accurate adjustment, your Jeep should be at its normal driving load. This means having a typical amount of fuel in the tank and any regular cargo or passengers that would normally be present. An empty Jeep will sit higher than a loaded one, affecting aim.
The Adjustment Process
With your Jeep prepared and reference points marked, you’re ready to begin the actual adjustment. This involves locating the adjustment screws and carefully turning them to move the headlight beam.
Locating The Adjustment Screws
Jeep headlights are typically mounted in a way that allows for vertical and horizontal adjustment. The exact location and type of screws can vary depending on the year and model of your Jeep.
- Common Locations: Adjustment screws are usually found on the back or sides of the headlight housing. You might need to remove the headlight bezel or grille to get clear access.
- Types of Screws:
- Vertical Adjustment: This screw usually moves the beam up and down. It’s often a larger screw with a plastic knob or a metal bolt head.
- Horizontal Adjustment: This screw moves the beam left and right. It might be a smaller screw or a different type of mechanism.
- Consult Your Manual: If you’re unsure, your Jeep’s owner’s manual will show you the precise location of these screws for your model. Some aftermarket headlights might have different adjustment mechanisms.
Adjusting The Headlights
This is where you’ll be making the physical changes to the beam’s position. It’s crucial to make small, incremental adjustments and check the results frequently.
- Turn on Low Beams: Start your Jeep and turn on the low beam headlights.
- Target the Right Headlight First: Begin with the driver’s side headlight.
- Identify the Hot Spot: Look at the pattern projected onto the wall. You’ll see a bright area, often called the “hot spot.” This is what you need to aim.
- Vertical Adjustment:
- If the hot spot is too high (above your marked aiming line), turn the vertical adjustment screw clockwise to lower the beam.
- If the hot spot is too low, turn the vertical adjustment screw counter-clockwise to raise the beam.
- Make small turns (e.g., a quarter or half turn) and then check the beam’s position on the wall.
- Horizontal Adjustment:
- If the hot spot is too far left or too far right (relative to the marked aiming lines), use the horizontal adjustment screw.
- Turn the screw to move the beam left or right until it is centered on your aiming marks.
- Again, make small adjustments and re-check.
- Repeat for the Left Headlight: Once the driver’s side headlight is correctly aimed, repeat the process for the passenger side headlight. The goal is to have both beams hit the same aiming points on the wall. The hot spot of the passenger side low beam should be slightly higher than the driver’s side at the cutoff point, to illuminate the shoulder of the road, but the main part of the beam should be aimed at your marked line.
- Check High Beams: After adjusting the low beams, turn on your high beams. While you can’t precisely aim high beams with simple adjustment screws (they are usually fixed relative to the low beam projector), you can check if their pattern is reasonable. They should be centered and extend forward without excessive scatter. If your high beams seem wildly off, there might be a more significant issue with the headlight housing or mounting.
Important Considerations During Adjustment
- One Headlight at a Time: Adjust one headlight completely before moving to the other. This prevents confusion.
- Small Adjustments are Key: Over-adjusting can lead to incorrect aiming. Small, controlled turns are best.
- Engine Running: It’s best to have the engine running to ensure the headlights are receiving full power and to mimic normal operating conditions.
- Check Both Low and High Beams: While you adjust low beams, verify the high beam pattern afterward.
Testing And Fine-tuning
Once you’ve made the initial adjustments, it’s time to test them in real-world conditions and make any necessary fine-tuning.
On-road Testing
The best way to confirm your headlight aim is to drive your Jeep at night.
- Find a Dark Road: Drive on a road with minimal ambient light.
- Observe Low Beams: Pay attention to how well the low beams illuminate the road ahead. Can you see road markings, signs, and potential hazards clearly? Is the beam focused on the road surface, or is it too high, causing glare?
- Observe High Beams: Switch to high beams. Do they provide sufficient forward illumination? Are they centered?
- Watch for Glare: Drive on a road with oncoming traffic. Do other drivers seem to be flashing their lights at you, indicating your headlights might be too high? If so, you’ll need to make further downward adjustments.
Fine-tuning Based On Observations
Based on your on-road testing, you might need to make further adjustments.
- Too Low: If you can’t see far enough ahead, you may need to raise the beams slightly. Go back to your aiming wall and make small counter-clockwise turns on the vertical adjustment screws.
- Too High/Glaring: If oncoming drivers are flashing their lights, or if the bright cutoff is higher than you’d like, you need to lower the beams. Make small clockwise turns on the vertical adjustment screws.
- Off-Center: If the beams are not illuminating the areas you expect (e.g., not enough on the right shoulder of the road), use the horizontal adjustment screws.
Pro Tip: A common mistake is over-adjusting. If you’re unsure, it’s often better to aim slightly lower than too high. The goal is a safe, functional beam, not necessarily the absolute furthest reach if it means blinding others.
Common Issues And Troubleshooting
Even with careful preparation, you might run into a few common problems when adjusting your Jeep’s headlights.
Headlight Adjustment Screws Won’t Turn
- Cause: The screws may be seized due to rust or dirt.
- Solution: Try applying a penetrating lubricant (like WD-40 or PB Blaster) to the screws and let it sit for a while. Then, try turning them again. Be gentle to avoid stripping the screw heads. If they are completely stuck, you might need to remove the headlight assembly to clean or replace the adjustment mechanism.
Headlight Housing Is Loose
- Cause: The mounting bolts for the headlight assembly might be loose.
- Solution: If the entire headlight housing wiggles when you touch it, it’s likely loose. You’ll need to find and tighten the mounting bolts. These are usually located behind the headlight assembly. This can affect your ability to get a consistent aim.
Aftermarket Headlights
- Cause: Aftermarket headlights, especially LED or projector-style units, can have different aiming mechanisms or beam patterns than stock headlights.
- Solution: Always refer to the manufacturer’s instructions for aftermarket headlights. Their aiming points and adjustment methods might differ. Some high-performance aftermarket lights may even require specific aiming tools for optimal results.
Inconsistent Beam Pattern
- Cause: Damaged reflector, misaligned bulb, or cracked lens.
- Solution: If the beam pattern is distorted, uneven, or has dark spots, the headlight assembly itself might be damaged or compromised. Inspect the lens for cracks and ensure the bulb is seated correctly. If the reflector is damaged or tarnished, the headlight may need to be replaced.
The 2-inch Rule And Other Guidelines
While the “4 inches below the center mark at 25 feet” is a good general rule of thumb, different sources and manufacturers may suggest slight variations. For example, some guidelines suggest aiming the hot spot of the low beam to be exactly on the horizontal line you marked, while others suggest just below it. The SAE (Society of Automotive Engineers) has specific standards, but these are complex.
For a practical approach, aim for the following:
- Vertical: The top edge of the bright cutoff should be at or slightly below your marked horizontal line.
- Horizontal: The beams should be centered, with the passenger side beam potentially angled slightly higher and to the right to illuminate the shoulder of the road.
Here’s a quick comparison of common aiming point recommendations:
| Aiming Point Type | Common Recommendation (for 25 ft distance) | Notes |
|---|
| Low Beam Hot Spot | At or 2-4 inches below the horizontal center line of the headlight. | This is the brightest part of the beam; aiming