When your Jeep Grand Cherokee’s engine starts to struggle, or you notice strange electrical issues, the battery cables might be the culprit. These cables are the unsung heroes, carrying vital electrical power from the battery to various parts of your vehicle.
Over time, they can corrode, fray, or loosen, leading to a host of problems. Replacing them might seem daunting, but with the right guidance, it’s a manageable DIY project that can save you money and keep your Grand Cherokee running smoothly.
This guide will walk you through everything you need to know about Jeep Grand Cherokee battery cable replacement, from understanding the signs of bad cables to the step-by-step process of swapping them out.
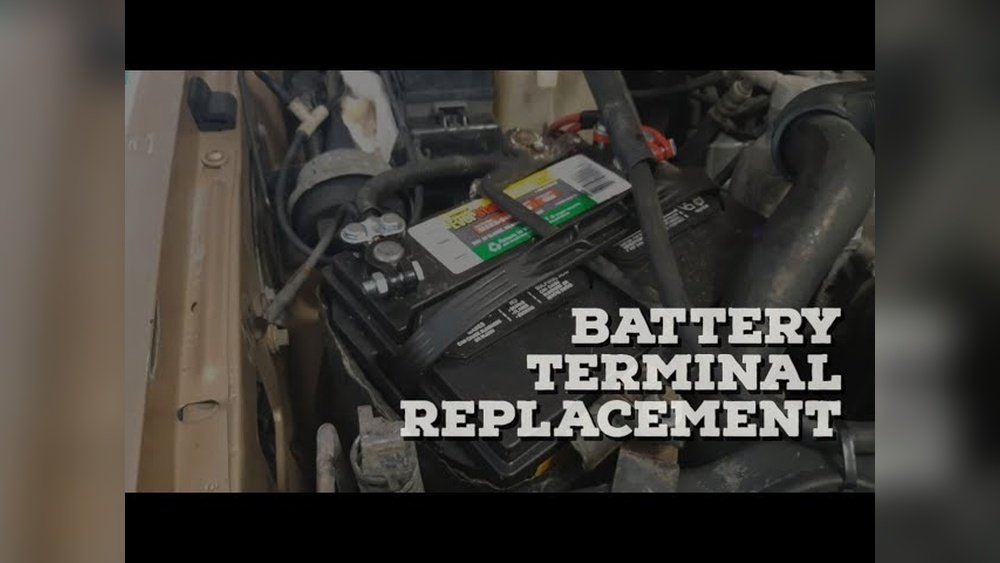
Understanding The Role And Issues Of Jeep Grand Cherokee Battery Cables
The battery cables in your Jeep Grand Cherokee are more than just wires; they are the critical conduits for electrical energy. Your vehicle’s battery stores power, but without robust cables connecting it to the starter, alternator, and the rest of the electrical system, that power can’t be used effectively. There are typically two main cables: the positive (+) cable (usually red) and the negative (-) cable (usually black).
The positive cable connects directly to the starter solenoid and then branches out to other electrical components. The negative cable connects to the vehicle’s chassis or engine block, creating a ground connection that completes the electrical circuit.
A healthy circuit requires both cables to be in excellent condition.
Several issues can affect these essential components:
- Corrosion: This is perhaps the most common problem. Sulfuric acid fumes from the battery can react with the metal terminals, creating a fuzzy, white, or greenish-blue substance. This corrosion acts as an insulator, preventing a good electrical connection.
- Physical Damage: Battery cables can be damaged by heat, vibration, or physical impact. Fraying, cracking, or complete breaks in the cable insulation or the wire itself will disrupt the flow of electricity.
- Loose Connections: Over time, the clamps that attach the cables to the battery terminals can loosen due to vibrations. A loose connection leads to intermittent power or a complete loss of electrical function.
- Internal Wire Degradation: Even if the insulation looks good, the internal copper wires can corrode or break over time, especially in older vehicles or those exposed to harsh environments. This can lead to increased resistance and poor conductivity.
When these issues arise, you might experience a range of symptoms, from slow engine cranking to complete electrical failure. Ignoring these signs can lead to more significant problems, including damage to other electrical components or leaving you stranded.
Signs You Need To Replace Your Jeep Grand Cherokee Battery Cables
Recognizing the symptoms of failing battery cables is crucial for timely replacement. These signs often mimic other battery problems, but a close inspection of the cables themselves can reveal the true cause.
Slow Engine Crank Or No Crank At All
This is one of the most telling signs. When you turn the key, the starter motor requires a massive surge of electrical current.
If the battery cables are corroded or damaged, they can’t deliver this surge effectively. You might hear a clicking sound, a slow, labored cranking, or nothing at all.
While a weak battery can cause this, heavily corroded or loose cables will present the same symptoms.
Dimming Headlights Or Interior Lights
Electrical components, especially lights, are sensitive to voltage drops. If your headlights or interior lights dim significantly when you accelerate or use other electrical accessories (like the power windows or radio), it indicates a poor electrical connection.
The alternator is working harder, and the voltage isn't reaching the accessories properly due to the resistance in the battery cables.
Check Engine Light Or Other Warning Lights
Modern vehicles have sophisticated electrical systems. A faulty battery cable can cause voltage fluctuations that trigger various warning lights on your dashboard, including the Check Engine Light. The engine control module (ECM) relies on stable voltage to operate correctly.
Corrosion On Battery Terminals
While some corrosion is normal and can be cleaned, excessive or persistent corrosion around the battery terminals is a strong indicator that the cables are compromised. The corrosion often creeps up the cable itself, creating a barrier to electrical flow.
If you see significant buildup that returns shortly after cleaning, the cable terminals or the cables themselves might need replacement.
Burning Smell
In severe cases, a loose or corroded cable can cause extreme resistance. This resistance generates heat, which can melt the cable insulation and even the surrounding components, leading to a distinct burning smell.
This is a critical situation requiring immediate attention.
Intermittent Electrical Issues
Your Jeep Grand Cherokee’s electrical system might behave erratically. Power windows might work sometimes and not others, the radio could cut out, or the dashboard lights might flicker. These intermittent electrical problems are often linked to poor connections at the battery terminals.

When To Consider Replacement: Battery Vs. Cables
It’s essential to differentiate between a failing battery and failing battery cables, as the solutions are different.
- Battery Issues: Symptoms often include a battery that struggles to hold a charge, requires frequent jump-starts, or is several years old (most car batteries last 3-5 years). A battery test at an auto parts store can definitively tell you if the battery itself is bad.
- Cable Issues: If the battery tests good, but you still experience slow cranking, electrical problems, or see significant corrosion that returns quickly, the cables are likely the problem. Look closely at the entire length of the cables, not just the terminals.
Pro Tip: Before replacing cables, always perform a basic battery test. Many auto parts stores offer this service for free. If the battery is indeed failing, replace it first. If the battery is good, then focus on the cables.
Preparing For Jeep Grand Cherokee Battery Cable Replacement
Before you begin the actual replacement, proper preparation is key to a smooth and safe process. This involves gathering the necessary tools and parts, understanding safety precautions, and preparing your workspace.
Tools And Materials You’ll Need
Having the right tools makes the job much easier and prevents damage to your vehicle. For a typical Jeep Grand Cherokee battery cable replacement, you will likely need:
- New Battery Cables: Ensure you purchase the correct cables for your specific Jeep Grand Cherokee model and year. These are usually sold as a set (positive and negative) or individually. Look for cables made of high-quality, oxygen-free copper for optimal conductivity.
- Socket Set or Wrenches: You’ll need sockets or wrenches of various sizes, typically ranging from 10mm to 13mm, to remove battery terminal clamps, mounting bolts, and any other fasteners holding the cables in place. A ratchet wrench with extensions can be very helpful.
- Battery Terminal Cleaner Tool: This is a wire brush tool designed to clean both the battery posts and the inside of the cable clamps.
- Pliers: Both standard and possibly needle-nose pliers can be useful for manipulating clamps or disconnecting small connectors.
- Gloves: Work gloves are essential to protect your hands from dirt, grime, and battery acid.
- Safety Glasses: Always wear safety glasses to protect your eyes from potential sparks or battery acid splashes.
- Wire Brush: A stiff wire brush can be used for cleaning corrosion from the battery tray and mounting points.
- Anti-Corrosion Spray or Dielectric Grease: This is applied to the cleaned battery terminals and cable clamps after installation to prevent future corrosion.
- Torque Wrench (Optional but Recommended): For ensuring terminal clamps are tightened to the manufacturer’s specifications.
- Jack and Jack Stands (if needed): Some Grand Cherokee models may require lifting the vehicle to access certain cable mounting points. Consult your owner’s manual.
- Work Light or Headlamp: Essential for seeing clearly in dimly lit engine bays.
Safety First: Crucial Precautions
Working with a car battery involves risks. Always follow these safety guidelines:
- Disconnect the Negative Cable First: This is the most critical safety step. Always disconnect the negative (-) cable from the battery terminal *before* disconnecting the positive (+) cable. This prevents accidental short circuits if your wrench touches the vehicle’s metal body while working on the positive terminal.
- Reconnect in Reverse Order: When installing the new cables, connect the positive (+) cable first, then the negative (-) cable.
- Avoid Sparks: Do not smoke or create sparks near the battery. Batteries release flammable hydrogen gas.
- Wear Protective Gear: Always wear safety glasses and gloves. Battery acid is highly corrosive.
- Keep Metal Away from Terminals: Never let tools or metal objects bridge the gap between the positive terminal and the negative terminal or any metal part of the car. This can cause a dangerous short circuit and sparks.
- Proper Ventilation: Work in a well-ventilated area.
- Disable the Vehicle: Ensure the ignition is off, and the parking brake is engaged. For manual transmissions, put the vehicle in gear. For automatics, put it in Park.
- Battery Disconnect Switch (Optional): For added safety, you can install a battery disconnect switch, but this is usually an advanced modification.
Workspace Preparation
- Clear the Area: Ensure you have ample space around the vehicle to work comfortably and safely.
- Cleanliness: Clean the battery area and surrounding components. Remove any dirt, debris, or existing corrosion from the battery tray and the mounting points for the cables. A clean workspace reduces the risk of contamination and makes the job easier.

Step-by-step: Replacing Jeep Grand Cherokee Battery Cables
Replacing the battery cables on a Jeep Grand Cherokee is a process that requires patience and attention to detail. Follow these steps carefully to ensure a successful replacement.
Step 1: Locate And Identify The Battery Cables
Open the hood of your Jeep Grand Cherokee and locate the battery. You will see two main cables connected to the battery terminals:
- The positive (+) cable is usually red and connects to the positive terminal. It often has a protective red cover or boot. This cable typically runs towards the starter motor.
- The negative (-) cable is usually black and connects to the negative terminal. It often has a black cover or boot and is connected to the vehicle’s chassis or engine block.
Inspect both cables for signs of damage, corrosion, or looseness.
Step 2: Disconnect The Battery
Crucially, disconnect the negative (-) battery cable first. Use an appropriate wrench or socket (often 10mm or 13mm) to loosen the nut on the negative terminal clamp. Once loose, carefully wiggle the clamp off the battery post. Tuck the cable away from the terminal so it cannot accidentally make contact.
Next, disconnect the positive (+) battery cable. Loosen the nut on the positive terminal clamp and remove it from the positive battery post. Again, ensure the cable is kept away from the battery and any metal parts of the vehicle.
Step 3: Remove Old Battery Cables
- Trace the Cables: Follow each cable from the battery terminal to its other end. The positive cable usually connects to the starter solenoid or a fuse box, while the negative cable connects to a grounding point on the engine block or chassis.
- Disconnect at the Other End: You may need to remove other components or brackets to gain access.
- Positive Cable: This cable often connects to the starter motor. You’ll typically find a bolt or nut securing the cable’s lug to the starter solenoid terminal. Use the appropriate wrench to remove it. Some models might have an inline fuse or connector that needs to be unclipped.
- Negative Cable: This cable is usually bolted directly to the engine block or a designated grounding point on the chassis. Locate the bolt or nut securing the cable’s lug and remove it. Ensure you have a firm grip on the cable end while removing the bolt to prevent it from falling.
- Remove Cable Retainers: Cables are often secured with plastic clips or metal brackets. Carefully release these clips or remove the bolts holding them. Note how these are attached, as you’ll need to reattach them with the new cables.
- Pull Out Old Cables: Once all connections are free, gently pull the old cables out. You might need to maneuver them carefully around engine components.
Step 4: Clean Battery Terminals And Mounting Points
This is a vital step often overlooked. Use your battery terminal cleaner tool to thoroughly clean the battery posts (both positive and negative) until they are shiny and free of corrosion. Also, clean the cable lugs (the metal ends of your new cables) and any mounting points on the starter or chassis where the cables attach. A clean surface ensures optimal electrical conductivity.
Step 5: Install New Battery Cables
- Route the New Cables: Carefully route the new positive and negative cables, mimicking the path of the old ones. Ensure they are not kinked, stretched too tightly, or routed near hot engine components or sharp edges.
- Connect the Grounding Cable (Negative): Attach the lug of the new negative cable to its designated grounding point on the engine block or chassis. Secure it with the bolt or nut you removed earlier. Tighten it firmly.
- Connect the Positive Cable: Attach the lug of the new positive cable to the starter solenoid terminal. Secure it with the appropriate bolt or nut. Ensure it’s snug.
- Secure Cables: Reinstall any removed clips or brackets to secure the new cables in place, preventing them from moving or chafing.
Step 6: Reconnect The Battery Terminals
This step must be done in the correct order:
- Connect the Positive (+) Cable First: Place the clamp of the new positive cable onto the positive battery post. Ensure it sits fully down. Tighten the nut securely with your wrench.
- Connect the Negative (-) Cable Last: Place the clamp of the new negative cable onto the negative battery post. Ensure it sits fully down. Tighten the nut securely.
Step 7: Apply Anti-corrosion Protection
Once the new cables are securely connected to the battery terminals, apply a thin layer of anti-corrosion spray or dielectric grease to the terminals and clamps. This will help prevent future corrosion and ensure a long-lasting, reliable connection.
Step 8: Final Checks And Testing
- Double-Check All Connections: Ensure all nuts and bolts are tight, including those at the battery terminals, starter, and ground points.
- Inspect Cable Routing: Make sure the cables are properly routed and not touching any moving parts or hot surfaces.
- Start the Engine: Turn the ignition key to start your Jeep Grand Cherokee. The engine should crank over strongly and start normally.
- Test Electrical Components: Check your headlights, interior lights, radio, and other electrical systems to ensure they are functioning correctly.
Comparing Battery Cable Types And Quality
Not all battery cables are created equal. The quality of the cables you choose can significantly impact their longevity and performance.
Understanding the differences can help you make a better purchase.
Material Matters: Copper Vs. Aluminum
- Copper Cables