Enhancing Your Jeep Grand Cherokee: The 2-inch Lift Guide
The Jeep Grand Cherokee is a popular SUV known for its blend of comfort, capability, and off-road prowess. For owners who want to push its boundaries further, a 2-inch lift kit offers a significant upgrade without the extreme modifications or costs associated with larger lifts.
This modification allows for larger tires, improved ground clearance, and a more aggressive stance, all while generally maintaining the vehicle's on-road manners. Whether you're looking to tackle tougher trails or simply want a more imposing look, a 2-inch lift is a common and effective choice.
This guide will walk you through everything you need to know about installing a 2-inch lift on your Jeep Grand Cherokee. We’ll cover the benefits, the different types of kits available, important considerations before you buy, the installation process, and what to expect afterward.
Understanding these aspects will help you make an informed decision and ensure a successful upgrade for your vehicle.
Why Choose A 2-inch Lift For Your Grand Cherokee?
A 2-inch lift might seem modest, but it provides a surprising number of advantages for the average Grand Cherokee owner. It strikes a balance between enhanced capability and practicality, making it a popular choice for many enthusiasts.
Increased Tire Size Capacity
The most significant benefit of a 2-inch lift is the ability to fit larger tires. Most stock Grand Cherokees can comfortably accommodate up to a 31-inch tire. With a 2-inch lift, you can typically fit 32-inch or even 33-inch tires, depending on the specific tire model and wheel offset. Larger tires offer several advantages:
- Better Traction: Taller tires with more aggressive tread patterns can grip better on various surfaces, from mud and rocks to snow.
- Improved Obstacle Clearance: The increased diameter of the tire itself adds to your vehicle’s ground clearance, helping you roll over obstacles more easily.
- Enhanced Off-Road Performance: Combined with the lift, larger tires significantly improve your Grand Cherokee’s ability to handle rough terrain.
Enhanced Ground Clearance
Beyond the tire size increase, the lift kit itself raises the vehicle’s body and suspension components higher off the ground. This added ground clearance is crucial for off-roading. It means less risk of scraping your differential, exhaust, or frame on rocks, logs, or uneven terrain. Even a couple of extra inches can make a substantial difference in preventing damage and allowing you to traverse more challenging paths.
Improved Approach, Departure, And Breakover Angles
A lift kit, especially when paired with larger tires, directly impacts your Jeep’s approach, departure, and breakover angles.
- Approach Angle: The angle at which your vehicle can ascend an obstacle without the front bumper or tires hitting.
- Departure Angle: The angle at which your vehicle can descend an obstacle without the rear bumper or tires hitting.
- Breakover Angle: The angle at which your vehicle can clear the crest of a hill or obstacle without the underside scraping the middle.
By increasing the height of the vehicle, a 2-inch lift helps improve these angles, allowing you to tackle steeper inclines and declines and clear crests more effectively.
Aesthetic Appeal
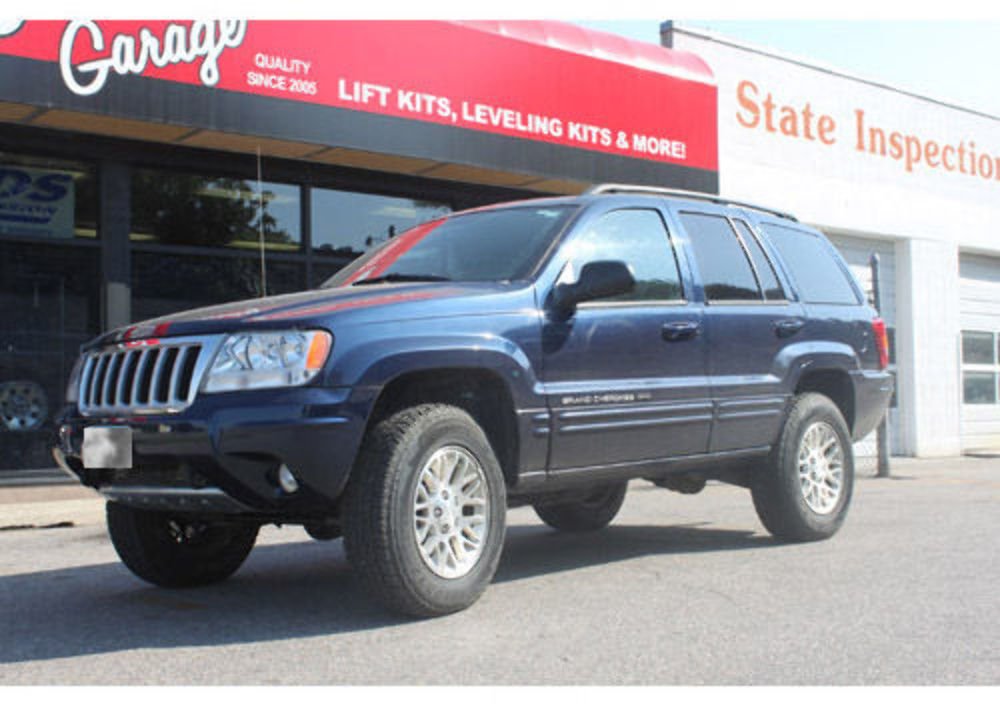
Many owners opt for a 2-inch lift purely for the visual upgrade. A slightly lifted Jeep with larger, more aggressive tires has a commanding presence. It gives the vehicle a more rugged, off-road-ready appearance that many Jeep enthusiasts desire. The stance becomes more assertive, making the Grand Cherokee look more capable even before it hits the trail.
Types Of 2-inch Lift Kits For Jeep Grand Cherokee
There are several ways to achieve a 2-inch lift on a Jeep Grand Cherokee. The method chosen often depends on the specific generation of your Grand Cherokee and your budget.
Spacer Lifts
This is often the most affordable and simplest way to achieve a 2-inch lift. Spacer lifts typically involve adding pucks or spacers above the existing coil springs or strut assemblies.
- How they work: For Grand Cherokees with independent front suspension (IFS) and coil springs in the rear, spacers are usually placed on top of the front strut and above the rear coil spring. For models with struts all around, spacers might be installed above or below the strut mount.
- Pros: Low cost, easy installation (often doable in a driveway), minimal impact on ride quality.
- Cons: Does not improve suspension travel or articulation, can sometimes lead to minor alignment issues that need correction, might not be as robust for extreme off-roading compared to other methods.
Coil Spring Lifts
These kits replace the stock coil springs with taller, stiffer aftermarket springs. This is a more involved suspension modification than a simple spacer lift.
- How they work: The new, longer springs provide the lift. This often requires disconnecting suspension components to allow the new springs to be installed. Some kits might include longer shocks or struts designed to work with the taller springs.
- Pros: Offers a more integrated suspension lift, can potentially improve ride quality and handling (depending on spring rates), generally more durable than spacer lifts.
- Cons: More expensive than spacer lifts, installation is more complex and may require specialized tools or professional help, ride quality can change significantly depending on the spring rates chosen.
Coilover Conversion/replacement (less Common For 2″)
While more common for larger lifts, some high-end kits might offer coilover replacements that provide around 2 inches of lift. Coilovers are an integrated shock absorber and spring unit.
- How they work: The entire coilover unit is replaced with a longer, adjustable or fixed-height unit.
- Pros: Can offer superior ride quality and performance, often adjustable for fine-tuning.
- Cons: Very expensive, usually overkill for just a 2-inch lift, installation is complex.
Body Lifts (not Recommended For 2″ Goal)
A body lift raises the vehicle’s body off the frame, while the suspension remains stock. This is not typically how a 2-inch lift is achieved on a Grand Cherokee, as most modern Grand Cherokees use unibody construction, not body-on-frame. Even on older models, body lifts are generally used for much larger tire fitment and significantly alter the vehicle’s center of gravity. For a 2-inch goal, suspension-based lifts are the standard.
Key Considerations Before Buying A 2-inch Lift Kit
Choosing the right lift kit involves more than just picking the cheapest option. Several factors will influence your decision and ensure you get the best results for your needs.
Vehicle Generation And Model Year
Jeep Grand Cherokees have evolved significantly over the years. Different generations (e.g., WK, WK2, WL) have different suspension designs. A lift kit designed for a 2015 WK2 Grand Cherokee will not fit a 2026 WL model. Always ensure the kit is specifically designed for your exact year, make, and model. Pay attention to whether your Grand Cherokee has Quadra-Lift air suspension, as this may require specific components or may not be compatible with all lift kits.
Suspension Type
- Independent Front Suspension (IFS): Most modern Grand Cherokees feature IFS. Lift kits for IFS vehicles often use spacers for the front struts and springs, or complete replacement coilover units.
- Solid Axles: Older Grand Cherokee models (like some ZJ or WJ) might have solid front axles, which use different lift methods, typically involving longer coil springs and potentially drop brackets for the differential.
Intended Use: On-road Vs. Off-road
- Primarily On-Road: If your Grand Cherokee spends most of its time on paved roads with occasional light trail use, a spacer lift is often sufficient and maintains a comfortable ride.
- Regular Off-Roading: For more aggressive trail use, a coil spring lift or a higher-quality spacer system might be preferable. Consider kits that include extended shocks or struts designed for increased travel to complement the lift.
Ride Quality Impact
Any modification to the suspension will affect ride quality.
- Spacer lifts generally have the least impact on ride comfort, as they use the stock springs and shocks. However, they don’t improve suspension performance.
- Coil spring lifts can either improve or degrade ride quality depending on the spring rates. Stiffer springs will provide more support for off-road use but can make the ride harsher on pavement. Softer springs might offer a better ride but could sag under load or aggressive driving.
Tire And Wheel Fitment
A 2-inch lift primarily allows for larger tires. However, consider:
- Tire Size: As mentioned, you can typically fit up to 32-33 inch tires.
- Wheel Offset: The offset of your wheels (how far they are inset or outset from the mounting surface) affects how much clearance you have for larger tires, especially when turning. A negative offset or a wheel spacer might be needed to push the wheels out, providing more fender clearance for bigger tires.
- Fender Trimming: Even with a 2-inch lift and appropriate tires, some minor fender trimming or mud flap removal might be necessary to prevent rubbing during articulation or tight turns.
Alignment
After installing a lift kit, especially one that alters suspension geometry significantly, your vehicle’s wheel alignment will likely be affected. It’s crucial to get a professional alignment after installation to ensure proper tire wear and safe handling. Some kits may include adjustable components or require specific alignment procedures.
Installation Complexity And Cost
- DIY: Spacer lifts are often considered DIY-friendly with basic tools.
- Professional Installation: Coil spring lifts or more complex systems usually require professional installation, adding to the overall cost. Factor in labor charges, which can range from a few hundred to over a thousand dollars, depending on your location and the complexity of the kit.
Popular 2-inch Lift Kit Brands And Options
While there are many manufacturers, some brands are consistently recognized for producing quality lift kits for the Jeep Grand Cherokee. It’s always wise to research reviews specific to your Grand Cherokee generation.
Here are a few examples of what you might find:
| Brand | Typical Kit Type | Key Features | Considerations |
|---|---|---|---|
| **Rough Country** | Spacer or Coil Spring | Affordable, widely available, often includes shocks. | Ride quality can be firmer; some users report long-term durability concerns on very aggressive trails. |
| **Old Man Emu (OME)** | Coil Springs / Shocks | Renowned for excellent ride quality and off-road performance. | Higher price point, installation can be more involved. |
| **TeraFlex** | Spacer or Coil Spring | High-quality components, designed for performance and durability. | Can be more expensive; ensure compatibility with specific Grand Cherokee models. |
| **Ironman 4×4** | Coil Springs / Shocks | Offers robust suspension solutions, often with a focus on durability. | May require specific knowledge for installation; check load ratings for springs. |
| **Supreme Suspension** | Spacer or Coil Spring | Offers various lift heights and component options, often budget-friendly. | Quality can vary; research specific product reviews for your Grand Cherokee generation. |
It’s important to note that availability and specific kit contents can change. Always check the manufacturer’s website or a reputable dealer for the most current information and compatibility details for your specific Jeep Grand Cherokee.
The Installation Process: What To Expect
Installing a 2-inch lift kit can range from a straightforward DIY project to a complex job requiring professional expertise. The process varies significantly based on the type of kit and your Grand Cherokee’s suspension setup.
Spacer Lift Installation (general Steps)
- Preparation: Park the vehicle on a level surface, engage the parking brake, and loosen the lug nuts on all wheels. Safely lift the vehicle using a jack and secure it with jack stands. Remove the wheels.
- Front Suspension:
- For IFS systems, you’ll typically need to disconnect sway bar links, control arms, or other components to gain access to the top of the front strut assembly.
- The stock strut assembly is then either compressed (if the top mount needs to be accessed) or the strut is lowered enough to insert the spacer between the strut mount and the vehicle’s body.
- Once the spacer is in place, reassemble the strut and reconnect suspension components.
- Rear Suspension:
- Depending on the design, you may need to lower the rear differential slightly or disconnect suspension links.
- The coil springs are compressed (or the suspension is lowered enough) to allow for the installation of the rear spring spacers.
- Reassemble and reconnect components.
- Reassembly and Final Checks: Reinstall the wheels, torque the lug nuts to specification, and lower the vehicle. Double-check all connections and bolts.
- Alignment: Crucially, schedule a professional alignment immediately after installation.
Coil Spring Lift Installation (general Steps)
Installation of a coil spring lift is more involved.
- Preparation: Similar to spacer lifts, ensure the vehicle is safely supported.
- Disassembly: More suspension components will need to be disconnected than with a spacer lift. This can include control arms, tie rods, sway bar links, and potentially the driveshaft or brake lines (if they are too short for the increased suspension travel).
- Spring Replacement: The stock coil springs are removed. Aftermarket springs are installed, which often requires significant force or suspension manipulation to fit, especially if they are stiffer and longer. If longer shocks or struts are included, they are installed at this stage.
- Reassembly: All disconnected components are reattached. If included, new shocks or struts are bolted in.
- Final Checks and Alignment: Torque all fasteners, reinstall wheels, lower the vehicle, and get a professional alignment.
Pro Tip: Inspecting Components
Before and during installation, thoroughly inspect all suspension components for wear or damage. Worn ball joints, bushings, or tie rods should be replaced before lifting the vehicle, as the lift will put additional stress on these parts.

Post-installation: What To Expect And Maintenance
Once your 2-inch lift is installed, you’ll notice immediate changes in your Grand Cherokee’s appearance and capability. However, there are a few things to keep in mind regarding performance, potential issues, and maintenance.
Driving Impressions
- On-Road: With a well-designed kit, the on-road ride should remain reasonably comfortable. Some kits, particularly those with stiffer springs, might introduce a slightly firmer ride. You might notice a bit more body roll in corners compared to stock, though this is often minimal with a