Understanding The Jeep Cj5 Steering Wheel Nut: A Crucial Component For Your Ride
The Jeep CJ5 is an iconic vehicle, known for its ruggedness and off-road capabilities. Many owners cherish their CJ5s and spend time maintaining and upgrading them.
While many focus on the engine, suspension, or tires, a small but vital component often overlooked is the steering wheel nut. This seemingly simple part plays a critical role in the safety and functionality of your Jeep's steering system.
Without the correct nut, properly secured, your steering wheel could become loose, leading to dangerous situations. This article will explore everything you need to know about the Jeep CJ5 steering wheel nut, from its function to types, removal, installation, and essential maintenance tips.
Understanding this component ensures you can keep your CJ5 steering true and safe on any terrain.
The Importance Of The Steering Wheel Nut
The steering wheel nut is more than just a fastener; it’s the primary point of connection between the steering wheel and the steering column. Its main job is to secure the steering wheel firmly to the splined shaft of the steering column. This connection is absolutely critical for several reasons:
- Safety: A loose steering wheel can lead to a loss of steering control. If the nut is not tightened correctly, or if it comes loose over time due to vibrations, the steering wheel could potentially spin freely on the shaft, making it impossible to steer the vehicle. This is a severe safety hazard, especially at higher speeds or during challenging driving conditions.
- Functionality: The steering wheel is the driver’s primary interface with the vehicle’s steering mechanism. A securely attached steering wheel ensures that every turn you make with the wheel is directly translated into the vehicle’s wheels turning, providing precise control.
- Structural Integrity: The nut also helps to hold other components in place, such as the horn contact, turn signal cam, and sometimes even the steering wheel cover or pad. A loose nut can cause these parts to rattle or malfunction.
- Vibration Dampening: While not its primary function, a properly tightened nut helps to prevent excessive vibration from being transmitted from the steering column to the steering wheel, contributing to a more comfortable driving experience.
For a vehicle like the Jeep CJ5, which is often used for off-roading, the stresses on the steering system can be significant. Bumps, jolts, and constant adjustments require every component, including the steering wheel nut, to be in perfect working order and securely fastened.
Types Of Jeep Cj5 Steering Wheel Nuts
Jeep CJ5s have been produced for many years, and while the core function of the steering wheel nut remains the same, there might be slight variations depending on the specific model year and the type of steering wheel installed. However, most CJ5 steering wheels utilize a common type of fastener.
Standard Hex Nut
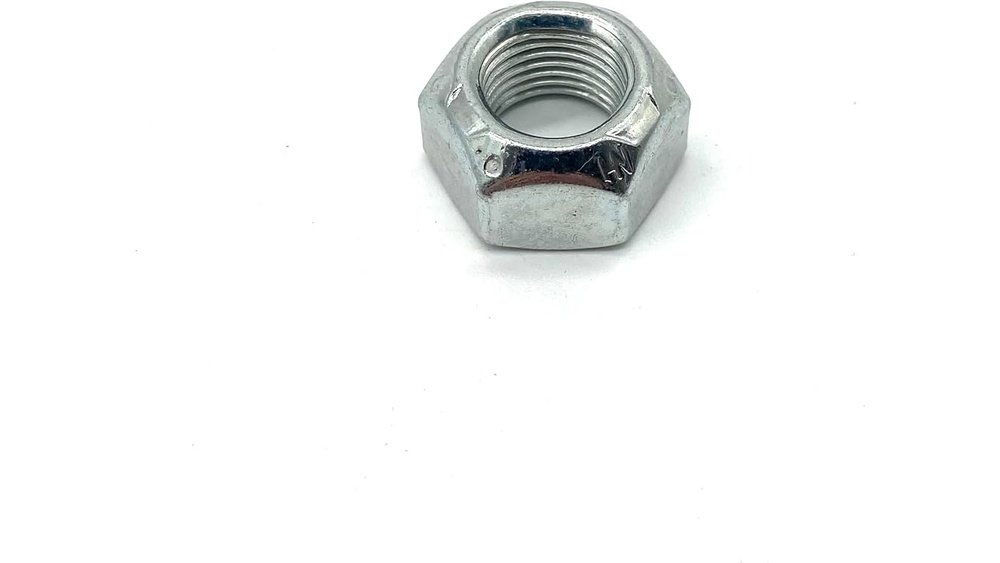
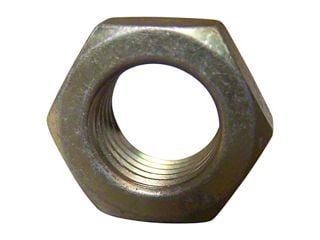
The most common type of steering wheel nut found on Jeep CJ5s is a standard hex nut. This is a robust, six-sided nut that threads onto the end of the steering column shaft.
- Material: These nuts are typically made from hardened steel to withstand the torque required for secure installation and the stresses of driving.
- Thread Size: The specific thread size can vary, but common sizes for automotive applications are often in the range of 1/2 inch or 9/16 inch with fine or coarse threads. It’s crucial to confirm the exact size for your specific CJ5 model.
- Washer: Often, a hardened washer is used in conjunction with the nut. This washer distributes the clamping force over a larger area of the steering wheel hub, preventing the nut from digging into the material and ensuring a more even pressure. Some washers might also have a lip or tab designed to engage with a specific slot on the steering column shaft, acting as a primitive form of a lock washer, though this is less common on later models.
Specialized Nuts (less Common)
While less frequent on stock CJ5s, some aftermarket steering wheels or custom setups might use specialized nuts. These could include:
- Flanged Nuts: These nuts have an integrated washer, providing a wider bearing surface.
- Locking Nuts: Nuts with nylon inserts (Nyloc nuts) or prevailing torque features that resist loosening from vibration. However, these are generally not recommended for steering wheels due to the need for precise torque and the potential for the locking mechanism to interfere with proper seating or removal.
Pro Tip: Always refer to your Jeep CJ5’s service manual for the exact specifications of the steering wheel nut and any associated washers for your particular year and model. Using the incorrect size or type can compromise safety.
Removing The Jeep Cj5 Steering Wheel Nut
Removing the steering wheel nut is usually the first step when replacing a steering wheel or accessing components behind it. This process requires some specific tools and a bit of patience.
Tools You’ll Need
- Steering Wheel Puller: This is the most important tool. While you might be tempted to try and pry the wheel off, a steering wheel puller is designed to safely remove the wheel from the splined shaft without damaging the steering column or the wheel itself.
- Socket Wrench Set: You’ll need a socket wrench with the correct size socket to fit the steering wheel nut. Common sizes are 11/16 inch or 3/4 inch, but it’s best to measure or check your manual.
- Breaker Bar: For stubborn nuts, a breaker bar can provide extra leverage.
- Penetrating Oil: If the nut is rusted or seized, a good penetrating oil can help loosen it.
- Gloves and Safety Glasses: Always protect yourself.
Step-by-step Removal Process
- Disconnect the Battery: For safety, always disconnect the negative battery terminal before working on any electrical components, including the horn wiring.
- Remove the Horn Button/Pad: This varies by steering wheel type. On older CJ5s, it might be a separate horn button that pries off or unscrews. On later models with a full pad, there might be clips or screws. Be gentle to avoid breaking plastic components.
- Disconnect Horn Wiring: Once the horn button is off, you’ll likely see a wire connected to the horn contact point on the steering column. Disconnect this wire.
- Loosen the Steering Wheel Nut: Using your socket wrench and possibly a breaker bar, attempt to loosen the steering wheel nut. It is typically a reverse-threaded nut, meaning you need to turn it counter-clockwise to loosen it. Apply steady pressure. If it’s very tight, apply penetrating oil and let it soak for a while.
- Do NOT Remove the Nut Completely (Yet): Leave the nut threaded on by just one or two turns. This is a crucial safety step.
- Attach the Steering Wheel Puller: Follow the instructions for your specific steering wheel puller. Typically, you will thread bolts into the holes on the steering wheel hub and then tighten a central bolt that presses against the end of the steering column shaft.
- Use the Puller: Slowly and steadily tighten the central bolt of the puller. This will exert upward pressure on the steering wheel, while the bolts in the hub pull the wheel down. The wheel should start to loosen from the splines.
- Remove the Nut and Wheel: Once the steering wheel is free from the splines, you can fully unscrew the nut and remove the steering wheel. Be prepared to catch the wheel, as it can come off suddenly.
- Inspect Components: With the wheel off, inspect the steering column shaft for damage, clean any debris, and examine the nut and washer for wear or damage.
Warning: Never try to pry the steering wheel off or hit it with a hammer. This can easily damage the steering column, the wheel, or even the steering box, leading to much more expensive repairs. Always use a proper steering wheel puller.
Installing The Jeep Cj5 Steering Wheel Nut
Installing a new or the existing steering wheel nut is just as critical as removing it. Proper torque and secure fastening are paramount for safety.
Tools You’ll Need
- Socket Wrench: With the correct size socket.
- Torque Wrench: Essential for ensuring the nut is tightened to the manufacturer’s specifications. This prevents it from being too loose or overtightened, which could damage the threads or steering column.
- New Steering Wheel Nut (if needed): Ensure it’s the correct size and thread pitch.
- New Washer (if needed): Use a hardened washer.
- Grease (optional): A small amount of anti-seize compound can be applied to the threads if recommended by the manual, but avoid getting it on the splines.
Step-by-step Installation Process
- Clean the Steering Column Shaft: Ensure the splines on the steering column shaft are clean and free of debris.
- Position the Steering Wheel: Align the steering wheel with the splines on the shaft. There is usually a specific orientation for the wheel to sit correctly. Lower the wheel onto the shaft.
- Thread the Nut: Start threading the steering wheel nut onto the shaft by hand. Ensure it threads smoothly. If it binds, back it off and try again to avoid cross-threading.
- Tighten the Nut (Initial): Snug the nut down with your socket wrench.
- Connect Horn Wiring: Reconnect the horn wiring to the contact point.
- Install Horn Button/Pad: Reinstall the horn button or pad.
- Torque the Nut: This is the most critical step. Consult your Jeep CJ5 service manual for the exact torque specification. For many Jeep models of that era, the steering wheel nut torque is often around 30-50 foot-pounds (ft-lbs), but always verify this for your specific vehicle.
- Use a torque wrench to tighten the nut to the specified value. Turn clockwise to tighten.
- Do not overtighten. Overtightening can strip the threads on the steering column shaft or the nut, or even crack the steering wheel hub.
- Do not undertighten. The nut must be secure enough to prevent the steering wheel from becoming loose during driving.
- Final Check: Once torqued, give the steering wheel a good shake to ensure it feels solid and secure. Reconnect the negative battery terminal. Test the horn and turn signals.
Pro Tip: If your steering wheel feels slightly off-center after installation, you can sometimes adjust it by loosening the nut slightly, repositioning the wheel on the splines, and retightening. This might require a few attempts to get it perfectly centered.
Common Problems And Troubleshooting
Even with careful installation, issues can arise with the steering wheel nut and its related components.
Loose Steering Wheel
This is the most common and dangerous problem.
- Cause: The nut was not tightened sufficiently, the threads have worn, or vibrations have caused it to loosen over time.
- Solution: Re-torque the steering wheel nut to the manufacturer’s specification. If the nut or shaft threads are damaged, they will need to be repaired or replaced, which is a more involved process. In some cases, a slightly larger nut or a thread repair kit might be used, but this should only be done by someone experienced.
Stripped Threads
- Cause: Overtightening the nut, cross-threading during installation, or worn-out threads on the nut or steering column shaft.
- Solution: This typically requires replacing either the steering wheel nut or, in more severe cases, the steering column shaft. If the shaft threads are damaged, a professional mechanic might be able to repair them using a thread chaser or by installing a repair insert, but replacement is often the safest long-term solution.
Horn Not Working
- Cause: The horn contact ring (often a plastic or brass piece that sits between the steering wheel and the column) is damaged, worn, or misaligned. This can happen if the steering wheel was removed or installed improperly.
- Solution: Inspect the horn contact components. Ensure they are clean, properly seated, and not cracked or broken. Replace any damaged parts. The steering wheel nut’s tightness can also affect the pressure on the horn contact.
Steering Wheel Wobble
- Cause: Beyond a loose nut, a steering wheel wobble can be caused by a bent steering column shaft, a damaged steering wheel hub, or issues with the steering linkage or suspension components.
- Solution: First, ensure the steering wheel nut is properly torqued. If the wobble persists, it indicates a deeper issue within the steering or suspension system that requires professional diagnosis.
Maintenance And Longevity
The steering wheel nut itself is a simple component, but ensuring its longevity and the overall health of the steering system involves regular checks and proper maintenance.
- Regular Inspections: Periodically check the tightness of your steering wheel. While it shouldn’t loosen if installed correctly, it’s good practice, especially after rough off-road excursions. Gently try to rotate or move the steering wheel side-to-side while the vehicle is stationary. Any play or looseness needs immediate attention.
- Use Quality Parts: When replacing the nut or washer, always use high-quality, automotive-grade parts. Cheap, ill-fitting nuts can strip easily or not provide adequate clamping force.
- Proper Torque: Always use a torque wrench when installing the steering wheel nut. Guessing the tightness can lead to the problems mentioned above.
- Cleanliness: Keep the steering column shaft and the nut clean. Rust and debris can make future removal difficult and can affect the seating of the components.
- Steering System Health: While not directly related to the nut, the overall health of your steering system (steering box, tie rods, ball joints) impacts the forces the steering wheel nut endures. Ensure these components are in good condition and properly lubricated.
Steering Wheel Nut Specifications Comparison
To help clarify potential differences, here’s a look at typical specifications. Remember that these are general guidelines, and you should always consult your vehicle’s service manual for precise details.
| Feature | Common Specification for Jeep CJ5 | Notes |
|---|---|---|
| **Nut Type** | Hex Nut | Standard, six-sided steel nut. |
| **Thread Size** | Varies (e.g., 1/2″-20, 9/16″-18) | Crucial to match your specific steering column shaft. |
| **Material** | Hardened Steel | Ensures durability and resistance to wear. |
| **Washer** | Hardened Flat Washer | Distributes load; some may have locking tabs. |
| Torque Spec | 30-50 ft-lbs (approx.) | Always verify with your service manual. Overtight