The Jeep Cherokee XJ is a beloved compact SUV, known for its ruggedness and off-road capabilities. For many owners, maintaining their XJ involves understanding and addressing every component, no matter how small.
The battery tray is one such often-overlooked part. While it might seem like a simple metal bracket, its condition and proper installation are crucial for the reliability and safety of your vehicle.
A failing battery tray can lead to a dead battery, electrical issues, or even damage to other components. This article will explore everything you need to know about the Jeep Cherokee XJ battery tray, from its function and common problems to replacement and upgrade options.
Understanding The Jeep Cherokee Xj Battery Tray
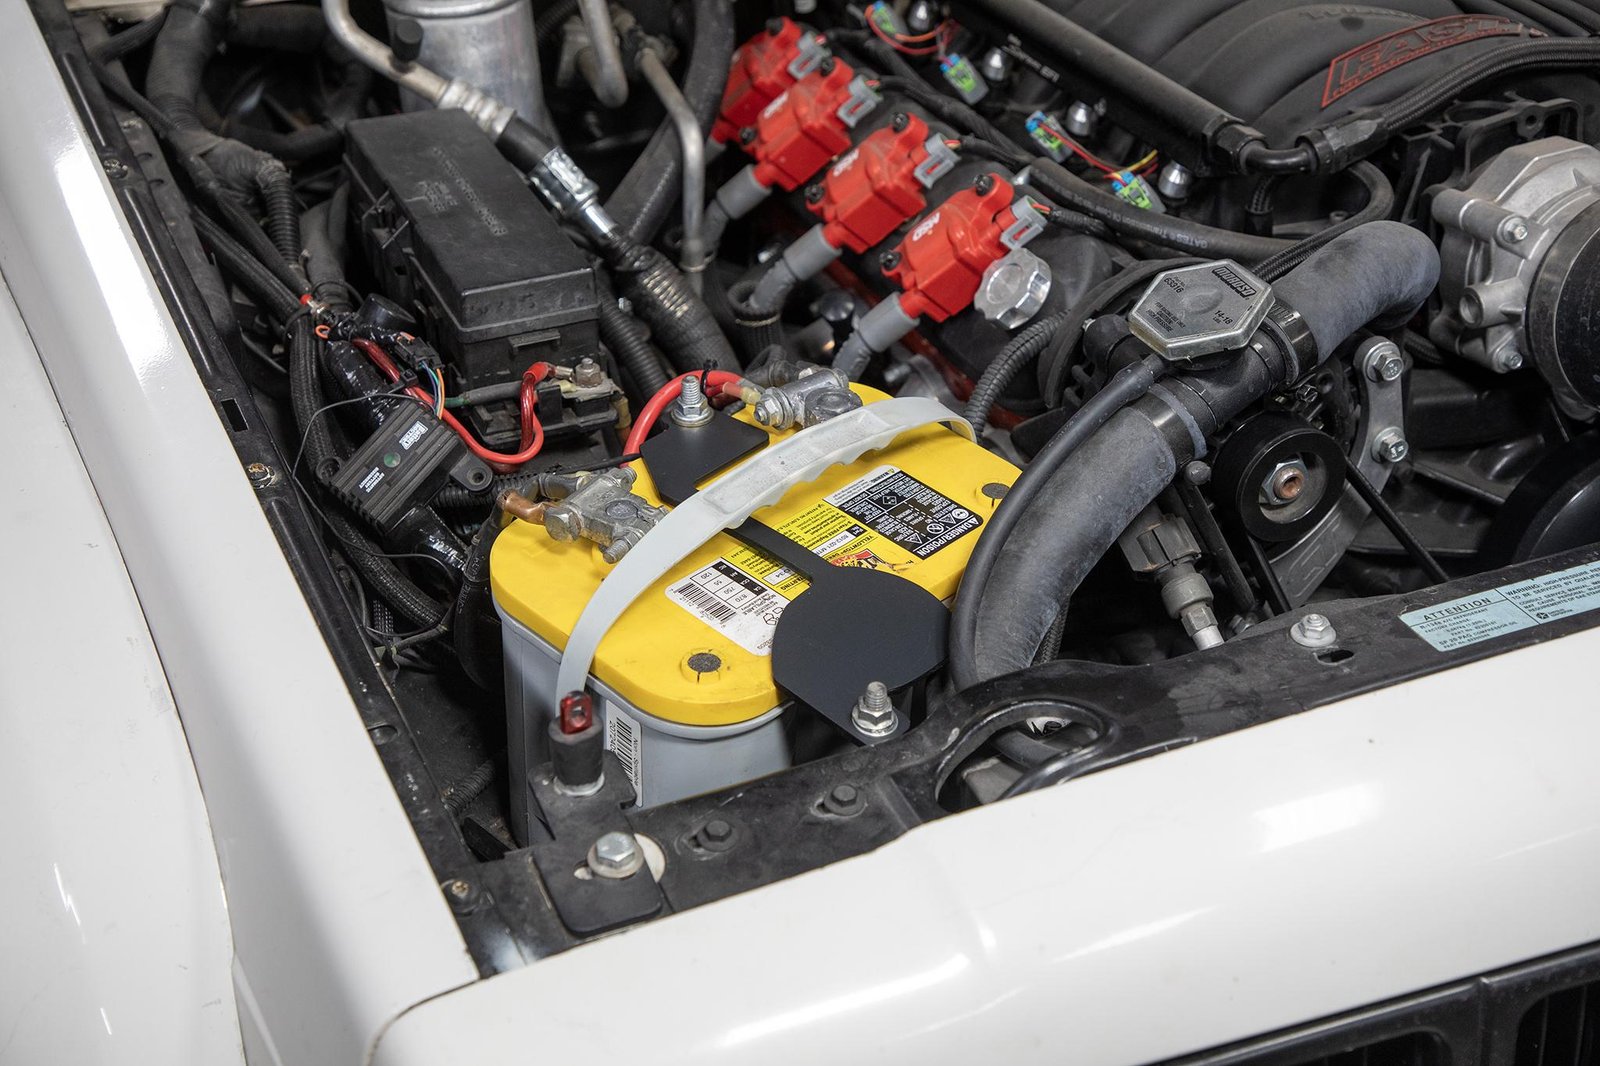
The battery tray, also known as the battery holder or battery box, is a fundamental part of your vehicle’s electrical system. Its primary purpose is to securely hold the car battery in place. This is not just about preventing the battery from rattling around; it’s about ensuring stable electrical connections and protecting the battery from road vibrations and impacts.
What Is A Battery Tray?
At its core, the battery tray is a structural component designed to support the weight and dimensions of your XJ’s battery. In the Jeep Cherokee XJ, the battery is typically located in the engine bay, often on the passenger side, towards the front.
The tray is usually made of metal, commonly steel, and is designed to withstand the harsh environment under the hood, exposed to heat, moisture, and road debris. It bolts directly to the vehicle’s chassis or inner fender well, providing a stable platform.
Why Is It Important?
The importance of a functional battery tray cannot be overstated. Here’s why it matters:
- Security: A loose battery can shift, leading to cracked casings or damaged terminals. This can cause the battery to leak acid, which is corrosive and can damage the surrounding metal and wiring.
- Electrical Stability: A secure battery ensures constant contact between the battery terminals and the cable clamps. Any movement can interrupt the flow of electricity, causing intermittent power issues, engine stalling, or failure of sensitive electronics.
- Protection from Vibration: Constant vibrations from driving, especially off-road, can degrade battery components over time. A well-designed tray absorbs some of this vibration, extending the battery’s lifespan.
- Safety: In the event of an accident, a securely mounted battery is less likely to detach, preventing potential electrical shorts or fires.
- Corrosion Prevention: Many battery trays are designed with features to help manage battery acid or moisture, preventing it from pooling and causing corrosion on the vehicle’s frame.
Location In The Jeep Cherokee Xj
On most Jeep Cherokee XJ models (produced from 1984 to 2001), the battery tray is situated in the engine compartment, typically on the passenger side, near the front of the vehicle. It’s usually mounted to the inner fender apron or directly to the chassis. Accessing it is generally straightforward, requiring the removal of the battery cables and then unbolting the tray itself.
Common Problems With Xj Battery Trays
Like any automotive part exposed to the elements and constant use, Jeep Cherokee XJ battery trays can develop problems over time. The most common issue is rust and corrosion.
Rust And Corrosion
The combination of moisture, salt (used for de-icing roads), battery acid fumes, and vibration makes the battery tray a prime target for rust.
- Causes:
- Road Salt: In areas where salt is used on roads during winter, it inevitably gets into the engine bay and can accelerate rust formation on metal parts.
- Battery Acid Leaks: Even minor leaks from a battery can cause severe corrosion.
- Moisture Trapping: Dirt, leaves, and debris can accumulate in the tray, trapping moisture against the metal.
- Age: Over decades, even without significant exposure, metal components can degrade.
- Symptoms:
- Visible Rust: The most obvious sign is surface rust, which can progress to deep pitting and holes.
- Weakened Structure: Rust can weaken the tray, making it appear flimsy or even causing it to break.
- Loose Battery: If the tray is significantly corroded, it may no longer hold the battery securely.
- Corrosion on Surrounding Areas: The corrosion can spread from the tray to the fender apron or chassis it’s mounted to.
Physical Damage
Besides rust, battery trays can suffer physical damage:
- Impacts: Road debris or bottoming out during off-road excursions can damage the tray.
- Improper Installation: Over-tightening bolts or forcing a battery that doesn’t quite fit can stress or crack the tray.
Battery Size Mismatch
While not a failure of the tray itself, using a battery that is too large or too small for the tray can cause problems. A battery that is too large might not fit correctly, putting stress on the tray or preventing proper securing.
A battery that is too small might not be held firmly, even with hold-down clamps, leading to movement and potential damage.
Replacing Your Jeep Cherokee Xj Battery Tray
If your XJ’s battery tray is showing signs of rust, damage, or is no longer holding the battery securely, it’s time for a replacement. The process is manageable for a DIY mechanic with basic tools.
Assessing The Damage
Before you start, carefully inspect the existing battery tray.
- Remove the Battery: Always disconnect the negative battery cable first, then the positive. Remove the battery from the tray.
- Inspect the Tray: Look for rust, holes, cracks, or deformation. Check the mounting points where the tray bolts to the vehicle.
- Inspect Surrounding Areas: Examine the fender apron or chassis where the tray is attached. Corrosion here can complicate the replacement.
Tools And Materials Needed
- New Battery Tray: Ensure it’s specifically designed for the Jeep Cherokee XJ.
- Socket Wrench Set: For removing bolts. Common sizes include 10mm, 13mm, and 15mm.
- Wrench Set: For holding nuts.
- Wire Brush: For cleaning rusted areas.
- Rust Inhibitor/Primer: To treat any minor rust on the mounting points or new tray.
- Paint: To match or protect the new tray and surrounding metal.
- Gloves and Safety Glasses: Essential for protection.
- Penetrating Oil: For loosening stubborn or rusted bolts.
- New Hardware (Optional but Recommended): Stainless steel or zinc-plated bolts and nuts can prevent future rust issues.
Step-by-step Replacement Guide
- Disconnect Battery: As mentioned, disconnect the negative (-) terminal first, then the positive (+). Tuck the cables away so they don’t accidentally touch the terminals.
- Remove Battery: Lift the battery out of the old tray. They are heavy, so be careful.
- Remove Hold-Down Clamp: Most XJ battery trays have a metal clamp that goes over the top of the battery and bolts down into the tray or bracket. Remove this clamp.
- Unbolt the Tray: Locate the bolts securing the battery tray to the vehicle’s body. Apply penetrating oil if they are rusted. Use your socket wrench to remove them. You might need a helper to hold nuts from underneath or from the side.
- Remove Old Tray: Once all bolts are removed, carefully lift the old battery tray out. If it’s rusted through, it might come apart easily.
- Clean Mounting Area: Thoroughly clean the area where the tray mounts. Use a wire brush to remove any rust, dirt, or debris. If there’s significant rust on the vehicle’s body, address it now with rust treatment or primer.
- Prepare New Tray: If your new tray is bare metal, consider cleaning it and applying a coat of rust-inhibiting primer and then paint for longevity.
- Install New Tray: Position the new battery tray in place. Align the bolt holes.
- Secure New Tray: Install the bolts. Tighten them firmly but avoid over-tightening, which could strip threads or crack the new tray. If you removed nuts, ensure they are properly seated.
- Reinstall Battery: Place the battery back into the new tray. Ensure it sits flat and securely.
- Install Hold-Down Clamp: Secure the battery with the hold-down clamp. Make sure it’s snug enough to prevent the battery from moving, but not so tight that it stresses the battery casing.
- Reconnect Battery Cables: Connect the positive (+) terminal first, then the negative (-) terminal. Ensure the clamps are clean and tight.
- Final Check: Give the battery a firm push to ensure it doesn’t move. Check that all tools are removed from the engine bay.
Tips For A Smooth Replacement
- Work in Good Light: Ensure you have adequate lighting, especially if working in a dimly lit garage.
- Take Pictures: Before and during disassembly, take photos. This helps you remember how things go back together.
- Replace Rusted Bolts: If bolts are badly rusted, it’s often easier to cut them off and replace them with new ones.
- Consider Upgraded Trays: Aftermarket options might offer better corrosion resistance or a more robust design.
Upgrading Your Battery Tray
While a direct replacement is often sufficient, some Jeep Cherokee XJ owners opt for upgraded battery trays. These upgrades typically focus on enhanced durability and corrosion resistance.
Materials Matter
- Stainless Steel: Offers superior corrosion resistance compared to standard steel. It’s more expensive but provides excellent longevity, especially in harsh climates.
- Aluminum: Lightweight and corrosion-resistant, but can be more expensive and potentially less strong than steel.
- Powder-Coated Steel: Many aftermarket trays use steel with a durable powder-coated finish. This offers good protection against rust and chipping, but deep scratches can still expose the metal to corrosion.
Design Enhancements
Some aftermarket trays offer improved designs:
- Better Drainage: Features that prevent water and debris from pooling in the tray.
- Integrated Hold-Downs: Some designs incorporate the hold-down mechanism directly into the tray for a cleaner look and more secure fit.
- Universal Fit Options: While less ideal for a specific model like the XJ, some universal trays can be adapted. However, sticking to XJ-specific parts usually guarantees a better fit.
Where To Find Upgrades
- Aftermarket Jeep Parts Retailers: Online stores specializing in Jeep parts are the best source for upgraded battery trays.
- Custom Fabrication: For a truly unique or heavy-duty solution, custom fabrication is an option, though it will be the most expensive.
When choosing an upgraded tray, verify its compatibility with your specific XJ year and model. Also, consider the type of battery you plan to use, as some trays are designed for specific battery sizes or types.
Battery Tray Maintenance And Prevention
Regular maintenance can significantly extend the life of your battery tray and prevent premature replacement.
Regular Cleaning
- Frequency: At least twice a year, or more often if you drive in areas with road salt or mud.
- Method:
- Disconnect Battery: Always disconnect the negative terminal first.
- Remove Debris: Use compressed air or a brush to remove leaves, dirt, and other debris from the tray.
- Wash: Use a hose with mild soap and water to clean the tray and surrounding area. Avoid high-pressure washing directly at electrical components.
- Dry Thoroughly: Ensure the tray and engine bay are completely dry before reconnecting the battery.
Inspecting For Corrosion
- Visual Checks: Regularly look for any signs of rust or white, powdery corrosion, especially around the edges of the tray and its mounting points.
- Check Battery Terminals: While you’re inspecting the tray, check your battery terminals for corrosion. Clean them with a wire brush and apply a terminal protector spray.
Applying Protectants
- Rust Inhibitor: For mild surface rust on the tray or mounting points, clean the area and apply a rust-inhibiting primer and then a protective coating.
- Undercoating: Some owners apply an undercoating spray to the underside of the tray and surrounding metal for added protection against road spray and debris. Ensure the product is suitable for engine bay temperatures and won’t interfere with cooling.
Battery Maintenance
- Check Battery Condition: Ensure your battery isn’t leaking. A healthy battery is less likely to cause corrosion issues.
- Secure Hold-Down: Periodically check that the battery hold-down clamp is snug and preventing the battery from shifting.
Battery Tray Alternatives And Considerations
While a metal tray is standard, there are other materials and considerations for your XJ’s battery mounting.
Plastic Battery Boxes
Some vehicles use plastic battery boxes instead of metal trays. These are inherently resistant to corrosion.
- Pros: No rust issues, lightweight.
- Cons: Can become brittle over time, especially with heat cycles and UV exposure. May not be as robust as a metal tray for extreme off-roading. Finding a direct-fit plastic box for an XJ might be difficult, often requiring custom fitting.
Custom Fabrication
For those with specific needs (e. g.
, relocating the battery, fitting larger batteries, or extreme durability), custom fabrication is an option.
- Pros: Tailored to your exact requirements.
- Cons: Can be expensive, requires specialized skills.
Battery Relocation
Some Jeep enthusiasts choose to relocate the battery to a different part of the vehicle, such as under a seat or to the rear cargo area. This often requires a custom battery box and significant wiring modifications.
- Pros: Frees up space in the engine bay, can improve weight distribution.
- Cons: Complex installation, requires careful planning to ensure safety and proper ventilation.
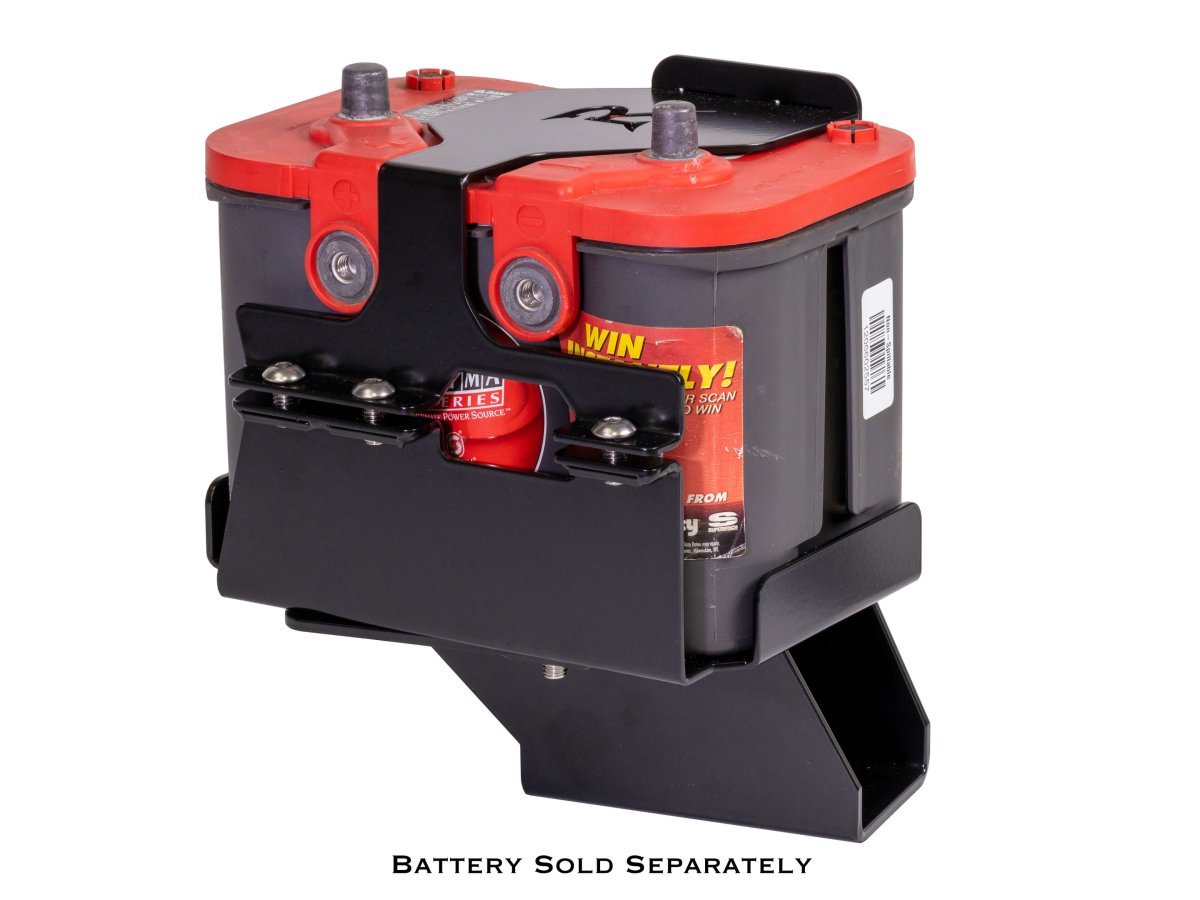
Battery Tray Sizing And Compatibility
Ensuring the correct battery tray size is critical. The Jeep Cherokee XJ typically uses Group 35 or Group 24F batteries, but always verify with your owner’s manual or by measuring your current battery and tray.
Battery Group Sizes
Battery group sizes are standardized by the Battery Council International (BCI) and indicate physical dimensions and terminal placement.
- Group 35: Common in many import and domestic vehicles. Dimensions are roughly 9″ L x 6.9″ W x 8.9″ H.
- Group 24F: Often used in trucks and SUVs. Dimensions are roughly 10.2″ L x 6.8″ W x 9″ H. The ‘F’ indicates the positive terminal is on the right when viewed from the front.
Checking Fitment
*