Jeep owners love adventure, but all that fun can be tough on your Jeep’s interior. Mud, water, sand, and everyday wear can quickly damage carpets and floors. That’s why many drivers choose Rhino lining—a tough, waterproof coating—to protect their Jeep’s interior. Doing this project yourself can save money and give you a durable, easy-to-clean finish. Here’s a complete, practical guide to rhino lining your Jeep interior, including tips, common mistakes, and what to expect.
What Is Rhino Lining And Why Use It?
Rhino lining is a spray-on or roll-on protective coating originally made for truck beds. It’s made from polyurethane or polyurea, which creates a thick, rubber-like layer. This coating resists scratches, dents, rust, and water.
For Jeep owners, rhino lining is popular because:
- It’s waterproof—no more wet carpets after off-roading.
- It’s easy to clean—just hose it out.
- It reduces road noise inside the cabin.
- It’s long-lasting—typically 5-10 years with proper care.
Applying rhino lining to your Jeep’s interior means you’re ready for any adventure without worrying about damage.
What You Need: Tools And Materials
Before you start, gather everything you’ll need:
- Rhino liner kit (genuine or high-quality alternative)
- Respirator mask and gloves
- Painter’s tape and plastic sheeting
- Screwdrivers and socket set
- Wire brush or grinder
- Sandpaper (80-120 grit)
- Degreaser or acetone
- Lint-free rags
- Paint roller or spray gun (depends on kit)
- Stir stick (if rolling/brushing)
- Heat gun (optional for better adhesion)
Cost Comparison: Diy Vs Professional
Here’s a look at what you might spend:
| Method | Average Cost | Time Needed |
|---|---|---|
| DIY Rhino Lining | $150 – $300 | 1-2 days |
| Professional Installation | $700 – $1,200 | 1 day (shop time) |
DIY saves money, but you must follow each step carefully for best results.

Step-by-step Guide To Rhino Lining Your Jeep Interior
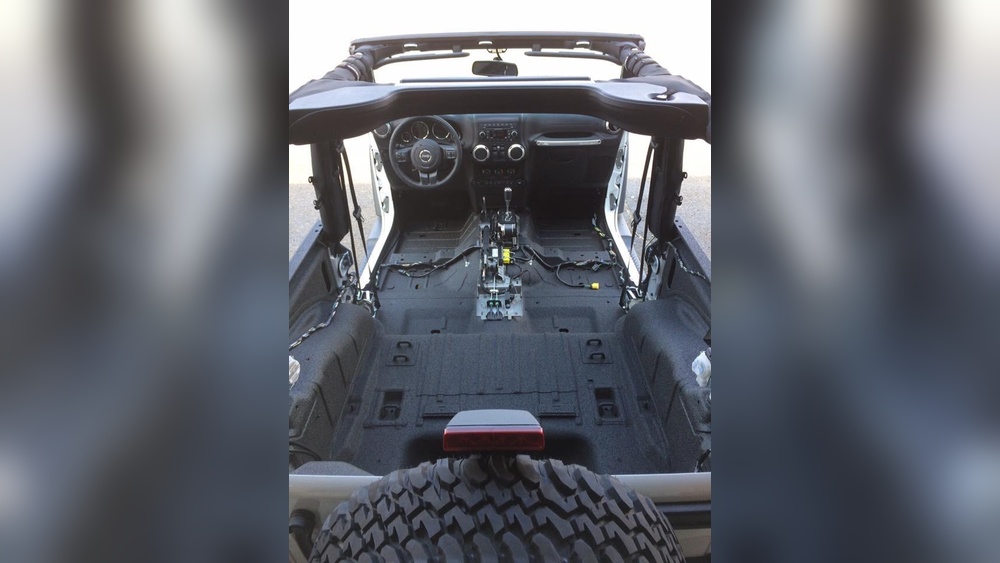
1. Remove Everything
Take out all seats, carpet, center console, and trim. Don’t forget seat belts and bolts. Store hardware in labeled bags for easy reassembly.
2. Clean And Prep
Vacuum dirt and debris. Wash all surfaces with soap and water, then let dry. Use degreaser or acetone on metal to remove oil, grease, and residue.
3. Sand The Surface
Rough up all surfaces with 80-120 grit sandpaper. For tough spots, use a wire brush or grinder. The goal: create a rough surface so the liner sticks well.
4. Mask Off Areas
Use painter’s tape and plastic to cover anything you don’t want coated—wiring, dash, pedals, and door seals.
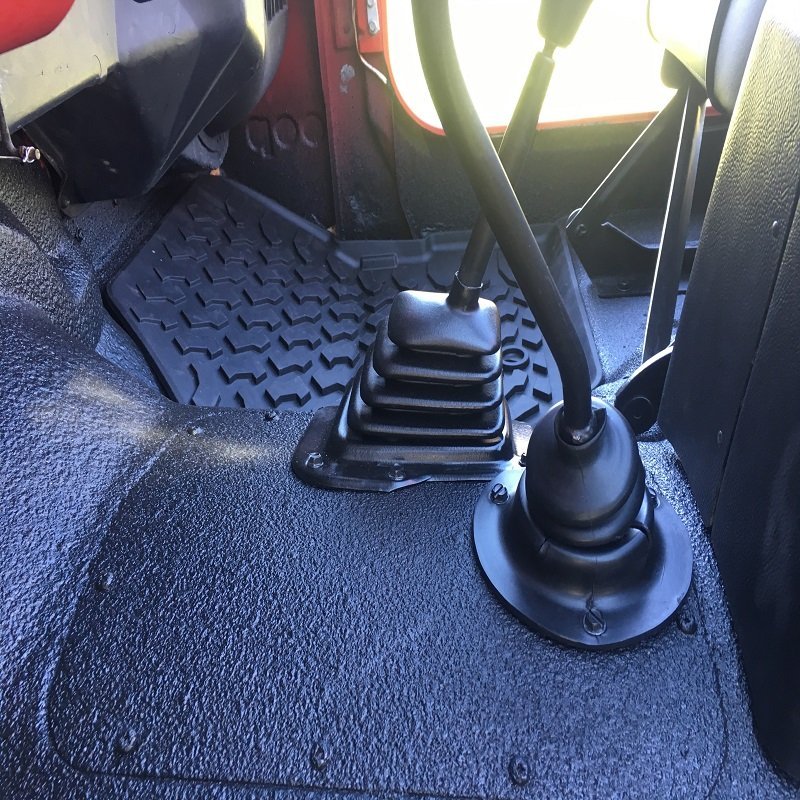
5. Apply The Liner
Mix the rhino liner according to instructions. Use a spray gun for even coverage, or a roller/brush for smaller areas. Apply in thin, even coats:
- First coat—let dry until tacky.
- Second coat—focus on high-wear areas like floors and cargo wells.
Most kits need 2-3 coats. Let each coat dry as directed (usually 1-2 hours between coats).
6. Cure And Reassemble
Let the coating cure fully (24-72 hours). Check with your finger—it should feel firm, not sticky. Once cured, reinstall all seats, trim, and hardware.
Drying & Reassembly Timeline
| Step | Minimum Time | Recommended Time |
|---|---|---|
| Between Coats | 1 hour | 2 hours |
| Full Cure | 24 hours | 48-72 hours |
Patience during curing leads to a stronger, longer-lasting finish.
Common Mistakes To Avoid
- Skipping prep: If you don’t sand and clean well, the liner will peel.
- Rushing drying time: Reinstalling seats too soon can damage the surface.
- Not using enough liner: Thin coats may wear out quickly, especially in high-traffic areas.
- Ignoring safety: Rhino liner fumes are strong—always use a mask and ventilate your workspace.
A non-obvious tip: Test your spray pattern on cardboard before starting inside your Jeep. This helps avoid runs or thick spots.

Care And Maintenance Tips
Rhino lining is tough, but a little care makes it last even longer:
- Clean with mild soap and water; avoid harsh chemicals.
- Inspect for chips or gouges after off-roading. Touch up small spots quickly to prevent rust.
- Use rubber mats if you carry heavy or sharp tools.
Many owners notice the Jeep stays cooler in summer and quieter on the road after lining.
Alternatives To Rhino Lining
While rhino lining is popular, there are alternatives:
| Product | Pros | Cons |
|---|---|---|
| Herculiner | Easy DIY, affordable | Less flexible, rougher texture |
| Line-X | Professional look, very durable | More expensive, pro install only |
| Monstaliner | UV resistant, many colors | Needs careful prep, longer cure time |
Choose what fits your budget, skills, and needs.
Frequently Asked Questions
How Long Does Rhino Lining A Jeep Interior Last?
A properly applied rhino liner can last 5-10 years, sometimes longer. High-wear areas may need touch-ups, but the coating is designed for tough use.
Can I Rhino Line Over Rust?
No, you must remove all rust before applying rhino lining. Coating over rust traps moisture and leads to more rust underneath.
Is The Process Reversible?
Rhino lining is permanent. Removing it is difficult and usually damages the original metal or paint.
Does Rhino Lining Add Weight?
Yes, but not much. Expect 15-25 pounds added for a full Jeep interior, depending on thickness and number of coats.
Where Can I Learn More About Rhino Lining?
You can find more details and product information at the official Rhino Linings website.
Transforming your Jeep’s interior with rhino lining is a smart upgrade for anyone who loves off-roading, camping, or simply wants a cleaner, tougher ride. With the right prep and patience, you’ll enjoy lasting protection and a unique look for years to come.