Painting your Jeep fender flares can transform the look of your vehicle and protect them from rust and damage. Many Jeep owners want their fender flares to match their style or color theme, but professional painting can be expensive. Luckily, painting fender flares at home is possible, even for beginners, if you follow the right steps and avoid common mistakes. This guide covers everything you need to know, from preparation to finishing touches, with practical advice and data to help you get a professional-looking result.
Choosing The Right Paint And Materials
Selecting the correct paint is essential for durability and appearance. Not all paints work well on plastic or metal fender flares.
| Paint Type | Best For | Durability | Finish Options |
|---|---|---|---|
| Acrylic Enamel Spray | Plastic | Good | Gloss, Matte |
| Automotive Urethane | Metal | Excellent | Gloss |
| Bedliner Spray | Plastic/Metal | High | Textured |
Primer is also important. Use a plastic primer for plastic flares and a rust-inhibiting primer for metal. According to the Automotive Paint Manufacturers Association, urethane paints last up to 5 years longer than standard acrylics on outdoor vehicles.
You will need:
- Paint (preferably spray cans)
- Primer
- Sandpaper (320–600 grit)
- Masking tape and paper
- Clean cloths
- Degreaser or rubbing alcohol
Preparing The Fender Flares
Preparation is the most important step. Skipping it can lead to peeling or uneven paint.
- Remove the fender flares: Most Jeep fender flares are attached with screws or clips. Taking them off gives better access and avoids overspray.
- Clean thoroughly: Wash the flares using soap and water. Remove all dirt, grease, and mud.
- Degrease the surface: Wipe with rubbing alcohol or a degreaser to remove oils.
- Sand for adhesion: Lightly sand the flares. For plastic, use 320–400 grit sandpaper. For metal, use 600 grit. This roughens the surface so paint sticks better.
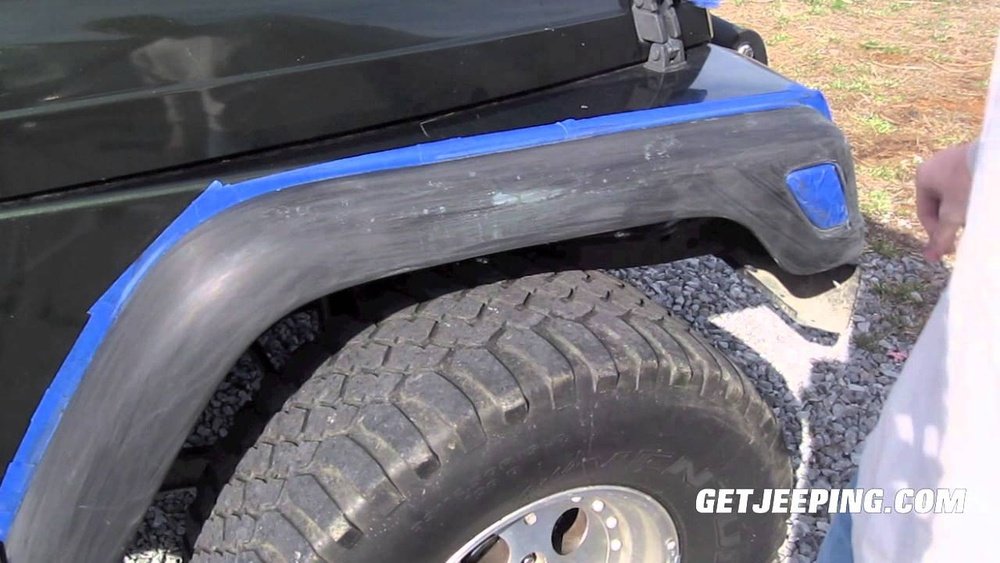
- Mask areas: If you can’t remove the flares, use masking tape and paper to cover nearby parts.
| Step | Estimated Time | Common Mistakes |
|---|---|---|
| Cleaning | 15 min | Missing grease spots |
| Sanding | 25 min | Using wrong grit |
| Masking | 10 min | Leaving gaps |
A non-obvious insight: Plastic flares can have a release agent from the factory that makes paint not stick. Always degrease well to avoid this problem.
Painting Process: Step-by-step
Painting takes patience. Rushing can ruin your work.
- Apply primer: Spray 2–3 light coats of primer, waiting 10 minutes between each. Make sure to cover all areas evenly.
- Let primer dry: Wait at least 30 minutes before painting.
- Spray paint: Shake the can well. Hold it 10–12 inches from the flare. Spray in smooth, overlapping strokes. Apply 3–4 thin coats, waiting 15 minutes between coats.
- Drying time: Allow paint to dry for at least 1 hour before touching. For best results, let it cure for 24 hours.
- Optional clear coat: For extra shine and protection, apply 2 coats of automotive clear coat after paint is dry.
| Coat Type | Number of Coats | Drying Time | Purpose |
|---|---|---|---|
| Primer | 2–3 | 30 min | Adhesion |
| Paint | 3–4 | 1 hr | Color |
| Clear Coat | 2 | 1 hr | Protection |
Never paint in high humidity or direct sunlight. The ideal temperature is 60–80°F, with low humidity.
Reinstalling And Caring For Painted Flares
Once the paint is dry, reinstall the flares. Be gentle to avoid scratches.
- Use a screwdriver, not a power tool, to avoid over-tightening.
- If you painted without removing, carefully peel masking tape.
To keep your painted fender flares looking new:
- Wash regularly with gentle soap.
- Avoid harsh chemicals.
- Wax every 3–4 months for extra protection.
Example: A Jeep owner painted their flares with bedliner spray. After one year, the textured finish still looked great, even after off-road mud and rain.
Common Mistakes And How To Avoid Them
Many beginners make simple errors that ruin the finish. Here are the most frequent:
- Skipping sanding: Paint will peel off smooth surfaces.
- Using thick coats: Thick paint runs and cracks.
- Not waiting between coats: Wet layers cause bubbles.
- Painting in bad weather: Humidity can cause dull finishes.
A second non-obvious tip: If the paint lifts or wrinkles after a coat, stop and let it dry fully. Do not add more paint—this can make things worse. Wait, sand gently, and repaint.
Frequently Asked Questions
Can I Paint Fender Flares Without Removing Them?
Yes, but it’s harder to get a clean edge. Use lots of masking tape and paper. Removing them gives better results.
What Paint Color Is Most Popular For Jeep Fender Flares?
Matte black is the most common. It hides dirt and matches many Jeep styles. Some choose body-color paint for a custom look.
How Long Does Painted Fender Flares Last?
With proper prep and paint, they last 2–5 years. Bedliner sprays and urethane paints tend to last longer than acrylics.
Is It Possible To Fix Scratches After Painting?
Small scratches can be touched up with spray paint. For deep scratches, sand the area, prime, and repaint.
Where Can I Find More Jeep Painting Tips?
Check the Jeep Owners Official Site for detailed guides and community advice.
Painting your Jeep fender flares is a rewarding project that can save money and give your Jeep a unique look. If you follow the steps above, use quality materials, and avoid common mistakes, you’ll get a durable, good-looking finish. Take your time, and don’t rush—your Jeep will stand out on the road and trail.