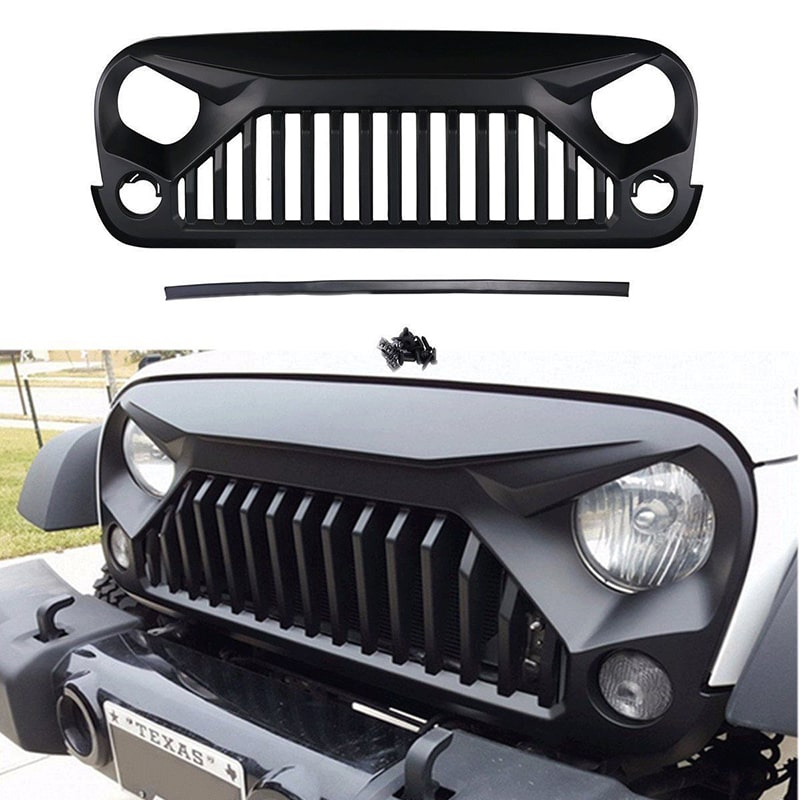
A unique front grill can change the whole look of your Jeep Wrangler. The Angry Grill is one of the most popular upgrades.
It gives your Jeep a tough, aggressive style that stands out on the road and trail. Installing an Angry Grill is not difficult, but you need to follow the right steps to avoid problems.
This guide will walk you through the process, share practical tips, and answer common questions so you can get the results you want.

Why Choose An Angry Grill For Your Jeep Wrangler?
The Angry Grill is more than just a cosmetic upgrade. Many Jeep owners pick it because:
- It provides a custom, fierce look.
- Most grills use durable ABS plastic, which is lightweight and strong.
- It can improve airflow to your engine, depending on the design.
Some models are also designed to fit with factory lights, winches, and other accessories. According to a survey by ExtremeTerrain, about 35% of Jeep Wrangler owners choose custom grills as one of their first modifications.
Tools And Materials You Will Need
Before starting, gather everything you need. This will make the installation process easier and faster.
You will need:
- Angry Grill (compatible with your Jeep Wrangler year/model)
- Phillips screwdriver
- Flathead screwdriver
- Socket wrench
- Clean cloth
- Protective gloves
Optional:
- Adhesive tape or weather seal (if the grill kit includes it)
- Plastic trim removal tool
Most kits come with all necessary hardware, but always check the package before you start.
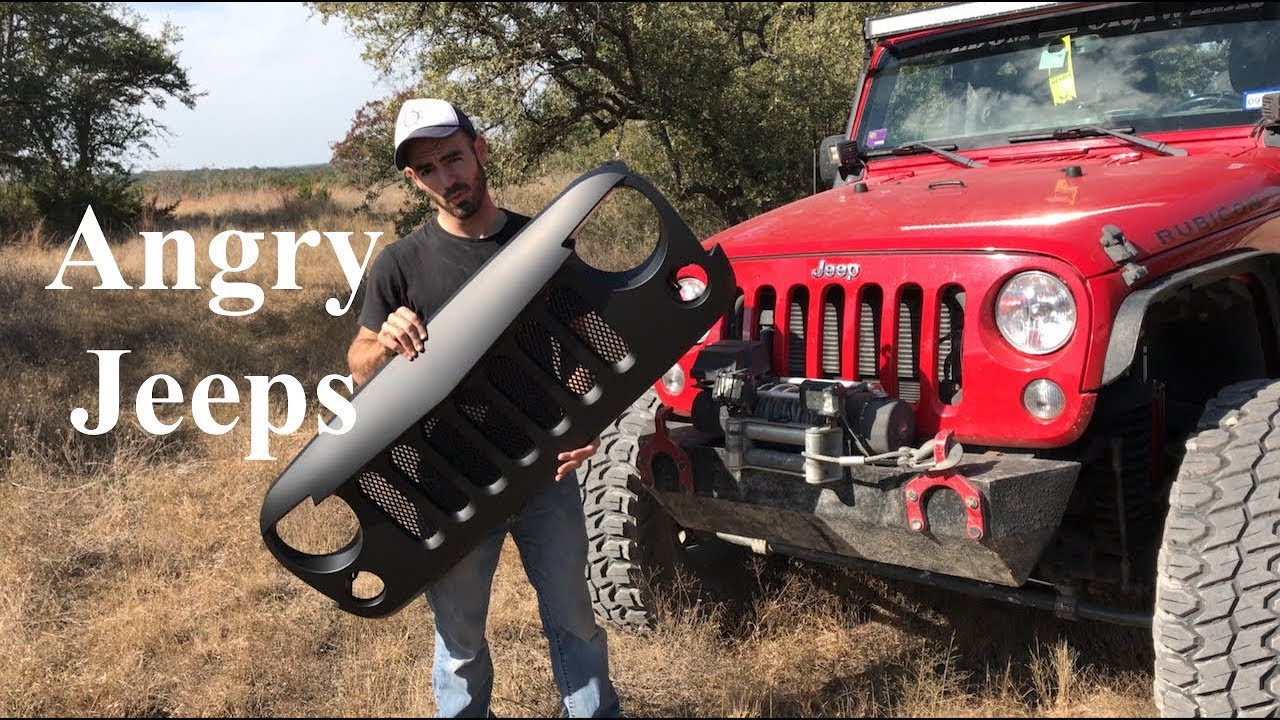
Step-by-step Installation Guide
Installing an Angry Grill on your Jeep Wrangler can usually be done in under an hour. Here are the steps to follow:
1. Prepare Your Jeep
Park your Jeep on a flat surface. Turn off the engine and let it cool down, especially if you have been driving recently.
2. Remove The Factory Grill
- Open the hood and locate the six push pins along the top edge of the factory grill.
- Use a flathead screwdriver to gently pry up each pin. If you have a trim removal tool, it can make the job easier.
- Once the pins are out, gently pull the grill forward. There may be clips at the bottom—give a steady tug to release them.
- Disconnect the turn signal wiring if your grill has built-in lights.
3. Clean The Mounting Area
Wipe down the area where the new grill will be installed. Dirt and debris can affect the fit and finish.
4. Install The Angry Grill
- Line up the new grill with the mounting holes.
- Push it into place, making sure all clips engage.
- Attach the push pins at the top. Use your socket wrench if the kit uses bolts instead.
- Reconnect any wiring for built-in lights.
5. Check Alignment And Fit
Close the hood and check that the grill sits evenly. If there are gaps, adjust the grill or add weather seal as needed.
6. Test Lights And Accessories
If your grill has lights, turn them on to confirm everything works. Make sure nothing blocks airflow to the radiator.
7. Final Inspection
Double-check all fasteners. Make sure the grill feels secure and does not move when you gently pull on it.
Angry Grill Vs. Factory Grill: What’s Different?
Here’s a quick comparison to help you understand how the Angry Grill differs from the factory model:
| Feature | Factory Grill | Angry Grill |
|---|---|---|
| Material | ABS Plastic | ABS Plastic or Composite |
| Design | Classic round eyes | Aggressive slant, “angry” eyes |
| Airflow | Standard | Improved (varies by model) |
| Installation Time | Factory-fitted | 30–60 minutes |
Common Mistakes And How To Avoid Them
Many beginners make simple mistakes that can cause problems later. Here are the most frequent ones:
- Forgetting to disconnect lights: Always unplug the turn signals before removing the old grill.
- Not aligning the grill: Double-check alignment before securing bolts or pins.
- Over-tightening fasteners: Too much force can crack the plastic.
- Ignoring airflow: Make sure nothing blocks the radiator.
An extra tip: If you see uneven gaps after installation, remove the grill and try again. Sometimes small bits of dirt or misaligned clips cause fit issues.
Angry Grill Options And Jeep Compatibility
Not all Angry Grills fit every Wrangler. Most are designed for JK (2007–2018) and JL (2018–present) models. Here’s a quick guide:
| Jeep Model | Grill Fit | Notes |
|---|---|---|
| Wrangler JK | Easy fit | Most kits are JK compatible |
| Wrangler JL | Easy fit | Check for JL-specific clips |
| Wrangler TJ | Difficult | May require modifications |
Always check product details before buying. Some grills require minor trimming, especially for older models.

Is The Angry Grill Legal?
Most US states allow custom grills, but check local laws for headlight and turn signal visibility. Some regions require original lighting positions. For more details, visit the National Highway Traffic Safety Administration.
Maintenance Tips
Keep your Angry Grill clean by washing it with mild soap. Avoid harsh chemicals that can damage the paint.
Inspect fasteners after off-roading. If you notice cracks or fading, consider touch-up paint or replacement.
Frequently Asked Questions
How Long Does Installation Take?
Most installations take 30–60 minutes. If you’re new to working on cars, give yourself extra time.
Do I Need Special Tools?
Basic tools like a screwdriver and socket wrench are enough. Some kits include their own fasteners.
Will The Angry Grill Affect Engine Cooling?
Most Angry Grills are designed to maintain or improve airflow. Always check for blocked vents after installation.
Can I Install The Angry Grill Myself?
Yes, it’s a simple DIY project. Just follow the steps and double-check your work.
Are Angry Grills Available In Different Colors?
Many brands offer black, matte, and custom colors. Some can be painted to match your Jeep.
Upgrading to an Angry Grill gives your Jeep Wrangler a bold new look and can even improve function. With careful installation and attention to detail, you’ll enjoy a tough, unique style on every adventure.