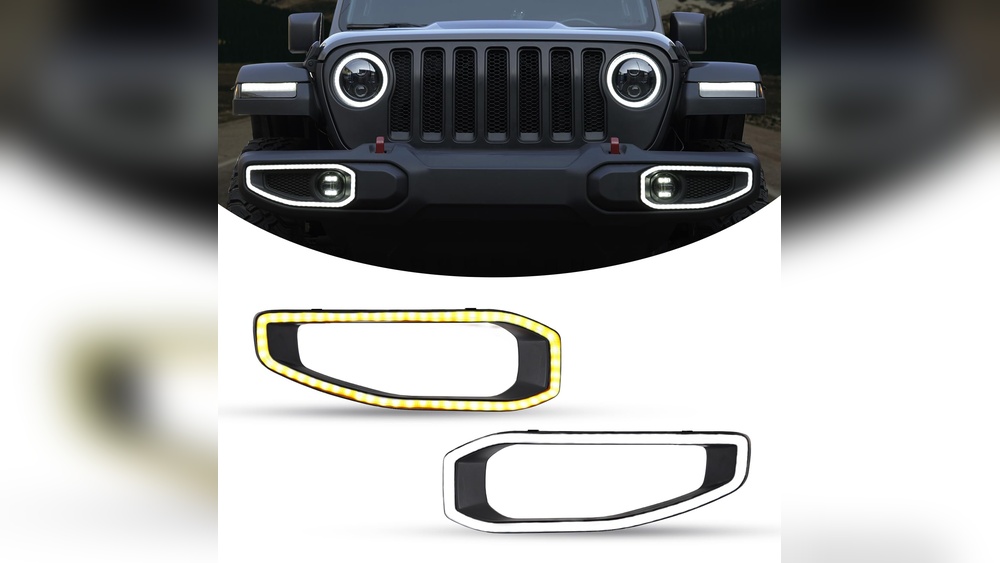
If you’ve upgraded your Jeep Wrangler’s rear tail lights to LEDs, you may notice fast blinking or a warning on your dashboard. This happens because LED lights use less power than factory bulbs, so your Jeep’s system thinks a bulb is out. The fix? Installing resistors. It’s not as complicated as it sounds, but doing it right ensures your lights work correctly and safely.
Why Install Resistors For Led Tail Lights?
LED tail lights are more efficient, but the Jeep Wrangler’s electrical system expects a certain amount of current. Without that, you get the “hyperflash” problem—super-fast blinking—or even warning messages. Load resistors add just the right resistance to mimic the original bulbs. This tells your Jeep everything is normal.
A common mistake is skipping resistors, thinking the Jeep will adjust on its own. While some newer models do adapt, most Wranglers (especially JK, JL, and JT) need resistors to avoid electrical issues.
Tools And Materials Needed
Before you start, gather these items for a safe and clean install:
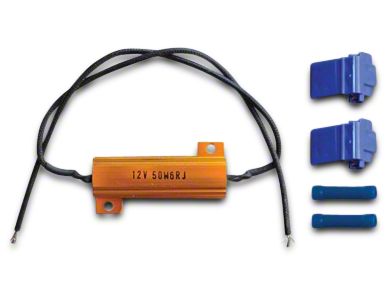
- Load resistors (6-ohm, 50-watt is standard for tail lights)
- Wire strippers and crimpers
- Electrical tape or heat shrink tubing
- Pliers
- Basic socket set or screwdriver (for tail light removal)
- Zip ties
- Safety gloves
Resistors can get very hot, so never install them against plastic or wires. Always plan for safe mounting.

Step-by-step Installation Guide
Follow these steps to install resistors for your Jeep Wrangler’s rear tail lights:
1. Disconnect The Battery
This is a safety must. Open the hood and remove the negative battery terminal. This prevents shorts or shocks.
2. Remove The Tail Light Assemblies
Open your Jeep’s rear door or trunk. Unscrew the bolts holding the tail light housing (usually Phillips or Torx screws, depending on your model). Gently pull out the assembly.
3. Locate The Wiring Harness
Find the wires going to the tail light bulb you replaced with an LED. Usually, there are three wires: ground, brake/turn, and running light.
4. Identify The Correct Wires
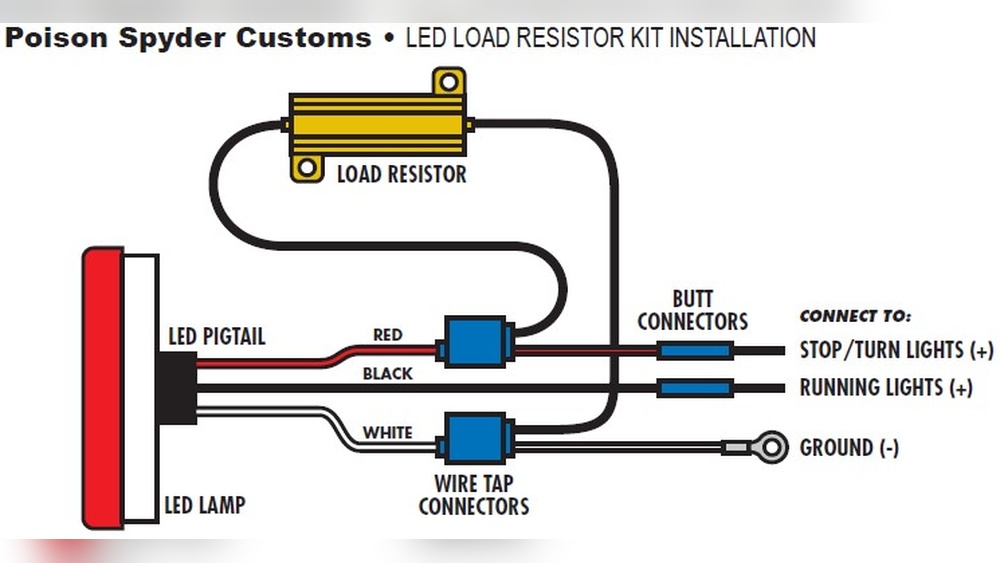
Use your Jeep’s wiring diagram or test with a multimeter. The resistor should connect between the ground wire and the turn/brake signal wire. This is where mistakes happen—never connect to the running light wire.
- Install the resistor
- Cut and strip a small section of the ground and turn/brake signal wires.
- Connect one end of the resistor to the ground wire, the other to the turn/brake wire.
- Use quality crimp connectors or solder for a secure connection.
- Cover connections with heat shrink tubing or electrical tape.
- Mount the resistor
Resistors get very hot—up to 400°F (204°C). Use the provided aluminum bracket or a metal surface on your Jeep’s body (not plastic). Secure with screws or strong adhesive tape.
7. Test Your Lights
Reconnect the battery. Turn on the tail lights, brake, and turn signals. Check for normal blinking and no error messages.
8. Reassemble And Tidy Up
Zip tie any loose wires. Reinstall the tail light housing and screws. Make sure nothing is in contact with the hot resistor.
Example Wiring Connection
Here’s a simple illustration of how the resistor connects. Always verify with your Jeep’s wiring color code.
| Wire Color | Function | Resistor Connection |
|---|---|---|
| Black | Ground | One end of resistor |
| White/Red | Brake/Turn | Other end of resistor |
| White | Running Light | No connection |
Double-check with your specific Jeep’s manual for wire colors.
Comparison: Led Tail Lights With And Without Resistors
Understanding the difference helps you see why resistors matter.
| Feature | With Resistor | Without Resistor |
|---|---|---|
| Blink Rate | Normal | Hyperflash |
| Dashboard Errors | None | Possible warnings |
| System Compatibility | High | Low |
| Heat Generation | High (at resistor) | Low |
Practical Tips For A Safe Install
- Never install resistors inside the tail light housing. The heat can melt plastic and damage wiring.
- Use only quality resistors. Cheap ones may fail or cause shorts.
- Mount resistors on metal. This acts as a heat sink and keeps temperatures safe.
- Check both sides. You’ll need one resistor per tail light (left and right).
- Inspect after a few days. Make sure nothing is loose and that wires aren’t touching the hot resistor.
Most beginners forget to check the heat after driving. Touch the resistor (carefully, or use a temperature gun) after 10-15 minutes to make sure nothing nearby is at risk.

Cost And Time Estimate
Installing resistors is a quick and affordable DIY project.
| Item | Estimated Cost | Time Needed |
|---|---|---|
| Resistor Kit (pair) | $10–$20 | — |
| Tools & Materials | Usually already owned | — |
| Labor (DIY) | Free | 30–60 minutes |
| Professional Install | $50–$100 | 1 hour |
Doing it yourself can save money and give you confidence for future Jeep upgrades.
Common Mistakes To Avoid
- Mounting resistors on plastic: Always use metal to prevent melting.
- Wrong wire selection: Double-check the wiring diagram.
- No heat protection: Bare connections can cause shorts or burns.
- Skipping one side: Both left and right tail lights need resistors for balanced operation.
When To Seek Professional Help
If you’re not comfortable cutting wires or using a multimeter, ask a professional installer. Incorrect wiring can damage your Jeep’s electrical system or even cause a fire.
Wrapping Up
Installing resistors for your Jeep Wrangler’s rear tail lights is a straightforward way to solve “hyperflash” and error messages after switching to LEDs. Take your time, double-check wire connections, and mount the resistor safely. With the right tools and guidance, you’ll enjoy modern, efficient lighting without annoying electrical problems. For more details on electrical upgrades and wiring safety, see this step-by-step LED guide.
Frequently Asked Questions
Do I Need A Resistor For Every Led Tail Light?
Yes, you need one resistor for each tail light. If you replace both rear lights with LEDs, install a resistor on both sides.
Can I Use Any Resistor, Or Does It Need To Be Specific?
Use a 6-ohm, 50-watt resistor. Lower wattage can overheat, and wrong resistance won’t fix hyperflash.
Where Is The Safest Place To Mount The Resistor?
Mount the resistor on a metal part of your Jeep’s body, away from plastic or wiring. This prevents heat damage.
Will Installing Resistors Void My Jeep’s Warranty?
Usually, adding resistors does not void your warranty, but always check with your dealer first.
What Are The Signs That My Resistor Is Not Working?
If you still see fast blinking or error messages, double-check your connections and make sure the resistor is securely mounted and wired to the correct wires.