Many Jeep Wrangler owners love to customize their vehicles. One popular modification is removing the fenders. Whether you want a rugged off-road look, more clearance for larger tires, or need to replace a damaged fender, knowing how to do this safely is important. Removing Jeep Wrangler fenders is not as hard as it may seem, but it does require patience and the right tools. In this guide, you’ll learn step-by-step how to remove fenders from your Jeep Wrangler, discover what to watch out for, and get answers to common questions.
Why Remove Jeep Wrangler Fenders?
People remove their Jeep Wrangler fenders for several reasons:
- Upgrading to aftermarket fenders for a unique look or better durability
- Creating more space for larger tires or off-road accessories
- Repairing or replacing damaged fenders after an accident or rust
Removing the fenders can also make it easier to clean out mud and debris. However, beginners often underestimate the work involved. Understanding the steps and possible challenges will help you avoid mistakes.
Tools And Preparation
Before you start, gather the tools you’ll need. Using the wrong tool can damage clips or paint.
Essential Tools:
- Ratchet and socket set (usually 8mm, 10mm, and 13mm sockets)
- Flathead screwdriver or trim removal tool
- Torx bit set (T25, T30)
- Needle-nose pliers
- Work gloves
- Eye protection
Preparation Tips:
- Park on a flat surface. Turn off the vehicle and set the parking brake.
- Remove the battery negative terminal if you plan to disconnect electrical connectors.
- Wash the fender area to remove dirt. This prevents scratching the paint.
- Keep a parts container handy for clips and bolts.

Step-by-step Guide To Removing Jeep Wrangler Fenders
Fender removal steps can vary depending on your Jeep’s model year. Here’s a general guide for JK (2007-2018) and JL (2018+) Wranglers. Always check your owner’s manual for specific details.
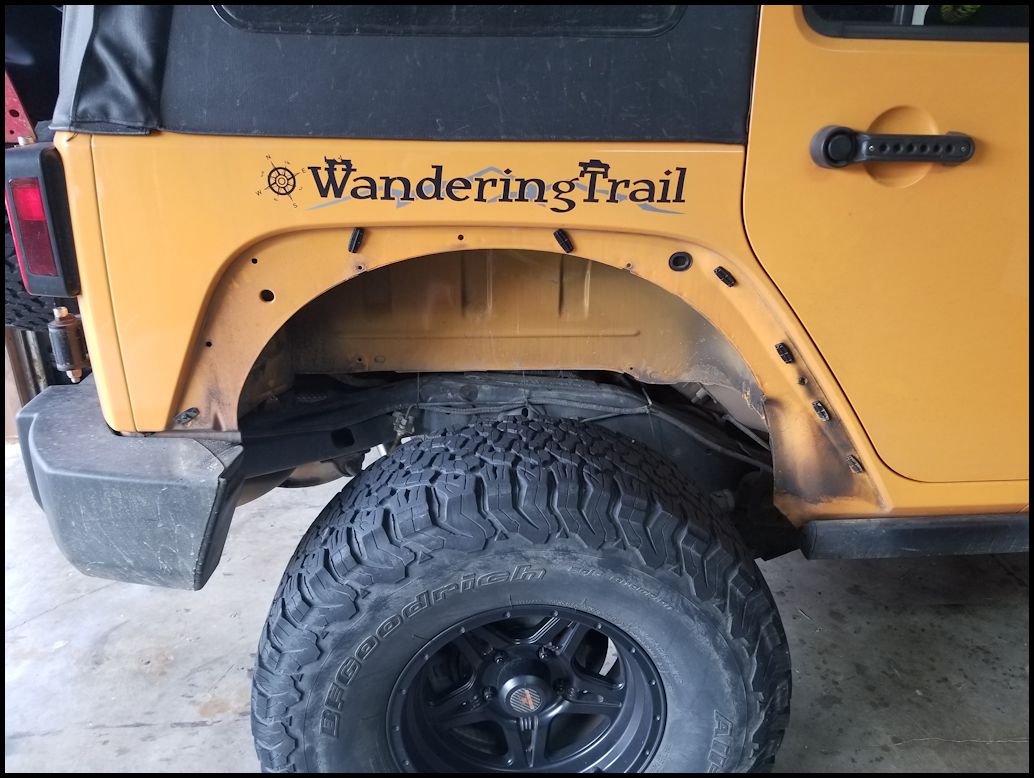
1. Remove The Fender Liner
The fender liner protects the wheel well. Start by removing it:
- Use a flathead screwdriver or trim tool to pry out the plastic push pins.
- Remove all screws or bolts holding the liner.
- Gently pull the liner out. If it feels stuck, check for missed fasteners.
2. Disconnect The Side Marker Light
Most Wranglers have a side marker light in the fender.
- Find the wiring harness behind the fender.
- Press the tab on the connector and pull it apart.
- Set the harness aside to avoid damaging the wires.
3. Remove Fender Bolts And Clips
Now, you’ll remove the bolts and clips holding the fender to the body.
- Use a ratchet and the correct socket size to remove all visible bolts.
- On newer models, Torx bolts are common. Use the right Torx bit.
- Some clips may be hidden behind the liner area.
| Fastener Type | Common Size | Location |
|---|---|---|
| Hex Bolts | 8mm, 10mm | Fender edge, inside wheel well |
| Torx Screws | T25, T30 | Near hood and grill |
| Plastic Clips | Push-pin | Fender liner, lower edge |
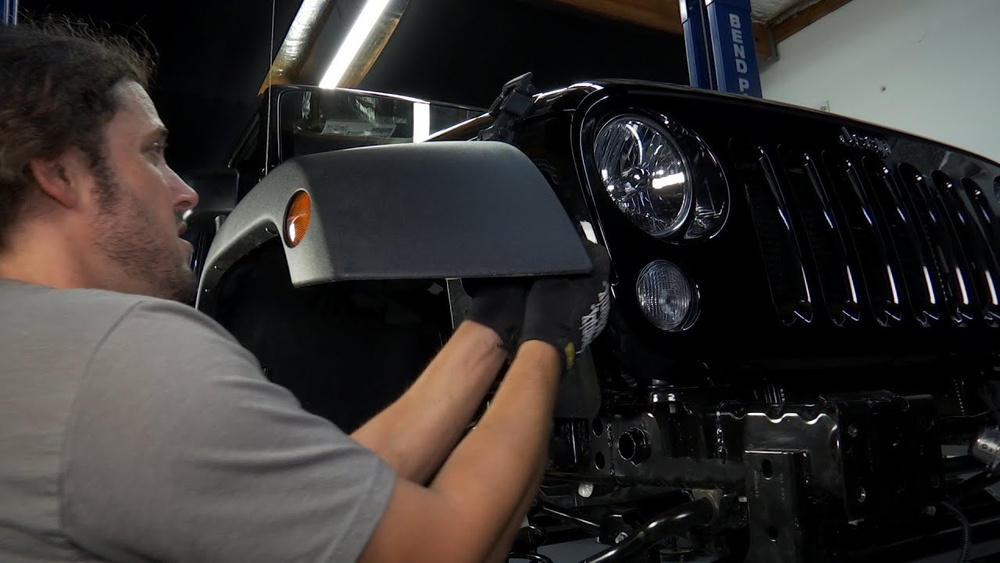
4. Gently Pull The Fender Away
Once all bolts and clips are out, carefully pull the fender away from the Jeep.
- Start at the top and work your way down.
- If you feel resistance, double-check for missed fasteners.
- Be gentle to avoid bending the fender or scratching paint.
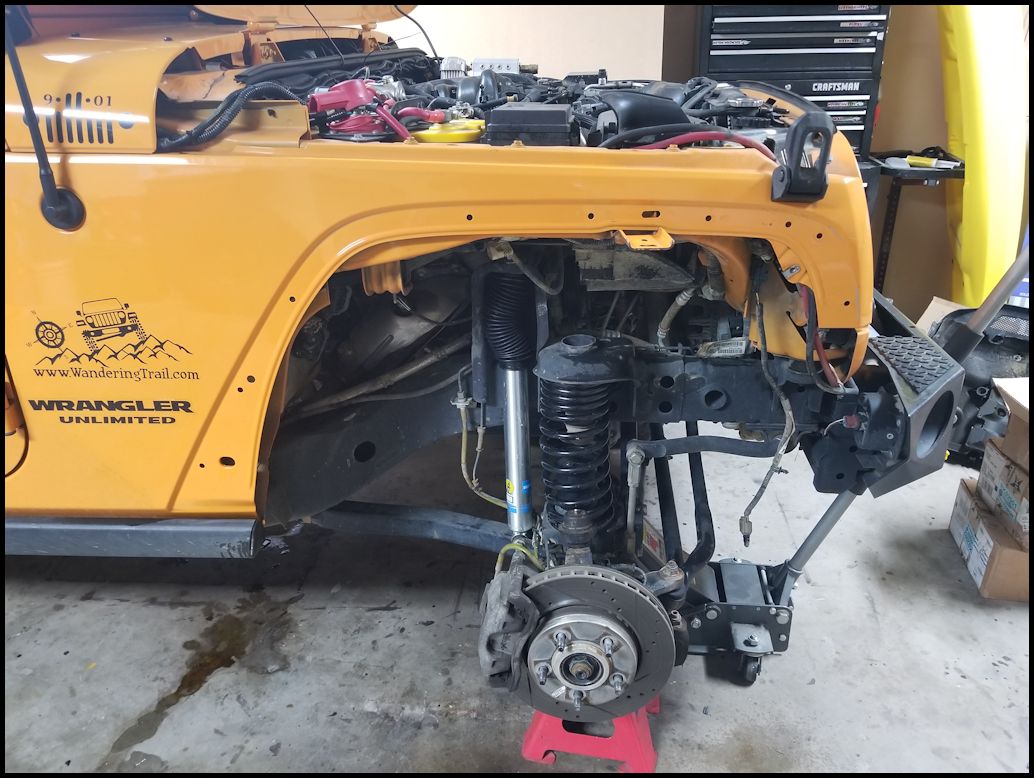
5. Inspect And Clean
With the fender off, take time to inspect the area.
- Check for rust or hidden damage.
- Clean any dirt or mud. This is the best time to touch up paint or apply rust protection.
Common Mistakes To Avoid
Some mistakes can lead to costly repairs. Here’s how to avoid them:
- Forcing stubborn clips. If a clip won’t budge, use a trim tool, not a screwdriver, to avoid cracking the fender.
- Losing hardware. Bag and label all clips and screws for easy reinstallation.
- Forgetting the side marker light. Pulling the fender without disconnecting the wiring can damage the harness.
- Not supporting the fender. Large fenders can fall and chip paint.
Reinstalling Or Replacing Fenders
After removing the fender, you may want to install a new one or put the original back.
- Align the fender with the mounting holes.
- Hand-tighten bolts before fully tightening.
- Reconnect the marker light wiring.
- Double-check that all clips and bolts are secure.
- Test the marker light before finishing.
| Step | Estimated Time | Difficulty |
|---|---|---|
| Remove Fender | 30-60 minutes | Moderate |
| Install Fender | 30-45 minutes | Easy-Moderate |
Practical Tips For A Smooth Process
- Spray bolts with penetrating oil if they are rusty.
- Keep all hardware organized in labeled bags.
- Use masking tape along the fender edge to protect paint during removal.
- If upgrading, compare aftermarket fender fitment with the old one before installation.
- After finishing, drive slowly at first and listen for any rattles.
When To Seek Professional Help
If you encounter seized bolts, severe rust, or electrical issues, it’s wise to get help from a mechanic. Some insurance policies may also require professional repairs for accident damage.
For more in-depth information about Jeep Wrangler modifications, check the official Jeep Wrangler site.
Frequently Asked Questions
How Long Does It Take To Remove Jeep Wrangler Fenders?
Most people can remove one fender in 30 to 60 minutes if they have the right tools. Rusty bolts or hidden clips can make the process longer.
Do I Need To Remove The Wheels?
You do not have to remove the wheels, but taking them off can give you more space to work, especially if you have large tires.
Will Removing The Fender Affect My Jeep’s Warranty?
If you damage parts during removal, it could affect your warranty. Always check with your dealer before making modifications.
Can I Reuse The Original Clips And Bolts?
Some plastic clips may break during removal. It’s smart to buy extra clips before starting, as they are cheap and easy to replace.
Is It Legal To Drive Without Fenders?
Laws vary by state. In many places, you must have fenders to drive on public roads. Check your local regulations before hitting the road without them.
Removing fenders from your Jeep Wrangler is a satisfying project if done with care. By following these steps and tips, you’ll avoid damage and keep your Jeep looking great. Remember, preparation and patience are key. Enjoy your Jeep customization journey!