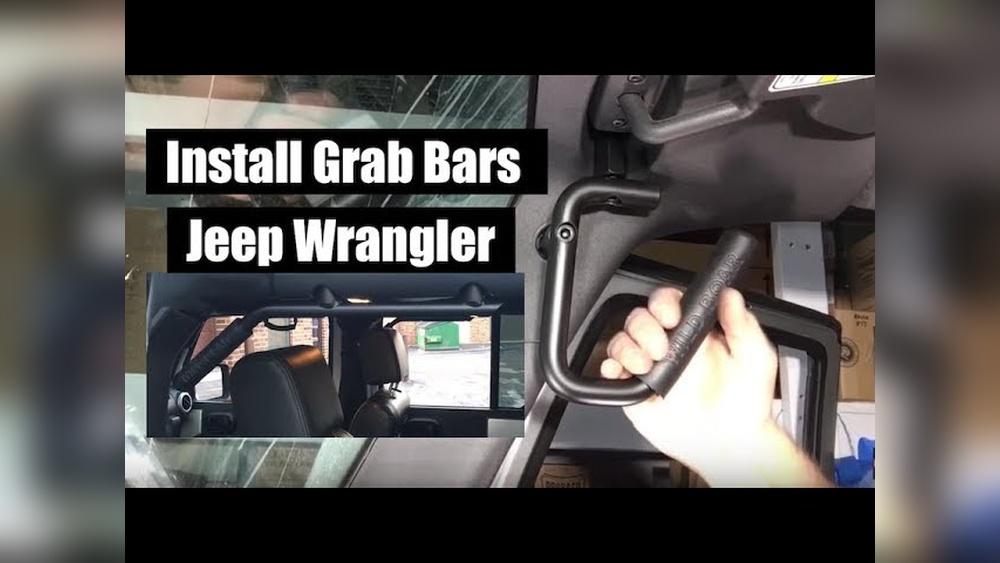
If you drive a Jeep Wrangler, you know it’s built for adventure. But climbing in and out—especially with a lift kit—can be tough. That’s where grab handles help. They give you extra support, make entry and exit easier, and add a rugged touch to your interior. Installing grab handles is one of the simplest upgrades you can do yourself, even with basic tools. Whether you want them for off-roading or daily driving, adding grab handles to your Jeep Wrangler is a practical DIY project.
Types Of Grab Handles For Jeep Wrangler
Before you start, it’s important to choose the right grab handles for your Jeep. There are two main types:
| Type | Main Material | Mounting Location | Pros | Cons |
|---|---|---|---|---|
| Paracord/Soft Handles | Nylon or Paracord | Roll bar | Easy to install, affordable | Less sturdy, can loosen over time |
| Solid/Metal Handles | Steel or Aluminum | Windshield frame or roll bar | Very strong, long-lasting | More expensive, harder to install |
Soft handles are a great choice if you want something quick and cheap. They’re also easy to move or remove. For more permanent support, solid handles are better, especially for lifted Jeeps or frequent off-road use.
Tools And Materials Needed
Gather your tools before starting. For most grab handle installations, you’ll need:
- Grab handles (make sure they fit your Wrangler’s model year)
- Socket wrench set (most common: 10mm, 13mm sockets)
- Torx bit set (T40, T50 for some models)
- Screwdriver (Phillips or flathead, based on handle type)
- Thread locker (like Loctite for metal handles)
- Step stool (for better reach)
- Safety glasses
Some grab handles include all hardware, but check your kit before you begin.

Step-by-step Installation Guide
1. Read Manufacturer’s Instructions
Always check the instructions that come with your grab handles. Jeep Wranglers have different mounts depending on the year (JK, JL, or Gladiator), so hardware and steps can vary.
2. Remove Factory Bolts
For most solid grab handles, you’ll use factory bolt holes near the windshield or roll bar. Locate the bolts (usually above the door frame). Use your socket wrench or Torx bit to remove them. Keep these bolts—you’ll reuse them.
3. Position The Grab Handle
Hold the grab handle in place. Align it with the bolt holes. You may need a helper to hold the handle while you start threading the bolts.
4. Attach The Handle
Insert the bolts through the handle mounting holes and into the Jeep frame. Use a small amount of thread locker to keep bolts from vibrating loose, especially if you off-road. Tighten bolts evenly, but don’t over-tighten—you could strip the threads.
5. Check Alignment And Tightness
Once both bolts are in, check the handle’s position. Make sure it sits flush and feels sturdy. Give it a gentle pull to test.
6. Repeat For Each Door
If you’re installing four handles, repeat the process for every door. Most people install at least two in the front.
7. For Paracord/soft Handles
Soft handles usually loop around the roll bar and attach with hook-and-loop straps. Simply wrap the handle around the bar, pull it tight, and fasten the straps. Make sure it doesn’t slide or twist.
Common Mistakes To Avoid
Many beginners rush and make small errors. Here’s what to watch out for:
- Over-tightening bolts: This can damage the threads in your Jeep frame.
- Not using thread locker: Vibrations can loosen bolts over time.
- Wrong placement: Some handles only fit certain years or models.
- Mixing up bolts: Factory bolts may be different lengths; keep track of each one.
- Forgetting to test: Always pull on the handle gently before driving.
Comparison: Metal Vs Soft Grab Handles
If you’re unsure which type to buy, this quick comparison can help:
| Feature | Metal Handles | Soft Handles |
|---|---|---|
| Cost | Higher ($40–$100/pair) | Lower ($10–$30/pair) |
| Installation Time | 15–30 minutes/door | 5–10 minutes/door |
| Durability | Very high | Medium |
| Weight Capacity | 300+ lbs | 100–150 lbs |
| Look | Factory or rugged | Sporty or casual |
Non-obvious insight: If your Jeep has airbags in the roll bar area (common in newer models), metal handles may require special brackets. Always check compatibility before you buy.
Practical Tips For A Smooth Installation
- Work in daylight so you can see all bolts and alignment points clearly.
- Place a towel on your seat to catch dropped bolts or tools.
- If you’re installing in cold weather, warm up the Jeep first—plastic trim can crack easily.
- For higher lifted Jeeps, install the handles at a slight angle for easier reach.
- Test each handle before moving to the next. A loose handle can be dangerous.

Why Install Grab Handles?
Besides safety, grab handles offer more:
- Easier access for kids, seniors, or shorter passengers
- Stable grip during off-roading or rough roads
- Less wear on your seat and door from climbing in and out
Some users even mount small accessories (like flashlights) to their grab handles, but always check weight limits.
Frequently Asked Questions
How Long Does It Take To Install Grab Handles?
Most grab handles take about 10–20 minutes each to install. If you’re new to DIY, plan for about an hour to do both front doors.
Will Installing Grab Handles Affect My Airbags?
For most models, grab handles do not affect airbags. However, newer Wranglers with side curtain airbags may need special brackets. Always check your owner’s manual or talk to your dealer for safety.
Can I Use Factory Bolts, Or Do I Need Special Hardware?
Many grab handles reuse the factory bolts. Some heavy-duty handles come with longer or stronger bolts. Follow your kit’s instructions, and never force a bolt that doesn’t fit easily.
Do Grab Handles Fit All Jeep Wrangler Models?
No. Fitment depends on the year and type (JK, JL, TJ, Gladiator, etc. ). Always check product details for compatibility before buying.
Where Can I Find Quality Grab Handles?
You can find a wide selection at auto parts stores, Jeep specialty shops, and online retailers. For official specifications, the Mopar Accessories site is a reliable resource.
Adding grab handles to your Jeep Wrangler is a quick upgrade with big benefits. With the right tools and a little care, you’ll boost comfort, safety, and style for every ride—on or off the road.