The serpentine belt is a vital component in your 2017 Jeep Patriot, driving many essential accessories like the alternator, power steering pump, and air conditioning compressor. Understanding its routing and maintenance is key to keeping your vehicle running smoothly.
This article provides a comprehensive guide to the 2017 Jeep Patriot serpentine belt, including its function, common issues, replacement steps, and a detailed diagram to help you visualize its path.
A properly functioning serpentine belt ensures that your vehicle’s accessories receive the power they need to operate. When this belt wears out or fails, it can lead to a cascade of problems, from a dead battery to loss of power steering and a non-functional air conditioner.
Regular inspection and timely replacement are crucial for preventing inconvenient breakdowns and more costly repairs down the line. This guide aims to demystify the serpentine belt system for your 2017 Jeep Patriot, making maintenance more accessible.
Understanding The Serpentine Belt System
The serpentine belt, also known as an accessory drive belt, is a single, continuous belt that snakes around multiple pulleys to drive various accessories in the engine compartment. Unlike older vehicles that used multiple V-belts, the serpentine belt system is more efficient and compact.
For the 2017 Jeep Patriot, this belt is engineered to provide reliable power to critical systems.
Function Of The Serpentine Belt
The primary role of the serpentine belt is to transfer rotational energy from the engine’s crankshaft to other accessory components. Each pulley the belt wraps around is connected to a specific system:
- Alternator Pulley: The alternator generates electricity to charge the battery and power the vehicle’s electrical systems. Without the belt, the battery would quickly drain, and the car would stop running.
- Power Steering Pump Pulley: This system provides hydraulic assistance to make steering easier. A broken belt means you’ll lose power steering, making the steering wheel very heavy.
- Water Pump Pulley: The water pump circulates coolant through the engine to prevent overheating. A non-functioning water pump can lead to severe engine damage.
- Air Conditioning (A/C) Compressor Pulley: This engages the A/C compressor, which is responsible for cooling the cabin. While not essential for the vehicle’s operation, it significantly impacts comfort.
- Tensioner Pulley: This pulley, often spring-loaded or hydraulic, maintains the correct tension on the serpentine belt, ensuring it doesn’t slip.
- Idler Pulley(s): These pulleys help guide the belt along its path and can also help maintain tension or provide clearance for other components.
Common Serpentine Belt Issues
Over time, serpentine belts are subjected to significant stress, heat, and friction, leading to wear and tear. Several common issues can arise:
- Cracking and Glazing: The rubber material of the belt can dry out, causing visible cracks on the ribbed surface. Glazing occurs when the belt’s surface becomes smooth and shiny, indicating a loss of grip.
- Fraying and Delamination: The edges of the belt can start to fray, or layers of the belt can begin to separate.
- Squealing Noises: A loud squealing sound, especially upon starting the engine or accelerating, often indicates a loose belt slipping on the pulleys. This can be due to a worn belt, a failing tensioner, or misaligned pulleys.
- Vibration: A worn or damaged belt can sometimes cause noticeable vibration in the engine compartment.
- Sudden Breakage: The most severe issue is a complete belt failure. This will immediately cause all accessories driven by the belt to stop working, leading to a rapid loss of functionality and potential engine damage if the water pump is affected.
Signs Of A Failing Serpentine Belt
Paying attention to your vehicle’s signals is crucial for early detection of belt problems. Look out for:
- Audible Noises: Squealing, chirping, or grinding sounds from the engine bay.
- Visual Wear: Cracks, fraying, or a shiny, smooth surface on the belt.
- Accessory Malfunction: Power steering becoming difficult, the battery warning light illuminating, or the A/C blowing warm air.
- Stalling: In severe cases, a broken belt can affect engine performance enough to cause stalling.
2017 Jeep Patriot Serpentine Belt Diagram And Routing
Visualizing the path of the serpentine belt around the pulleys is essential for understanding its operation and for replacement. The routing can vary slightly based on the specific engine configuration, but for most 2017 Jeep Patriots, the belt follows a specific path.
The 2.4L engine, common in many 2017 Jeep Patriots, typically involves the following pulleys: crankshaft, alternator, power steering pump, water pump, A/C compressor, tensioner, and one or more idler pulleys.
Detailed Belt Routing Explanation
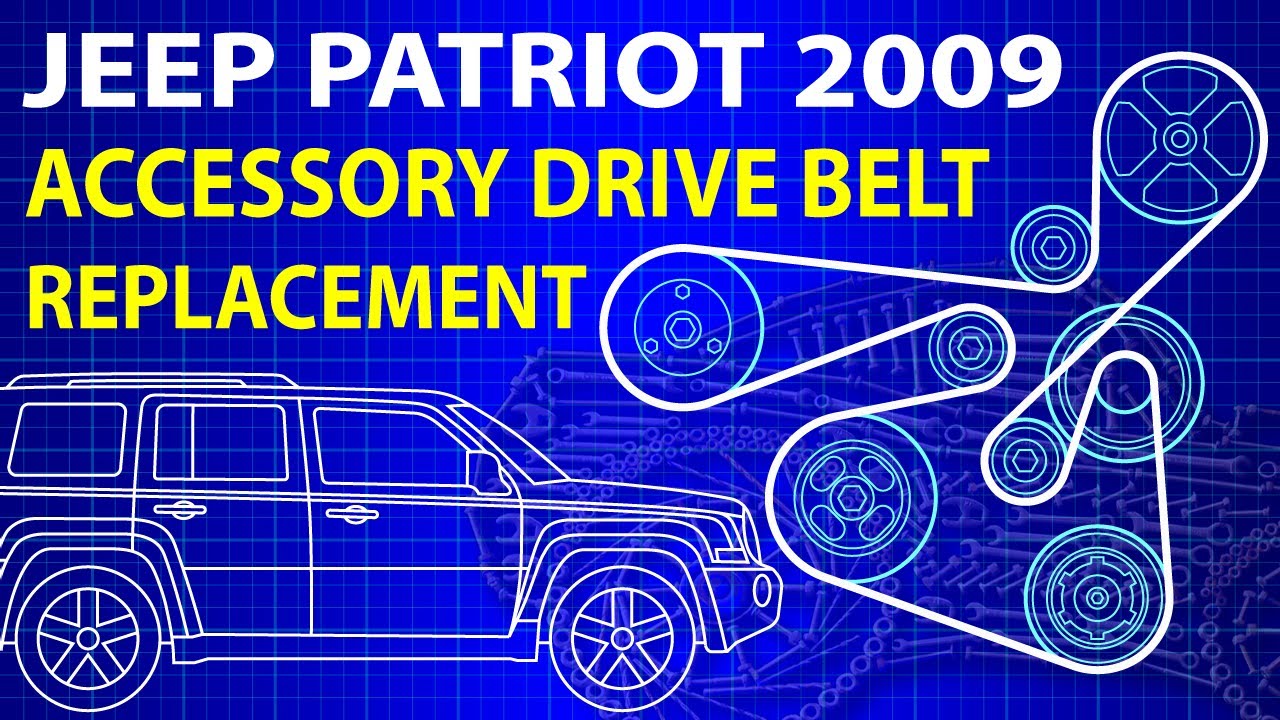
To illustrate the path, imagine the belt starting at the crankshaft pulley (the largest pulley at the bottom front of the engine). From there, it typically snakes upwards to the alternator pulley. Then, it might loop down to the power steering pump pulley, followed by a run to the water pump pulley. After the water pump, it will likely go to the A/C compressor pulley, and finally, it will wrap around the tensioner pulley before returning to the crankshaft pulley. An idler pulley might be placed strategically to ensure proper tension and contact with all accessory pulleys.
Pro Tip: Always refer to a vehicle-specific diagram for your exact model and engine. Sometimes, slight variations exist even within the same model year.
Visualizing The Path: A Generic Diagram
While an exact diagram requires referencing a service manual or a specific illustration for the 2017 Jeep Patriot, we can describe the general layout.
(Please note: As a text-based AI, I cannot directly display an image. However, the description below should allow you to visualize or find a suitable diagram online.)
Imagine looking at the front of the engine. The crankshaft pulley is at the bottom center. The belt comes off it, goes up and around the alternator pulley (usually on the passenger side of the engine). Then, it might curve down and around the power steering pump pulley (location can vary). Next, it heads towards the center or driver’s side for the water pump pulley. After that, it loops to the A/C compressor pulley (typically lower down). Finally, the belt makes contact with the tensioner pulley (often spring-loaded, located near the other pulleys) and then returns to the crankshaft pulley. There might be an idler pulley positioned to guide the belt smoothly.
Key Pulleys to Identify:
- Crankshaft Pulley
- Alternator Pulley
- Power Steering Pump Pulley
- Water Pump Pulley
- A/C Compressor Pulley
- Tensioner Pulley
- Idler Pulley(s)
When replacing the belt, you’ll need to release tension on the tensioner pulley, slip the old belt off, route the new belt correctly around all the pulleys, and then release the tensioner to tighten the new belt.
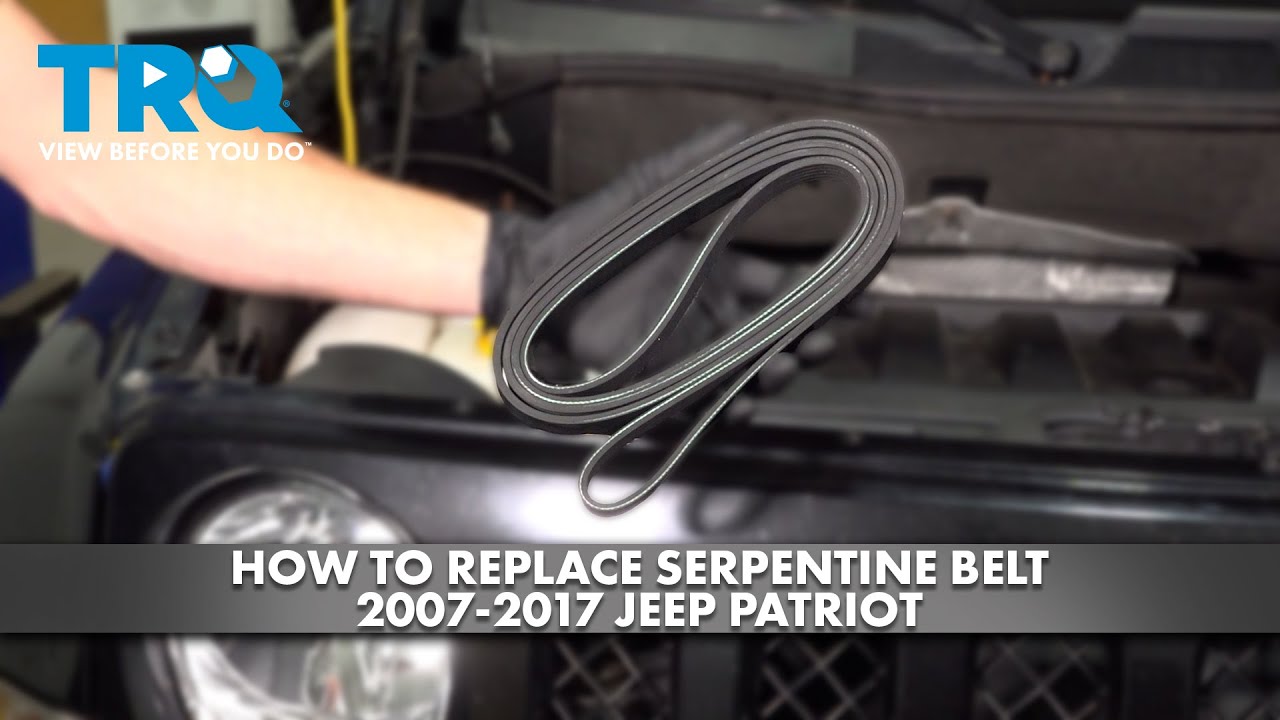
Serpentine Belt Replacement Guide For 2017 Jeep Patriot
Replacing a serpentine belt is a task many DIY enthusiasts can tackle with the right tools and a clear understanding of the process. However, if you are uncomfortable working on your vehicle, it’s always best to consult a professional mechanic.
Tools And Materials Needed
Before you begin, gather the necessary tools and parts:
- New Serpentine Belt: Ensure it’s the correct part number for your 2017 Jeep Patriot.
- Socket Wrench Set: You’ll need specific socket sizes, often metric.
- Serpentine Belt Tool Kit (Recommended): This specialized tool makes releasing the tensioner much easier and safer, especially in tight engine bays. It usually includes various pry bars and adapters.
- Pry Bar: May be needed if a specialized tool isn’t available, but use with extreme caution.
- Gloves: To protect your hands.
- Safety Glasses: Essential eye protection.
- Flashlight or Work Light: For better visibility.
- Vehicle Service Manual (Optional but highly recommended): Provides specific torque specs and detailed procedures.
Step-by-step Replacement Process
- Safety First: Park your Jeep Patriot on a level surface, engage the parking brake, and ensure the engine is completely cool. Disconnect the negative battery terminal to prevent accidental electrical shorts.
- Locate the Serpentine Belt and Tensioner: Open the hood and identify the serpentine belt and all the pulleys it wraps around. Locate the tensioner pulley. This is usually a spring-loaded pulley that provides tension to the belt.
- Release Belt Tension: This is the most critical step.
- Using a Serpentine Belt Tool: Attach the appropriate socket or pry bar end of the tool to the designated bolt head or square hole on the tensioner pulley assembly. Apply steady pressure in the direction that releases tension (this usually means rotating the tensioner against its spring). This will loosen the belt.
- Without a Specialized Tool (Use Caution): You might be able to use a long-handled ratchet or breaker bar on the tensioner’s bolt. Carefully apply pressure to rotate the tensioner and loosen the belt. Be extremely careful not to slip, as this can damage components or cause injury.
- Remove the Old Belt: Once the tension is released, carefully slip the old belt off one of the pulleys, usually the easiest one to access. Then, slowly release the tensioner back to its resting position. You can now remove the old belt completely from the engine bay.
- Route the New Belt: Consult your serpentine belt diagram (either printed in your manual or a clear picture you took beforehand). Carefully route the new belt around all the pulleys according to the diagram. Ensure the ribbed side of the belt engages with the ribbed pulleys and the smooth side runs on the smooth pulleys. Double-check that the belt is seated correctly on every pulley.
- Apply Tension to the New Belt: Once the belt is correctly routed, use your serpentine belt tool or ratchet again. Apply pressure to the tensioner to release tension, and slip the belt onto the final pulley (often the crankshaft pulley).
- Final Check: Carefully release the tensioner. The new belt should now be taut. Inspect the belt on every pulley to ensure it’s seated correctly and not crooked. Make sure no part of the belt is rubbing against any stationary objects.
- Reconnect and Start: Reconnect the negative battery terminal. Start the engine and listen for any unusual noises. Check that all accessories (alternator, power steering, A/C) are functioning correctly. Let the engine run for a few minutes, then shut it off and re-inspect the belt and pulleys for proper seating.
Warning: If you hear any squealing or grinding noises after starting, shut off the engine immediately and re-check the belt installation. An improperly installed belt can cause damage or fail prematurely.
Factors Affecting Serpentine Belt Lifespan
Several factors influence how long your serpentine belt will last. Understanding these can help you anticipate replacement needs and prolong the belt’s life.
Environmental And Driving Conditions
- Heat: Prolonged exposure to high engine temperatures can accelerate rubber degradation. Vehicles driven in hot climates or subjected to heavy towing may experience faster belt wear.
- Moisture and Contaminants: Exposure to oil, coolant leaks, or excessive road grime can cause the belt material to break down, leading to slippage and premature failure.
- Driving Habits: Frequent hard acceleration or prolonged idling can put extra stress on the belt system.
Component Health
- Pulley Alignment: Misaligned pulleys can cause the belt to run at an angle, leading to uneven wear, fraying, and premature failure.
- Bearing Issues: Worn bearings in the alternator, power steering pump, water pump, or idler pulleys can create drag or resistance, causing the belt to slip or overheat. A seized pulley bearing will often cause the belt to shred or break very quickly.
- Tensioner Functionality: A weak or failing tensioner will not keep the belt adequately tight, leading to slippage, noise, and accelerated wear. Conversely, an overly tight belt (due to a faulty tensioner or incorrect installation) can put excessive strain on the belt and accessory bearings.
Belt Quality And Material
- OEM vs. Aftermarket: Original Equipment Manufacturer (OEM) belts are generally designed to meet specific performance and durability standards. High-quality aftermarket belts can also be excellent, but it’s wise to choose reputable brands. Lower-quality belts may not withstand the rigors of daily driving as well.
- Belt Type: Modern serpentine belts are typically made from EPDM (ethylene propylene diene monomer) rubber, known for its heat and oil resistance. Some older or less durable belts might use other materials that degrade faster.
When To Replace Your Serpentine Belt
There isn’t a fixed mileage interval for serpentine belt replacement that applies to every vehicle. However, manufacturers often provide recommendations, and visual inspection is key.
Recommended Replacement Intervals And Inspections
- Manufacturer Recommendations: Check your 2017 Jeep Patriot owner’s manual for any specified replacement intervals. These are often around 60,000 to 100,000 miles, but this can vary.
- Visual Inspection: Most mechanics recommend inspecting the serpentine belt at every oil change. Look for any signs of wear mentioned earlier: cracks, fraying, glazing, or contamination.
- Age: Even if the mileage is low, the rubber in the belt can degrade over time due to exposure to heat and elements. If your belt is more than 5-7 years old, consider replacing it proactively, even if it looks okay.
Symptoms That Mandate Immediate Replacement
Some symptoms indicate that the belt needs replacement immediately to prevent further damage or being stranded:
- Loud Squealing/Chirping: Especially if it’s persistent and occurs during operation.
- Visible Tears or Missing Chunks: Any significant damage to the belt’s surface.
- Belt Shredding: If you see pieces of rubber debris under the hood, the belt is likely failing rapidly.
- Complete Loss of Accessory Function: If your battery light comes on, power steering is gone, or the engine is overheating, the belt has likely broken or slipped off.
Comparing Serpentine Belt Replacement Costs
The cost of replacing a serpentine belt can vary significantly depending on whether you opt for a DIY approach or professional service, and the specific parts used.
Diy Vs. Professional Replacement Costs
- DIY: The primary cost for a DIY replacement is the price of the new belt itself. A quality serpentine belt for a 2017 Jeep Patriot typically ranges from **$25