Understanding the 2016 Jeep Cherokee belt diagram is crucial for any owner who wants to perform maintenance or diagnose issues with their vehicle's engine. This diagram shows the path of the serpentine belt, which powers various essential components like the alternator, power steering pump, air conditioning compressor, and water pump.
A properly routed belt ensures these systems function correctly, keeping your engine cool and your vehicle running smoothly. If the belt is misaligned, worn, or broken, it can lead to a cascade of problems, from a dead battery to overheating.
The 2016 Jeep Cherokee came with a few different engine options, and each might have a slightly different belt routing. The most common engines for this model year are the 2.
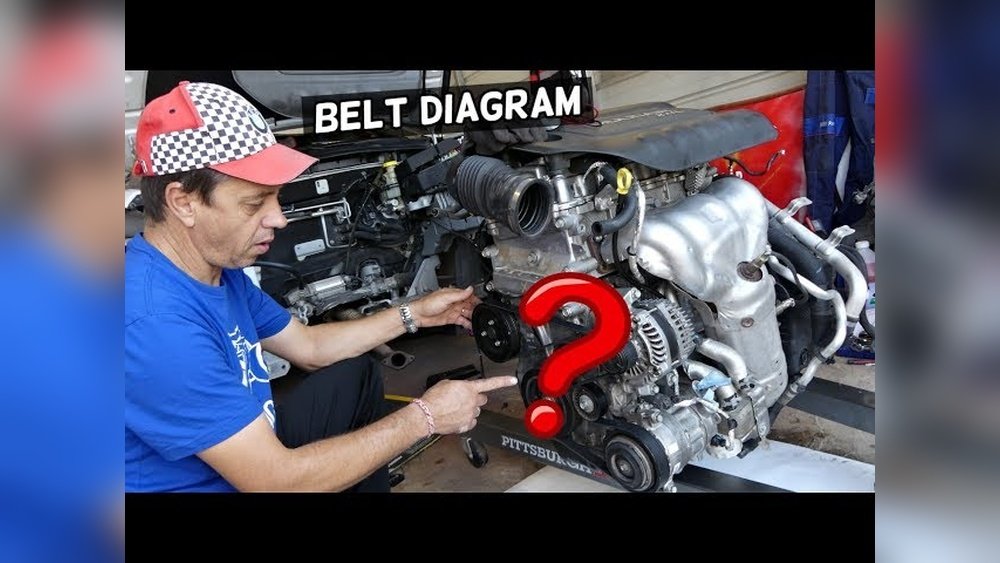
4L Tigershark inline-4 and the 3. 2L Pentastar V6.
While the general principle of a serpentine belt remains the same, the specific layout of pulleys can vary between these engines. This article will guide you through understanding these diagrams, identifying common issues, and knowing when to seek professional help.
We will break down the typical components involved and explain the importance of each.
Understanding Serpentine Belt Systems
A serpentine belt is a single, continuous belt that drives multiple accessories in your engine. Unlike older vehicles that used multiple V-belts, the serpentine belt system is more efficient and uses less space.
It's called "serpentine" because its path snakes around various pulleys.
The tensioner pulley keeps the belt at the correct tightness, ensuring it grips the pulleys without slipping. If the tensioner fails, the belt can become loose, leading to noise and loss of accessory function.
The main components driven by the serpentine belt include:
- Alternator: Generates electricity to charge the battery and power the vehicle’s electrical systems.
- Power Steering Pump: Provides hydraulic pressure to make steering easier. (Note: Some 2016 Cherokee models use electric power steering, which does not have a belt-driven pump).
- Air Conditioning (A/C) Compressor: Compresses refrigerant to cool the cabin.
- Water Pump: Circulates coolant through the engine to prevent overheating.
- Crankshaft Pulley: Driven directly by the engine’s crankshaft, this is usually the largest pulley and the starting point of the belt’s path.
- Idler Pulleys: These pulleys help guide the belt along its path and maintain proper tension.
The 2016 Jeep Cherokee belt diagram is essentially a map of how the belt winds around these pulleys. Without the belt spinning these components, your car’s essential functions would cease.
2016 Jeep Cherokee 2.4l Engine Belt Diagram
The 2. 4L Tigershark engine is a common choice for the 2016 Jeep Cherokee, known for its fuel efficiency.
The serpentine belt on this engine typically routes around six pulleys. Understanding this specific layout is key for maintenance.
Here’s a general description of the serpentine belt path for the 2. 4L engine.
Remember that visual diagrams are always best for precise routing, but this description will help you visualize the system.
The belt usually starts at the crankshaft pulley at the bottom of the engine. From there, it snakes upwards and around the tensioner pulley, which is spring-loaded to maintain the correct belt tension. Next, it typically routes to the alternator pulley, then down to the water pump pulley. After the water pump, it might go to an idler pulley to help guide it, then to the A/C compressor pulley (if equipped), and finally back to the crankshaft pulley.
Pro Tip: Always ensure the belt is routed correctly. An incorrectly installed belt can slip, damage pulleys, or even jump off entirely, causing immediate loss of power to essential systems.
Key Components And Their Role (2.4l Engine)
- Crankshaft Pulley: This is the main driver, connected directly to the engine’s rotating crankshaft. It’s usually the largest pulley.
- Automatic Tensioner Pulley: This pulley is on a spring-loaded arm. It automatically adjusts to keep the belt tight as it expands and contracts with temperature changes or wears down. You can often identify it by its spring mechanism.
- Alternator Pulley: This pulley drives the alternator, which is responsible for charging the battery and powering the car’s electrical needs.
- Water Pump Pulley: Connected to the water pump, this pulley circulates coolant through the engine, radiator, and heater core to maintain optimal operating temperature.
- A/C Compressor Pulley: This pulley engages the air conditioning compressor. When the A/C is off, the pulley might still spin freely (via an internal clutch), or the belt might bypass it entirely on some systems.
- Idler Pulley(s): These smooth pulleys are used to redirect the belt’s path, ensuring it makes proper contact with all the driven pulleys. They don’t drive any accessories directly.
Identifying these components on your engine will help you follow the belt’s path as shown in a visual diagram.

Credit: www.moparpartsgiant.com
2016 Jeep Cherokee 3.2l V6 Engine Belt Diagram
The 3. 2L Pentastar V6 engine offers more power and is also found in the 2016 Jeep Cherokee.
This engine also uses a serpentine belt, but its layout of pulleys can differ from the 4-cylinder engine. The V6 configuration might involve a slightly longer belt or a different arrangement due to the engine's block and accessory placement.
The general path is similar: starting from the crankshaft, going around the tensioner, and then routing through the alternator, A/C compressor, water pump, and any idler pulleys before returning to the crankshaft. However, the specific order and angles will vary. For instance, the V6 might have an additional idler pulley or a different placement for the power steering pump if it’s belt-driven on this specific configuration.
Example: When replacing the belt on the 3.2L V6, you might notice the belt has to make more turns or navigate tighter spaces compared to the 2.4L, requiring careful attention to the diagram to avoid mistakes.
Components Specific To Or Different On The 3.2l V6
- Crankshaft Pulley: Similar function to the 2.4L, but sized for the V6.
- Automatic Tensioner: Essential for maintaining belt tension, especially with the added load of a V6 engine’s accessories.
- Alternator Pulley: Drives the alternator.
- A/C Compressor Pulley: Engages the A/C system.
- Water Pump Pulley: Circulates coolant.
- Idler Pulleys: The V6 might utilize one or two idler pulleys to ensure proper belt wrap around the various accessory pulleys.
- Power Steering Pump Pulley (if applicable): On some older V6 configurations, a belt-driven power steering pump might be present. However, many 2016 models, including the Cherokee, transitioned to electric power steering, meaning this pulley might not be present or driven by the belt on your specific vehicle. Always verify your vehicle’s configuration.
The exact number and placement of pulleys can sometimes vary based on optional equipment or specific production runs. This is why consulting a detailed diagram for your exact 2016 Jeep Cherokee model and engine is paramount.
Common Serpentine Belt Issues And Symptoms
Serpentine belts are designed to last for many miles, but they are wear items and can fail over time. Recognizing the symptoms of a failing belt or related component can save you from a breakdown.
Here are common issues and their signs:
- Worn or Cracked Belt: Over time, the rubber material of the belt degrades due to heat, friction, and age. This can lead to visible cracks, fraying, or glazing (a shiny, smooth surface) on the belt’s ribbed side.
- Symptom: Squealing noise, especially on startup or when accelerating. This is often caused by the belt slipping on the pulleys due to wear or contamination.
- Loose Belt: If the tensioner fails or the belt stretches beyond its limits, it can become loose.
- Symptom: More pronounced squealing or chirping noises. Loss of power to accessories like the alternator (battery warning light may illuminate) or power steering (heavy steering).
- Misaligned Pulleys: If a pulley is bent, worn, or improperly installed, it can cause the belt to run off-center.
- Symptom: The belt may appear to be riding off the edge of a pulley, or you might see rubber dust around the pulleys. This can lead to premature belt wear and potential failure.
- Worn Tensioner or Idler Pulley Bearing: The bearings inside the tensioner or idler pulleys can wear out.
- Symptom: A grinding, rumbling, or whining noise that changes with engine RPM. Sometimes, a failing tensioner can cause the belt to flap or vibrate excessively.
- Failed Accessory Bearing: If a bearing in the alternator, A/C compressor, or water pump seizes, it can put immense stress on the serpentine belt.
- Symptom: A loud grinding or squealing noise, often accompanied by the belt suddenly breaking or being thrown off. The accessory will stop working immediately.
Warning: A broken serpentine belt means your vehicle will lose power to critical systems almost instantly. The alternator stops charging, the water pump stops circulating coolant, and power steering assistance is lost. Driveability is severely impacted, and the engine can overheat rapidly. If your belt breaks, pull over safely as soon as possible.

Credit: www.jeepcommander.com
How To Read A Serpentine Belt Diagram
A serpentine belt diagram is a visual representation showing the correct path the belt must follow around all the pulleys. These diagrams are essential for DIY mechanics and even professional technicians to ensure correct installation.
When you look at a diagram, you’ll see symbols representing each pulley and lines indicating the belt’s path. The lines often show the ribbed side and the flat side of the belt, though most diagrams focus on the path itself.
Here’s how to interpret one:
- Identify All Pulleys: The diagram will label or visually represent each pulley (crankshaft, alternator, A/C, water pump, tensioner, idlers).
- Trace the Path: Start at a designated point, usually the crankshaft pulley. Follow the line representing the belt as it wraps around each subsequent pulley.
- Note the Direction: Pay attention to the direction the belt travels around each pulley. Some pulleys might be smooth on one side and ribbed on the other, and the diagram shows which side of the belt contacts which pulley.
- Locate the Tensioner: The diagram will show how the belt interacts with the tensioner pulley. This is often the point where the belt is last routed before returning to the crankshaft, or where it’s initially routed to apply tension.
- Consider Engine Specifics: As mentioned, the 2.4L and 3.2L V6 engines will have different diagrams. Ensure you are using the correct one for your specific engine.
Where to Find Diagrams:
You can typically find accurate belt diagrams in several places:
- Under the Hood: Many vehicles have a diagram sticker located on the underside of the hood or on the radiator support.
- Owner’s Manual: While less common for detailed diagrams, some manuals may offer basic routing information.
- Service Manuals: Professional repair manuals (like Chilton or Haynes) or factory service manuals contain highly detailed diagrams.
- Online Automotive Forums and Parts Websites: Many enthusiast forums and auto parts retailers provide diagrams for specific vehicle models.
In my experience, the sticker under the hood is the most convenient and often overlooked resource. Always check there first!
Replacing The Serpentine Belt: A Step-by-step Guide
Replacing a serpentine belt is a common maintenance task that many car owners can tackle with basic tools. However, it requires careful attention to detail.
Tools and Materials:
- New serpentine belt (ensure it’s the correct part number for your 2016 Jeep Cherokee and engine)
- Serpentine belt tool kit (or a long-handled ratchet/breaker bar with the correct socket size for the tensioner)
- Gloves
- Safety glasses
- Flashlight
- Pen and paper (or a smartphone camera) to sketch/photograph the belt path.
Steps:
- Locate the Belt and Tensioner: Open the hood and identify the serpentine belt and the automatic tensioner pulley. The tensioner is usually a spring-loaded arm with a pulley on the end.
- Document the Belt Path: Before removing the old belt, take a clear picture or draw a diagram of its current routing. This is your most important reference. Note how it wraps around each pulley.
- Release Belt Tension: Attach the appropriate socket or tool to the designated bolt head or hex shape on the tensioner arm. Slowly rotate the tensioner arm to release the tension on the belt. This will allow you to slip the belt off one of the pulleys.
- Note: The direction to rotate the tensioner varies by vehicle. You are essentially trying to move the tensioner pulley away from the belt.
- Remove the Old Belt: Once the tension is released, carefully slip the old belt off one of the pulleys, usually the easiest one to access, like the alternator or an idler pulley. Then, slowly release the tensioner back to its resting position. Remove the old belt completely from the engine bay.
- Inspect Pulleys: While the belt is off, take this opportunity to inspect all the pulleys. Spin each one by hand (except the crankshaft and water pump, which won’t spin freely). They should rotate smoothly and quietly. If you hear grinding, rumbling, or feel excessive play, the pulley bearing may be failing and should be replaced. Also, check that pulleys are aligned and not wobbling.
- Install the New Belt: Refer to your picture or diagram. Drape the new belt around all the pulleys except for the one you used to remove the old belt.
- Apply Tension and Seat the Belt: Use your tool to rotate the tensioner arm again to release tension. Slip the belt onto the final pulley. Ensure the belt is correctly seated in the grooves of all the ribbed pulleys.
- Release Tensioner and Verify: Slowly release the tensioner arm, allowing it to apply tension to the new belt. Double-check that the belt is fully seated on all pulleys and that its path matches your diagram exactly. Ensure no part of the belt is riding on the edge of a pulley.
- Start the Engine: Start the engine briefly. Listen for any unusual noises like squealing or grinding. Check that all accessories appear to be working (e.g., A/C