Understanding the 2012 Jeep Patriot 2. 4 belt diagram is essential for any owner looking to perform maintenance or diagnose issues with their vehicle's serpentine belt system.
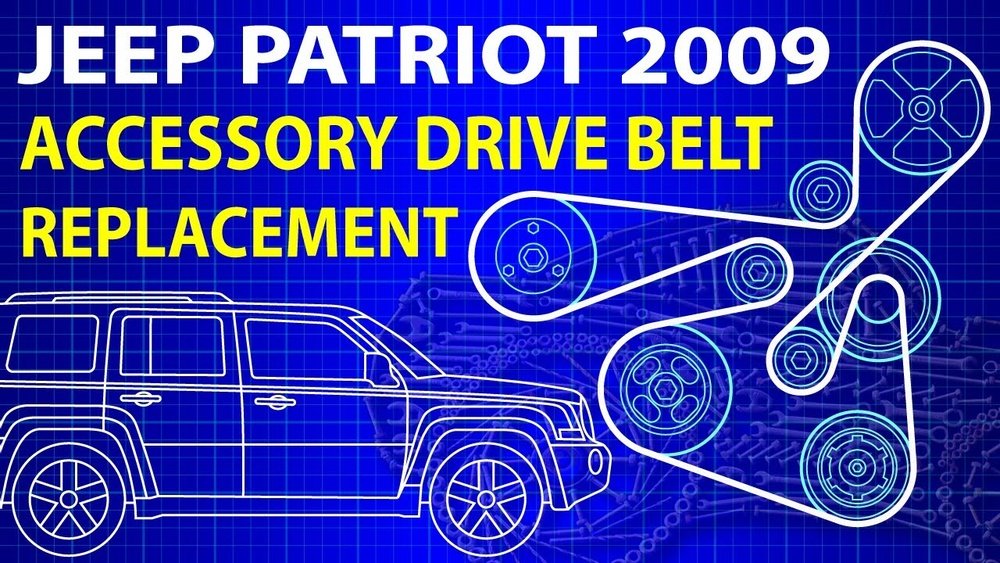
This diagram serves as a visual guide, showing the path the serpentine belt takes around various pulleys and components. Knowing this layout helps in correctly installing a new belt, identifying worn or damaged components, and understanding how the engine accessories are driven.
The 2.4L engine in the 2012 Jeep Patriot utilizes a single serpentine belt to power multiple accessories, including the alternator, power steering pump, air conditioning compressor, and water pump. A properly functioning belt and tensioner are crucial for the reliable operation of these systems. When a belt shows signs of wear, such as cracking, fraying, or glazing, it needs to be replaced. This article will provide a detailed look at the belt path, common issues, replacement procedures, and tips for maintenance, all centered around the 2012 Jeep Patriot 2.4 belt diagram.
Understanding The Serpentine Belt System
The serpentine belt is a single, continuous belt that snakes around several pulleys, driving essential engine accessories. Unlike older V-belts, which required multiple belts for different components, the serpentine belt simplifies the system, reducing complexity and weight. For the 2012 Jeep Patriot 2.4L engine, this belt is the lifeline for its power steering, alternator, A/C compressor, and water pump.
The Role Of Each Component
Each pulley the serpentine belt interacts with plays a vital role in the vehicle’s operation. Understanding these roles helps in diagnosing problems and appreciating the importance of the belt system.
- Crankshaft Pulley: This is typically the largest pulley and is directly connected to the engine’s crankshaft. It’s the primary driver of the serpentine belt, receiving power directly from the engine’s rotation. Its size helps to smooth out the power delivery to the belt.
- Alternator Pulley: The alternator converts mechanical energy from the engine into electrical energy to charge the battery and power the vehicle’s electrical systems. A worn belt or a failing alternator pulley can lead to charging issues.
- Power Steering Pump Pulley: This pulley drives the power steering pump, which assists the driver in turning the steering wheel. If the belt slips on this pulley, you might notice heavier steering, especially at low speeds.
- Air Conditioning (A/C) Compressor Pulley: When the A/C is engaged, this pulley spins the compressor, which circulates refrigerant to cool the cabin. A slipping belt can result in poor or no A/C performance.
- Water Pump Pulley: The water pump circulates coolant through the engine and radiator, preventing overheating. A belt issue here can quickly lead to severe engine damage due to overheating.
- Tensioner Pulley: This is a critical component. The automatic tensioner uses a spring or hydraulic mechanism to keep the serpentine belt taut at all times. A healthy tensioner ensures the belt maintains proper grip on all pulleys, preventing slippage. A failing tensioner can cause belt noise and premature belt wear.
- Idler Pulley(s): Some systems include idler pulleys. These are typically smooth pulleys used to redirect the belt, increase its contact with other pulleys for better grip, or help route the belt around obstacles. They do not drive any accessories.
How The Belt Path Works
The 2012 Jeep Patriot 2.4 belt diagram illustrates how the belt is routed around these pulleys. The path is designed to maximize the belt’s contact with each driven pulley, ensuring efficient power transfer. The tensioner pulley is usually positioned to apply pressure, keeping the belt snug. When the engine runs, the crankshaft pulley spins, and the belt follows the path, turning all the accessory pulleys in unison. If any accessory seizes, or if the belt breaks, the remaining accessories will stop functioning.
Locating The Serpentine Belt And Diagram
Finding the serpentine belt on your 2012 Jeep Patriot is usually straightforward. It's located at the front of the engine, typically on the passenger side, and is easily visible once the hood is open.
The belt is a long, black rubber belt with grooves on one side to grip the pulleys.
Where To Find A Belt Diagram
Several resources can provide a clear 2012 Jeep Patriot 2.4 belt diagram:
- Under the Hood: Many vehicles have a belt routing diagram sticker located on the underside of the hood or on a strut tower. This is the most convenient place to find it.
- Owner’s Manual: Your Jeep Patriot’s owner’s manual might contain a diagram or a description of the belt system.
- Online Resources: Numerous automotive forums, repair websites, and parts retailers offer belt diagrams for specific vehicle models. Searching for “2012 Jeep Patriot 2.4 serpentine belt diagram” will yield many results.
- Repair Manuals: Professional repair manuals, such as those from Haynes or Chilton, provide detailed diagrams and instructions.
Pro Tip: Always try to find the diagram specific to your vehicle’s engine (2.4L in this case). While diagrams for similar models might look alike, slight variations in pulley placement can exist, and using the correct diagram is crucial for proper installation.
Interpreting The Diagram
A typical 2012 Jeep Patriot 2.4 belt diagram will show the engine block, the various pulleys, and an arrow indicating the direction of the belt’s travel. The belt is represented by a line that snakes around the pulleys. Pay close attention to the orientation of the belt, whether the grooved side or the smooth side contacts each pulley. Most accessory pulleys require the grooved side for better grip, while the tensioner and idler pulleys might use the smooth side.

Common Serpentine Belt Problems And Symptoms
Serpentine belts, like all rubber components, degrade over time due to heat, tension, and friction. Recognizing the signs of a failing belt or tensioner can prevent breakdowns and more costly repairs.
Belt Wear And Tear
Over time, the rubber of the serpentine belt can become brittle, crack, or fray.
- Cracking: Small cracks on the ribbed side of the belt are a common sign of aging. If these cracks become deep or numerous, the belt is likely to fail.
- Fraying: The edges of the belt may start to fray, indicating excessive wear or misalignment.
- Glazing: The ribbed surface of the belt can become smooth and shiny, a condition known as glazing. This reduces its grip on the pulleys, leading to slippage and noise.
- Chirping or Squealing Noises: A common symptom of a worn belt or a misaligned pulley is a persistent chirping or squealing sound, especially on startup or when accelerating. This noise often occurs when the belt is slipping.
- Visible Damage: Look for any chunks missing from the belt or any signs of overheating or contamination with oil or coolant.
Tensioner Issues
The automatic tensioner is vital for maintaining proper belt tension. If it fails, it can cause several problems:
- Loose Belt: A weak or failing tensioner may not provide enough force, allowing the belt to become loose. This leads to slippage, noise, and poor performance of accessories.
- Excessive Noise: A worn tensioner pulley bearing can cause a grinding or rattling noise. The tensioner itself might also make a squealing sound if its spring mechanism is failing.
- Premature Belt Wear: If the tensioner is faulty, it can cause the belt to vibrate or oscillate, leading to premature wear and potential breakage.
- Belt Jumping Off: In severe cases, a completely failed tensioner can allow the belt to become so loose that it jumps off the pulleys entirely, disabling all accessories.
Pulley Problems
While the belt is the most common culprit, issues with the pulleys themselves can also cause problems:
- Seized Pulley: If an accessory bearing fails (e.g., alternator, A/C compressor), the pulley can seize. This will immediately stop the belt from moving, often causing it to squeal loudly, smoke, or break.
- Misaligned Pulley: If a pulley is not perfectly aligned with the others, it will cause the belt to run crooked, leading to rapid wear on the belt edges and potentially causing it to fray or jump off.
- Worn Pulley Grooves: Over time, the grooves on the pulleys can wear down, reducing the belt’s grip and causing slippage.
Replacing The Serpentine Belt
Replacing the serpentine belt on a 2012 Jeep Patriot 2.4L is a task that many DIYers can tackle with the right tools and a clear understanding of the process. It’s a relatively straightforward job, but attention to detail is key.
Tools And Materials Needed
- New Serpentine Belt: Ensure you have the correct belt for your specific 2012 Jeep Patriot 2.4L engine.
- Serpentine Belt Tool Kit: This is highly recommended. It typically includes a long-handled ratchet or breaker bar and various adapters to fit different tensioner bolt sizes.
- Socket Set and Ratchet: For removing any splash shields or covers that may be in the way.
- Gloves: To protect your hands.
- Safety Glasses: Essential for eye protection.
- Flashlight: To see clearly in the engine bay.
- The Belt Diagram: Have your 2012 Jeep Patriot 2.4 belt diagram readily available.
Step-by-step Replacement Guide
- Safety First: Ensure the engine is completely cool. Disconnect the negative battery terminal to prevent accidental starting.
- Locate the Belt and Tensioner: Find the serpentine belt and identify the automatic tensioner pulley. The tensioner is usually a spring-loaded arm with a pulley on the end. There will be a bolt head on the tensioner arm designed for a ratchet or breaker bar.
- Consult the Diagram: Refer to your 2012 Jeep Patriot 2.4 belt diagram to understand the belt’s routing.
- Release Belt Tension: Attach the appropriate socket or adapter to the tensioner pulley bolt. Use a long-handled ratchet or breaker bar to rotate the tensioner arm, which will release the tension on the belt. You will need to rotate it far enough to slip the old belt off one of the pulleys (usually the alternator or power steering pulley is easiest).
- Remove the Old Belt: Once the tension is released, carefully slip the old belt off the pulleys. Note its exact path as you remove it, or refer to the diagram.
- Install the New Belt: Route the new belt according to the diagram. Ensure the ribbed side engages with the grooved pulleys and the smooth side with the smooth pulleys. Start by fitting the belt around most of the pulleys, leaving one easily accessible pulley (like the crankshaft pulley) for last.
- Apply Tension: With the belt correctly routed, carefully rotate the tensioner arm again using your ratchet. Slip the belt onto the final pulley.
- Release Tensioner Slowly: Once the belt is fully on all pulleys, slowly release the tensioner arm. The tensioner should automatically apply the correct tension to the new belt.
- Double-Check: Visually inspect the belt routing on all pulleys. Ensure it’s seated correctly in the grooves and is not rubbing against any other components. Check that the belt is straight on all pulleys.
- Reconnect Battery and Start Engine: Reconnect the negative battery terminal. Start the engine and listen for any unusual noises. Let it run for a few minutes and check the belt for proper tracking and tension.
Warning: If the belt makes a squealing noise after installation, it could indicate improper routing, insufficient tension (faulty tensioner), or a pulley that is not spinning freely. Re-check all steps carefully.

Maintaining The Serpentine Belt System
Regular inspection and maintenance of the serpentine belt and its associated components can significantly extend their lifespan and prevent unexpected failures.
Inspection Schedule
It’s good practice to inspect your serpentine belt at least twice a year or every 6,000 miles, whichever comes first. A more thorough inspection should be done during routine oil changes.
What To Look For During Inspection
- Visual Wear: Check for cracks, fraying, glazing, or any missing chunks of rubber.
- Tension: Push on the belt midway between two pulleys. It should have a little give, but not feel excessively loose. A general rule is about 1/2 inch of deflection. If it feels very slack, the tensioner might be weak.
- Noise: Listen for any chirping, squealing, or grinding noises coming from the front of the engine, especially during startup, acceleration, or when accessories like the A/C are engaged.
- Pulley Alignment: Ensure the belt is running straight on all pulleys and not riding on the edges.
- Tensioner Operation: Observe the tensioner pulley while the engine is running. It should remain stable and not oscillate excessively.
Lifespan Of A Serpentine Belt
The lifespan of a serpentine belt can vary depending on driving conditions, climate, and the quality of the belt. Generally, most serpentine belts are recommended for replacement every 60,000 to 100,000 miles. However, it’s crucial to inspect them regularly and replace them sooner if signs of wear appear, regardless of mileage.
Replacing The Tensioner And Idler Pulleys
While replacing the serpentine belt, it's often a good idea to inspect the tensioner and any idler pulleys. If the tensioner feels weak, makes noise, or the pulley bearing is rough, it should be replaced along with the belt.
Replacing these components proactively can prevent premature belt failure and ensure the new belt performs optimally.
When To Seek Professional Help
While serpentine belt replacement is a manageable DIY task, there are situations where consulting a professional mechanic is advisable.
Complex Engine Bays
Some engines have very tight engine bays, making it difficult to access the belt and tensioner. If you find yourself struggling to get tools in place or can’t clearly see the belt path, it might be best to leave it to a professional.
Suspected Pulley Issues
If you hear grinding noises or suspect a seized pulley, diagnosing the exact component can be challenging. A mechanic has specialized tools and experience to quickly pinpoint the faulty pulley and replace the associated accessory if necessary.
Lack Of Confidence Or Tools
If you don’t have the necessary tools (especially a serpentine belt tool) or lack confidence in performing the job, it’s safer and more efficient to have a qualified technician handle it. Mistakes during belt replacement can lead to damage to the new belt or other engine components.
Specialized Diagnostic Equipment
Sometimes, belt noise or accessory malfunction might be due to issues beyond a simple belt replacement. A professional shop has diagnostic equipment to check alternator output, power steering pressure, and A/C system performance accurately.