The 2008 Jeep Liberty, a popular mid-size SUV, relies on a precisely routed serpentine belt to power essential accessories like the alternator, power steering pump, water pump, and air conditioning compressor.
Understanding the serpentine belt diagram for your specific 2008 Jeep Liberty model is crucial for proper maintenance, diagnosis, and replacement. This diagram acts as a visual roadmap, showing the exact path the belt takes around various pulleys.
Without this guide, attempting to replace or even inspect the belt can lead to incorrect installation, potentially causing damage to the belt itself or the components it drives.
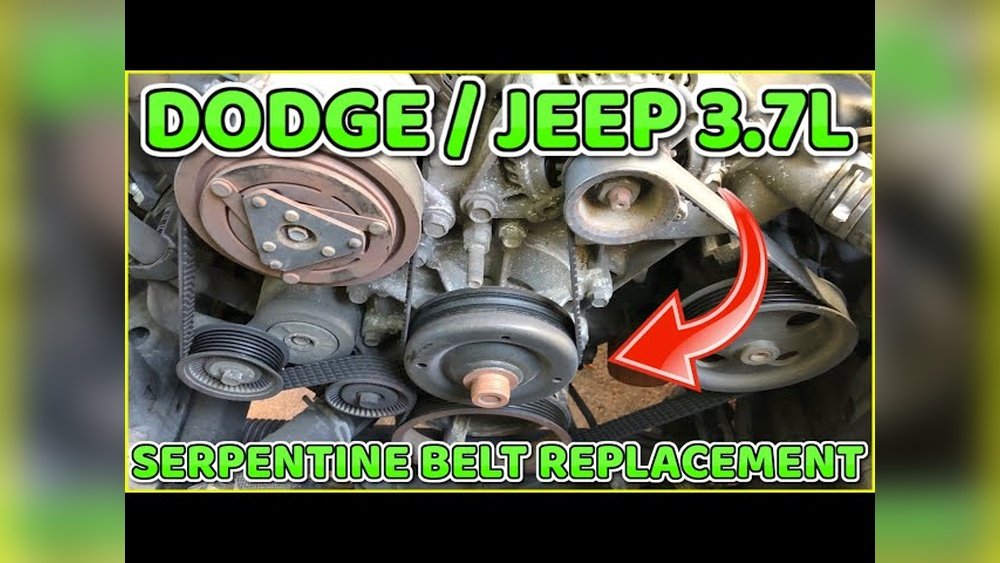
This article will serve as your comprehensive guide to the 2008 Jeep Liberty serpentine belt system. We will break down the components involved, explain the importance of the belt's routing, and discuss common issues.
Whether you're a seasoned DIY mechanic or a novice looking to understand your vehicle better, this information will empower you to tackle serpentine belt-related tasks with confidence.
We will also cover the typical symptoms of a failing belt and provide actionable advice for maintenance and replacement.
Understanding The Serpentine Belt System
The serpentine belt is a single, continuous rubber belt that snakes around multiple pulleys attached to the engine. Its primary function is to transfer rotational energy from the crankshaft to various engine accessories.
Unlike older vehicles that used multiple V-belts, the serpentine belt design is more efficient, lighter, and requires less maintenance.
For the 2008 Jeep Liberty, this belt is a critical component that keeps your vehicle running smoothly and all its essential systems operational.
Key Components Driven By The Serpentine Belt
The serpentine belt is connected to several important pulleys, each driving a specific accessory. Knowing these components is fundamental to understanding the belt’s path.
- Crankshaft Pulley: This is the main pulley connected directly to the engine’s crankshaft. It’s the starting point of the belt’s rotation.
- Alternator Pulley: The alternator is responsible for generating electricity to charge the battery and power the vehicle’s electrical systems. The belt spins the alternator’s rotor to produce this power.
- Power Steering Pump Pulley: This pulley drives the power steering pump, which assists in turning the steering wheel, making it easier to maneuver the vehicle.
- Water Pump Pulley: The water pump circulates coolant through the engine to prevent overheating. The serpentine belt powers this pump, ensuring the engine stays at an optimal operating temperature.
- Air Conditioning (A/C) Compressor Pulley: When the A/C is engaged, this pulley drives the compressor, which is responsible for cooling the cabin.
- Idler Pulley: This is a smooth pulley that does not drive an accessory. Its purpose is to maintain tension on the serpentine belt, ensuring it stays tight and doesn’t slip.
- Tensioner Pulley: This pulley is part of a tensioner assembly, which automatically adjusts the belt’s tension as the belt heats up and stretches or cools and contracts. This ensures consistent tension for optimal performance and longevity.
The Importance Of Proper Belt Routing
The serpentine belt diagram is not just a suggestion; it’s a precise blueprint. Each pulley must be engaged by the belt in a specific sequence. Deviating from this path can lead to several problems:
- Belt Slippage: Incorrect routing can cause the belt to run at an angle on a pulley, leading to slippage. This reduces the efficiency of the driven accessories and can generate heat, damaging the belt.
- Accessory Malfunction: If a critical accessory like the water pump or alternator isn’t being driven correctly, it won’t function as intended. This can result in engine overheating or a dead battery.
- Premature Belt Wear: Misalignment or excessive tension caused by improper routing can lead to premature wear, cracking, or even snapping of the belt.
- Component Damage: In severe cases, a poorly routed belt could rub against other engine components, causing damage.
2008 Jeep Liberty Serpentine Belt Diagram Explained
Locating and understanding the serpentine belt diagram for your 2008 Jeep Liberty is the first step in any belt-related maintenance. These diagrams are typically found in the vehicle’s owner’s manual, a service manual, or sometimes directly on a sticker under the hood.
The diagram will visually represent the path the belt follows around all the pulleys.
Where To Find The Diagram
- Owner’s Manual: This is the most common and accessible place. Look for a section on maintenance or under-hood components.
- Under the Hood Sticker: Many vehicles have a diagram printed on a sticker attached to the underside of the hood or on a strut tower.
- Service Manual: For more detailed information, a professional service manual (like Haynes or Chilton) will provide comprehensive diagrams and repair procedures.
- Online Resources: Reputable auto parts websites or forums dedicated to Jeep vehicles often have diagrams available for download or viewing.
Decoding The Diagram
A typical serpentine belt diagram uses lines to represent the belt and circles with labels to indicate the pulleys. The lines will show the specific path the belt takes, including which side of the pulley it wraps around.
- Solid Lines: Usually represent the path of the belt.
- Arrows: May indicate the direction of rotation for each pulley.
- Labels: Clearly identify each component (e.g., ALT for Alternator, PS for Power Steering, WP for Water Pump, CRANK for Crankshaft, IDLER, TENSIONER).
Pro Tip: Always ensure you are using the diagram specific to your 2008 Jeep Liberty’s engine configuration. Different engine sizes or trim levels might have slightly different pulley arrangements.

Common Serpentine Belt Issues And Symptoms
Over time, serpentine belts can wear out or develop problems. Recognizing the symptoms can help you address issues before they leave you stranded.
Symptoms Of A Failing Serpentine Belt
- Squealing Noise: This is the most common symptom. A high-pitched squeal, especially noticeable on startup or when accelerating, often indicates a loose or worn belt that is slipping on the pulleys.
- Cracked or Frayed Belt: Visually inspecting the belt can reveal cracks, fraying, glazing (a shiny appearance), or missing chunks. These are clear signs the belt needs replacement.
- Accessory Malfunction: If an accessory stops working, it could be due to a broken belt or a belt that has slipped off its pulleys. For example, if your battery light comes on, the alternator might not be working. If your power steering feels heavy, the power steering pump might not be engaged.
- Vibrating or Worn Pulleys: While less common, a damaged pulley can cause the belt to vibrate or wear unevenly.
- Engine Overheating: If the water pump is not being driven by the belt, the engine can quickly overheat.
Causes Of Belt Failure
- Age and Wear: Rubber degrades over time due to heat, ozone, and flexing. Even without visible damage, a belt can lose its elasticity and become prone to slipping.
- Tensioner Issues: A faulty automatic tensioner can lead to either a loose belt (causing squealing) or an overly tight belt (causing premature wear on the belt and bearings of the driven accessories).
- Pulley Misalignment: If a pulley is not perfectly aligned, it can cause the belt to run at an angle, leading to rapid wear and potential slippage.
- Contamination: Oil or coolant leaks onto the belt can degrade the rubber and cause it to slip.
- Bearing Failure: If a bearing in one of the accessories or pulleys seizes, it can cause the belt to break or slip.
Replacing The Serpentine Belt On A 2008 Jeep Liberty
Replacing the serpentine belt is a task that many DIY enthusiasts can handle with the right tools and knowledge. The process involves releasing tension on the belt, removing the old belt, routing the new belt according to the diagram, and then releasing the tensioner to tighten the new belt.
Tools And Materials Needed
- New Serpentine Belt: Ensure you have the correct part number for your 2008 Jeep Liberty model.
- Serpentine Belt Tool Kit (or appropriate wrench/socket): This is essential for releasing the tensioner. The specific tool needed will depend on the type of tensioner mechanism. Often, a long-handled wrench or a breaker bar with a specific socket or pry bar attachment is used.
- Gloves: To protect your hands.
- Safety Glasses: To protect your eyes.
- Flashlight: For better visibility.
- The Serpentine Belt Diagram: Keep it handy for reference.
Step-by-step Replacement Process
- Locate the Serpentine Belt Diagram: As mentioned earlier, find the diagram under the hood or in your manual. Study it carefully.
- Identify the Tensioner Pulley: This is the pulley that moves when you apply force to the tensioner arm.
- Release Belt Tension: Attach the appropriate tool to the tensioner arm. Apply steady force to rotate the tensioner, which will slacken the belt. The direction to rotate the tensioner to release tension varies, so consult your diagram or a service manual if unsure.
- Remove the Old Belt: While holding the tensioner released, slip the old belt off one of the pulleys, usually starting with an easily accessible one like the power steering or alternator pulley. Once it’s off one pulley, you can carefully remove it from the other pulleys.
- Inspect Pulleys and Tensioner: Before installing the new belt, spin each pulley by hand. They should rotate smoothly without any noise or resistance. Check the tensioner arm for excessive play or damage.
- Route the New Belt: Following the diagram precisely, begin routing the new belt around the pulleys. It’s often easiest to leave the crankshaft pulley for last, as it’s usually the largest and lowest.
- Apply Tension to the New Belt: Once the belt is routed around all pulleys except one, use your tool to rotate the tensioner again to create slack. Slip the belt onto the final pulley.
- Release the Tensioner: Slowly release the tensioner arm, allowing it to apply tension to the new belt. Ensure the belt is seated correctly on all pulleys.
- Double-Check the Routing: Carefully compare the installed belt to the diagram one last time to ensure it’s routed correctly and fully seated on every pulley.
- Start the Engine: Start the engine briefly and listen for any unusual noises. Check that all accessories are functioning. Turn the engine off and re-inspect the belt’s position on the pulleys.
Warning: Never attempt to turn the engine over manually by rotating the crankshaft pulley bolt with the serpentine belt installed. This can put excessive stress on the belt and components.

Maintenance And Inspection Tips
Regular inspection and maintenance of your serpentine belt can prevent unexpected breakdowns and costly repairs.
Frequency Of Inspection
It’s a good practice to inspect the serpentine belt at least once a year or every 15,000-20,000 miles. More frequent checks are recommended if you frequently drive in extreme conditions (very hot or cold weather, dusty environments) or if you notice any of the symptoms mentioned earlier.
What To Look For During Inspection
- Cracks: Examine the belt for any visible cracks, especially on the ribbed side.
- Glazing: A shiny, smooth appearance on the belt’s surface indicates it has been slipping and overheating, reducing its grip.
- Fraying or Shredding: Look for any signs of the belt’s edges breaking apart.
- Tension: While a definitive tension check usually requires a tool, you can get a general idea by pressing down on the longest accessible span of the belt. It should have some give but not be excessively loose.
- Misalignment: Check if the belt is running straight on all pulleys or if it appears to be riding on the edge of any.
When To Replace The Belt
- Visible Damage: Any cracks, fraying, or glazing are strong indicators for replacement.
- Age: Most serpentine belts are recommended for replacement every 60,000 to 100,000 miles, depending on the manufacturer and material. Check your owner’s manual for specific recommendations.
- Noise: Persistent squealing that doesn’t go away after the engine warms up often means the belt needs replacement.
- If a Belt Breaks: A broken serpentine belt means immediate loss of power to critical accessories, requiring prompt replacement.
Troubleshooting Common Serpentine Belt Problems
Even with proper maintenance, issues can arise. Here are some common problems and how to approach them.
Persistent Squealing Noise
If you hear a persistent squealing noise that doesn’t resolve after the engine warms up, it’s likely the belt is slipping. This could be due to:
- Worn Belt: The belt has lost its grip.
- Loose Tensioner: The tensioner is not applying enough pressure.
- Contamination: Oil or coolant on the belt. Clean pulleys if possible and replace the belt. If the leak persists, find and fix the source.
- Misaligned Pulley: One of the pulleys might be slightly out of alignment, causing the belt to slip.
Belt Slips Off Pulleys
If the belt has come off entirely, it indicates a more significant issue. Possible causes include:
- Incorrect Installation: The belt was not routed correctly during a previous replacement.
- Failed Tensioner: The tensioner may have failed completely, allowing the belt to become too loose.
- Seized Accessory: An accessory or pulley bearing has seized, causing the belt to be thrown off.
- Damaged Pulley: A damaged or worn pulley groove can prevent the belt from staying in place.
In my experience, when a belt comes off, it’s essential to inspect all pulleys for free movement and check the tensioner’s operation before reinstalling a new belt. A seized pulley can quickly destroy a new belt.
Accessory Not Working
If a specific accessory fails (e.g., power steering loss, no A/C, battery warning light), and the belt appears intact, check the following:
- Belt Tension: Is the belt tight enough to engage the pulley?
- Belt Condition: Is the belt slipping on that particular pulley due to wear or contamination?
- Accessory Itself: The accessory might have failed independently of the belt.
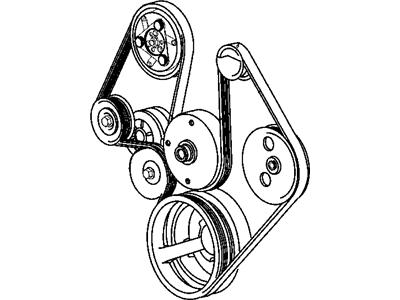
Understanding The 2008 Jeep Liberty 3.7l V6 Serpentine Belt Diagram
The most common engine for the 2008 Jeep Liberty is the 3. 7L V6.
The serpentine belt system for this engine typically involves several pulleys. While the exact layout can vary slightly based on specific model year updates or optional equipment, the general principle remains the same.