Automatic transmissions rely on solenoids to control gear shifts. When a solenoid fails, shifts delay, slip, or skip.
The check engine light may come on, and limp mode may engage. Knowing what happens when a transmission solenoid goes bad helps you detect issues early, prevent major damage, and decide whether to repair or replace the solenoid.
Transmission solenoids regulate hydraulic fluid flow to the clutch packs under the control of the Transmission Control Module (TCM). What happens when a transmission solenoid goes bad is that this flow becomes inconsistent, leading to:
- Delayed or skipped shifts
- Harsh gear engagement
- Slipping or stuck gears
- Check engine or transmission warning lights
How Transmission Solenoids Work
Each solenoid is an electrically controlled valve. The TCM energizes the solenoid coil, which moves a plunger to direct fluid. The fluid then engages or releases the clutch packs to change gears.
When a solenoid fails, what happens when a transmission solenoid goes bad is that pressure is misdirected. The gearbox may jerk, slip, or fail to engage certain gears.
Causes of Transmission Solenoid Failure
- Contaminated fluid: Dirt or metal flakes block valves.
- Worn internal parts: Heat cycles degrade seals and coils.
- Corroded connectors: Moisture interrupts electrical signals.
- Damaged wiring: Chafed wires or broken harnesses.
- Low fluid levels: Insufficient pressure causes erratic shifts.
- Overheating: Repeated high heat damages solenoids.
Symptoms of a Bad Transmission Solenoid
Common warning signs:
- Delayed shifting
- Stuck in gear
- Slipping gears
- Harsh or jerky shifts
- Fluid leaks
- Overheating
- Limp mode activation
- Check engine light
- Poor fuel economy
1. Delayed Shifting
When a transmission solenoid starts failing, the gearbox may hesitate before engaging the next gear. You might notice a lag when shifting from Park to Drive or while accelerating.
Delayed shifting often feels like the car is “thinking” before moving. This happens because the solenoid isn’t directing hydraulic fluid correctly, causing a temporary loss of pressure to the clutch packs.
2. Stuck in Gear
A failing solenoid can prevent the transmission from changing gears. For example, the car may remain in second gear instead of shifting up or down.
Being stuck in gear is dangerous, especially on highways, because it reduces control over speed and acceleration. This occurs when the solenoid valve is stuck closed or open, blocking fluid flow needed for the shift.
3. Slipping Gears
Transmission slipping happens when the engine revs increase without a corresponding acceleration. This is a direct result of insufficient hydraulic pressure caused by a faulty solenoid. Slipping can feel like the car is intermittently losing power and may be accompanied by a burning smell if the clutches overheat.
4. Harsh or Jerky Shifts
Instead of smooth transitions, gear changes may feel abrupt or jerky. Harsh shifting is common when the solenoid partially fails or misfires. You may experience sudden jolts while accelerating or decelerating. This not only affects comfort but can cause extra wear on the transmission components.
5. Fluid Leaks
A bad solenoid can sometimes cause fluid leaks from the valve body or surrounding seals. Low transmission fluid levels worsen the problem, reducing hydraulic pressure and making shifts even more inconsistent.
Regularly checking fluid levels and looking for puddles under the car can help detect early signs.
6. Overheating
Slipping gears, delayed shifting, or stuck solenoids generate excess heat. Overheating can cause permanent damage to the transmission and other components.
A high-temperature warning light on the dashboard may appear, or you may notice a burning odor from the transmission fluid.
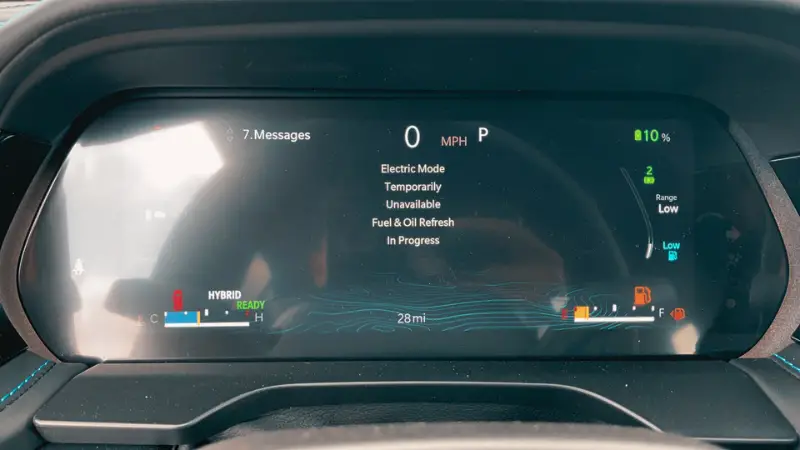
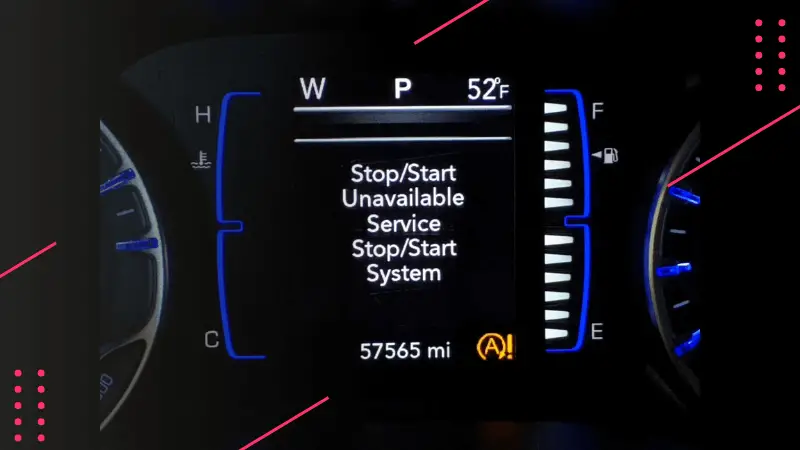
7. Limp Mode Activation
Modern vehicles may enter limp mode to protect the transmission when a solenoid fails. In this mode, the car limits speed and keeps the transmission in a single gear to prevent further damage.
While limp mode allows you to reach a repair shop safely, it signals serious transmission issues that need immediate attention.
8. Check Engine Light
A failing transmission solenoid often triggers the check engine light or a transmission warning light. Diagnostic trouble codes (DTCs) such as P0750-P0770 indicate solenoid circuit issues.
Scanning for these codes helps pinpoint which solenoid or circuit is causing the problem.
9. Poor Fuel Economy
Faulty solenoids cause inefficient gear changes, leading to higher engine RPMs and reduced fuel efficiency. You may notice a sudden drop in miles per gallon (MPG) if the transmission is slipping or shifting at incorrect intervals.
Key Takeaway:
Symptoms usually appear gradually. Minor delays or jerky shifts may seem insignificant initially, but ignoring them can escalate to severe transmission damage, costly repairs, or even complete transmission failure. Early detection and action are critical.
Step by Step Diagnosis of a Bad Transmission Solenoid
Diagnosing a failing transmission solenoid requires a combination of observation, scanning, and mechanical testing.
Each step helps pinpoint the source of the problem, whether it’s electrical, hydraulic, or mechanical.

Following this systematic approach ensures you accurately identify what happens when a transmission solenoid goes bad and prevents unnecessary repairs or replacements.
Step 1: Record Symptoms and Driving Conditions
Begin by documenting all observed symptoms. Note whether issues occur during a cold start versus a warm engine, in city traffic versus on the highway, or under specific conditions like towing or uphill driving.
Observing patterns helps you distinguish between a minor glitch and a systemic solenoid failure. For example, delayed shifts only when cold may indicate a temperature-sensitive solenoid issue.
Step 2: Scan for Transmission Codes
Use an OBD2 scanner capable of reading Transmission Control Module (TCM) codes. Codes such as P0750 to P0770 typically indicate solenoid circuit problems.
Recording these codes is essential for identifying the exact solenoid or circuit affected. Modern scanners often provide live data along with trouble codes, which can help you track intermittent issues that may not trigger a permanent error light.
Step 3: Inspect Transmission Fluid
Check the level, color, and smell of the transmission fluid. Low fluid can cause solenoids to malfunction due to inadequate hydraulic pressure.
Dark, burnt-smelling fluid indicates overheating or clutch wear, while metal flakes suggest internal component damage.
Fluid inspection gives both preventive and diagnostic insight, as many solenoid failures are aggravated by contaminated or degraded fluid.
Step 4: Inspect Wiring and Connectors
Electrical issues are a common cause of solenoid failure. Inspect the wiring harness and connectors for loose connections, corrosion, or damaged insulation.
Even minor chafing or oxidation can interrupt signals from the TCM, causing erratic solenoid behavior. Wiggle tests can sometimes temporarily reproduce symptoms, confirming an electrical problem.
Step 5: Live Data Scan
Advanced diagnostic scanners allow you to compare commanded solenoid signals versus actual hydraulic response. Discrepancies between these values suggest a solenoid that is not responding correctly to the TCM commands.
This step is particularly useful for intermittent issues that don’t trigger a fault code but still affect transmission performance.
Step 6: Active Solenoid Test
Some professional scanners can actively energize individual solenoids while monitoring transmission response.
If a solenoid fails to engage or disengage as expected, it confirms a fault. This test is invaluable because it isolates the problem solenoid, reducing guesswork and helping plan repairs accurately.
Step 7: Pressure Test
Transmission line pressure tests provide insight into hydraulic system performance. Connect gauges to measure fluid pressure under load and at different gears.
Erratic or low-pressure readings indicate a solenoid or valve body malfunction, which can directly explain symptoms such as slipping, harsh shifts, or delayed engagement.
Step 8: Coil Resistance Test
Use a multimeter to measure the resistance of each solenoid coil. Resistance outside manufacturer specifications indicates an electrical failure within the solenoid.
This simple test can often confirm a solenoid is faulty even before removing it from the transmission. Always compare readings to the vehicle’s service manual specifications.
Solenoid Replacement: Step by Step Guide
Replacing a faulty transmission solenoid requires careful preparation and attention to detail. Following each step ensures a smooth repair and helps prevent further transmission damage.
- Prepare the Vehicle – Park on level ground, chock the wheels, and disconnect the battery.
- Raise Vehicle – Use jack stands.
- Drain Fluid – Remove the pan and inspect the magnet for metal flakes.
- Remove Filter – Replace with a new one.
- Access Solenoid or Pack – Identify faulty solenoid.
- Disconnect Wiring – Carefully unplug connectors.
- Remove Solenoid – Unscrew bolts and remove.
- Install New Solenoid – Add new seals, torque bolts.
- Reinstall the Filter and Pan – Torque evenly, refill fluid.
- Test Repair – Shift through gears, check for leaks, clear codes.
Step 1: Prepare the Vehicle
Park your Jeep on a level surface and engage the parking brake. Chock the wheels to prevent movement. Disconnect the battery to avoid electrical shorts while working on the transmission.
Safety first, this step prevents accidents and protects sensitive electronics.
Step 2: Raise the Vehicle
Use a reliable jack and secure the vehicle on jack stands. Never rely solely on a jack, as the vehicle must remain stable while you access the transmission pan and solenoids underneath.
Step 3: Drain Transmission Fluid
Place a drain pan under the transmission. Remove the transmission pan bolts and carefully drain the fluid. Inspect the pan magnet for metal flakes, which can indicate internal wear.
Proper disposal of old fluid is important for safety and environmental compliance.
Step 4: Remove and Replace the Filter
Remove the old transmission filter. Contaminants trapped in the filter can affect solenoid performance, so always install a new filter. Ensure it seats properly to avoid leaks or restricted fluid flow.
Step 5: Access the Solenoid or Solenoid Pack
Identify the faulty solenoid using your diagnostic scan. Depending on the transmission model, you may need to remove a cover or plate to reach the solenoids. Take care to avoid damaging surrounding components.
Step 6: Disconnect Wiring
Carefully unplug all electrical connectors from the solenoid. Inspect connectors for corrosion or bent pins. Proper connection is critical for solenoid function.
Step 7: Remove the Solenoid
Unscrew the bolts holding the solenoid in place and remove it. Some solenoids are part of a solenoid pack, which may require removing multiple bolts. Keep track of all hardware for reinstallation.
Step 8: Install the New Solenoid
Install the new solenoid, ensuring new seals or O-rings are in place. Torque the bolts to manufacturer specifications to avoid leaks or component damage. A properly seated solenoid ensures correct hydraulic pressure.
Step 9: Reinstall the Filter and Transmission Pan
Reinstall the transmission filter and pan. Torque the pan bolts evenly in a crisscross pattern to prevent warping or leaks. Refill the transmission with the recommended fluid type and volume.
Step 10: Test the Repair
Reconnect the battery and start the engine. Shift through all gears, checking for smooth engagement and leaks. Clear any stored transmission codes using your OBD2 scanner. Monitor for proper transmission operation during a short test drive.
Costs and Repair Options for a Bad Transmission Solenoid
- Single solenoid replacement – lowest cost.
- Solenoid pack replacement – moderate cost, ideal if multiple solenoids fail.
- Valve body rebuild – higher cost, needed for debris or wear.
- Full transmission replacement – most expensive, for severe damage.
When a transmission solenoid fails, the repair cost varies depending on the severity of the issue and whether you’re replacing a single solenoid, a pack, or the entire transmission.
Understanding your options helps you make informed decisions and avoid unnecessary expenses.
1. Single Solenoid Replacement
Replacing a single solenoid is the most cost-effective solution. It is suitable when diagnostics pinpoint only one faulty solenoid. Labor costs are moderate, and parts are relatively inexpensive.
This option restores normal transmission function quickly if the issue is isolated.
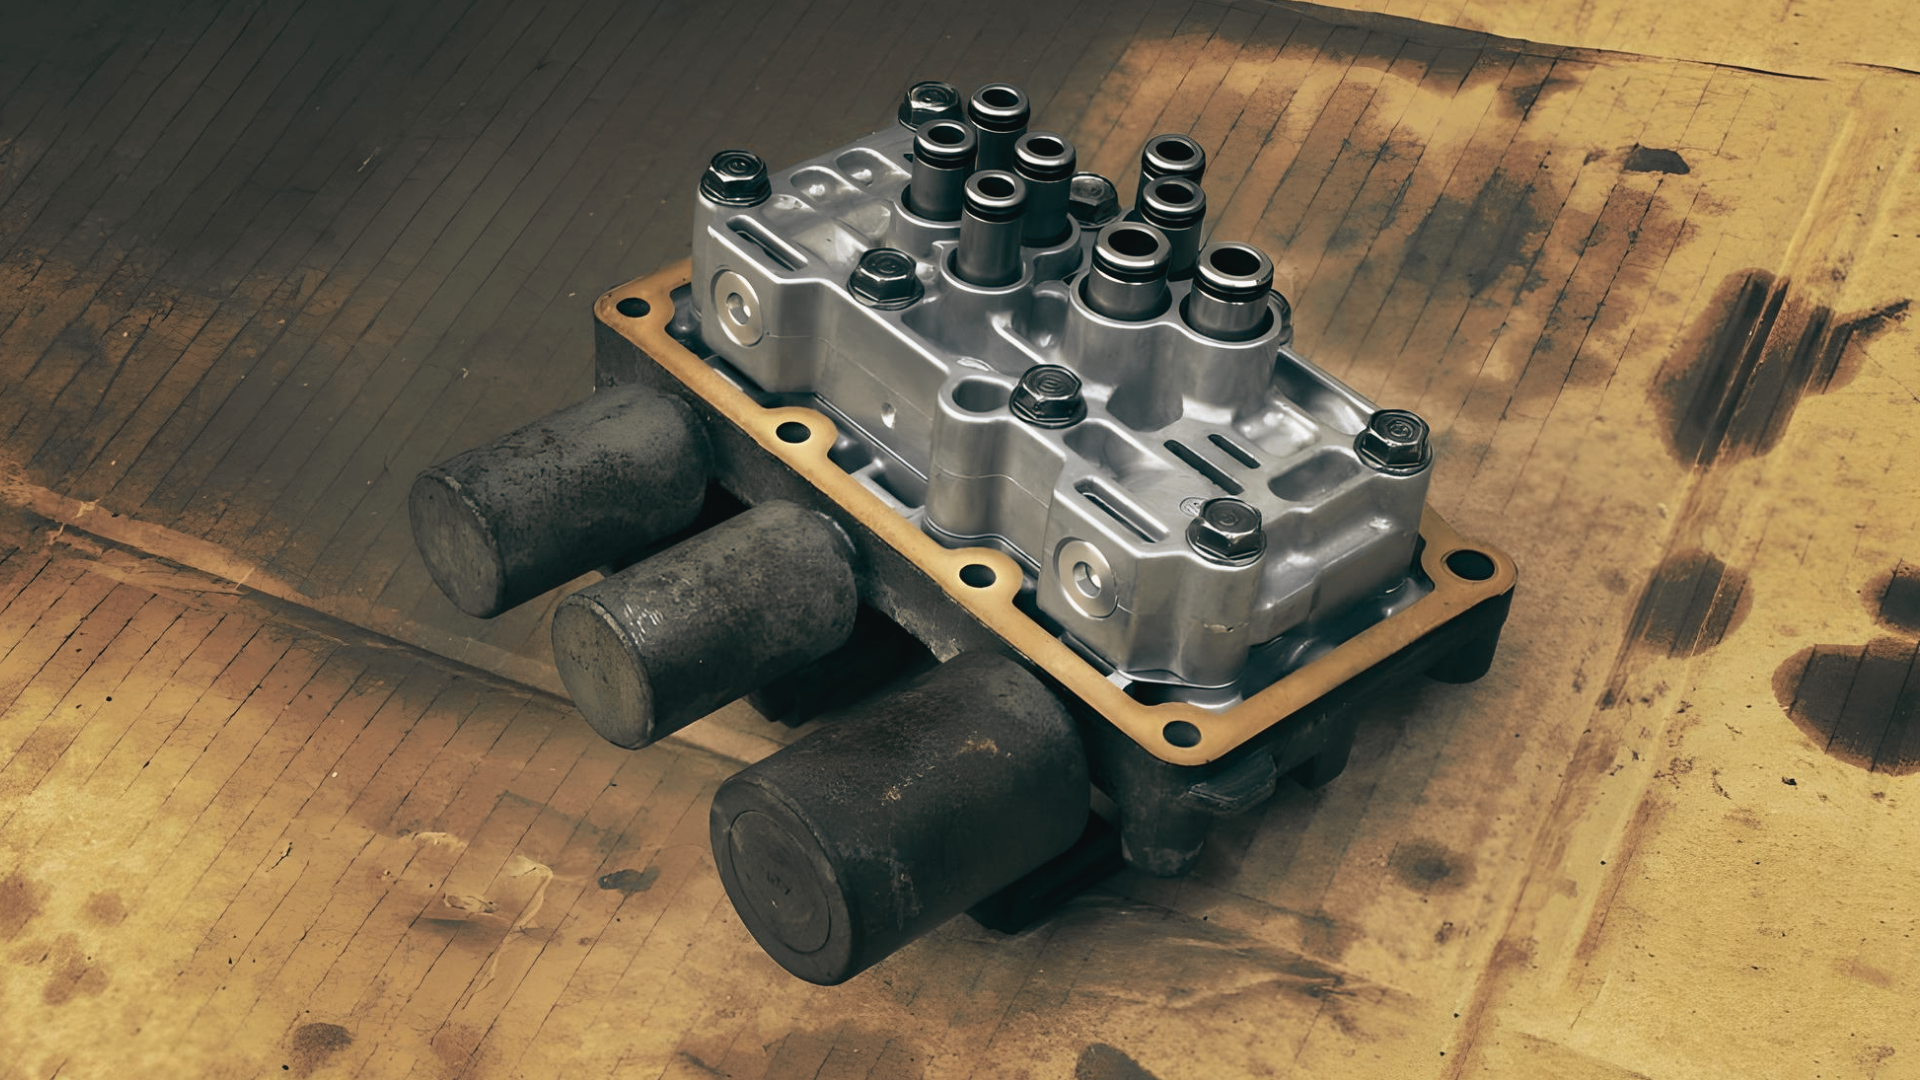
2. Solenoid Pack Replacement
A solenoid pack contains multiple solenoids in one assembly. If more than one solenoid shows signs of failure, replacing the entire pack is recommended.
This approach is slightly more expensive than a single solenoid replacement but reduces the risk of repeated failures in the near future. It’s ideal for older transmissions or vehicles with higher mileage.
3. Valve Body Rebuild
The valve body houses the solenoids and directs hydraulic pressure to the gears. If the valve body is worn or contaminated with debris, a rebuild or replacement may be necessary.
This repair is more expensive because it involves disassembling the valve body, cleaning or replacing internal components, and reassembling it.
A rebuilt valve body restores optimal hydraulic flow and transmission performance.
4. Full Transmission Replacement
In cases of severe internal damage, replacing the entire transmission may be the only solution. This is the most expensive option but ensures long-term reliability.
It is usually required when multiple solenoids fail along with other components like clutches, gears, or the torque converter.
Summary Table: Repair Options and Costs
| Repair Option | Cost | Best Use Case | Benefits |
|---|---|---|---|
| Single Solenoid Replacement | Low | One solenoid faulty | Quick, inexpensive, restores normal function |
| Solenoid Pack Replacement | Moderate | Multiple solenoids failing | Reduces risk of repeated failure |
| Valve Body Rebuild | High | Debris or wear inside valve body | Restores hydraulic performance fully |
| Full Transmission Replacement | Very High | Severe internal damage | Long-term reliability, complete fix |
Understanding these options helps you weigh repair cost versus long-term reliability. Early diagnosis and addressing solenoid issues promptly often save thousands in potential transmission repairs.
Here’s a detailed and polished version of your Preventive Measures section with explanations for each point:
Preventive Measures to Avoid Transmission Solenoid Failure
Preventing solenoid failure is far easier and cheaper than repairing a damaged transmission. Following proper maintenance and driving habits keeps your transmission performing optimally and extends solenoid life.
1. Replace Fluid and Filter
Transmission fluid lubricates internal components and transmits hydraulic pressure to the solenoids. Over time, fluid degrades, losing its effectiveness, and the filter can clog with debris.
Follow your vehicle’s recommended service schedule for fluid and filter replacement to prevent solenoid sticking and other transmission issues.
2. Use Manufacturer-Approved Fluids
Not all transmission fluids are created equal. Using manufacturer-approved fluids ensures the correct viscosity, additives, and thermal properties for your Jeep Grand Cherokee.
Incorrect fluid can lead to poor solenoid performance, delayed shifts, and accelerated wear on clutch packs.
3. Inspect Connectors and Wiring Regularly
Electrical issues often cause solenoid failure. Periodically inspect the wiring harnesses, connectors, and pins for corrosion, looseness, or damage. Clean connectors as needed and replace frayed wires to maintain reliable electrical signals to the solenoids.
4. Avoid Overheating with Auxiliary Coolers
High temperatures shorten the solenoid and transmission lifespan. If you tow heavy loads, drive in hot climates, or frequently carry passengers, consider installing an auxiliary transmission cooler. This helps maintain proper operating temperature, reduces fluid breakdown, and prevents solenoid overheating.
5. Repair Leaks Promptly
Leaking transmission fluid reduces hydraulic pressure and can lead to solenoid malfunction. Inspect for fluid leaks under the vehicle, especially around seals, gaskets, and the pan. Repair leaks promptly to maintain proper fluid levels and protect internal components.
6. Avoid Aggressive Driving
Rapid acceleration, hard braking, and towing beyond vehicle limits put extra stress on solenoids and the transmission. Drive smoothly and within recommended limits to reduce wear, maintain proper fluid pressure, and extend the life of your transmission components.
Following these preventive measures can significantly reduce the risk of solenoid failure, improve shifting performance, and extend the life of your Jeep Grand Cherokee’s transmission.
FAQ
Is it safe to drive with a bad solenoid?
Short trips may be safe, but long-term driving risks clutch and valve body damage.
Can new fluid fix solenoid issues?
Only if the solenoid is sticking due to contamination. Electrical faults need replacement.
Will resetting the TCM fix solenoid problems?
No. Reset clears adaptive data but does not repair electrical or mechanical failures.
How long do replacement solenoids last?
Typically, several years with clean fluid, proper heat management, and intact wiring.
Full Checklist Before Acting
Before attempting any repairs, it’s essential to gather all relevant information and perform preliminary checks. A structured checklist ensures you accurately diagnose the problem and choose the most effective repair option.
1. Record All Symptoms and Driving Patterns
Document when and how transmission issues occur. Note cold starts versus warm engine, city driving versus highway, uphill or towing conditions, and any unusual noises or shifts.
This helps identify patterns and narrows down which solenoid or component might be failing.
2. Scan and Log Transmission Codes
Use an OBD2 scanner capable of reading TCM codes. Record all active and pending codes. Codes like P0750 to P0770 specifically indicate solenoid or circuit issues. Logging these codes provides evidence to support your diagnosis and informs your repair strategy.
3. Inspect Fluid Condition
Check transmission fluid for level, color, and odor. Contaminated, burnt, or low fluid can cause solenoid problems. Look for metal flakes, which may indicate internal wear. Proper fluid condition is crucial for hydraulic pressure and solenoid function.
4. Check Wiring and Connectors
Inspect all electrical connections related to the solenoid. Look for loose plugs, frayed wires, corrosion, or damaged insulation. Electrical issues can mimic solenoid failure, so ensuring solid connections is a key diagnostic step.
5. Test Solenoid Coil Resistance
Using a multimeter, measure the resistance of each solenoid coil. Compare readings to the manufacturer’s specifications. Out-of-spec readings indicate a defective solenoid that needs replacement.
6. Review Live Data
Advanced scanners allow you to observe real-time solenoid performance, comparing commanded versus actual hydraulic response. Discrepancies confirm solenoid malfunctions and help identify intermittent issues that may not trigger codes.
7. Decide Repair Path Based on Evidence
After completing the above steps, determine the most appropriate repair. Options range from a single solenoid replacement, solenoid pack replacement, valve body rebuild, to a full transmission replacement.
Making a decision based on thorough diagnostics prevents unnecessary work and costs.
Following this checklist ensures a methodical, evidence-based approach to transmission solenoid issues, reducing the risk of misdiagnosis and costly mistakes.
Conclusion
Knowing what happens when a transmission solenoid goes bad allows early intervention. Symptoms start subtly and escalate to gear slipping, harsh shifts, and limp mode.
Following step-by-step diagnostics, testing, and replacement guidance protects the gearbox, saves money, and ensures vehicle safety. Preventive maintenance prolongs solenoid life and keeps your transmission performing optimally.