Removing Jeep Tj Fender Flares: A Complete Guide
Jeep TJ fender flares do more than just add style—they protect your vehicle’s body from mud, rocks, and road debris. But sometimes, owners want to remove them. Maybe you need to upgrade, repair rust, or simply prefer the look without flares.
Whatever your reason, removing Jeep TJ fender flares is a straightforward process when you know the right steps. This guide walks you through everything you need, highlights common mistakes, and compares flare removal tools for best results.
Why Remove Fender Flares?
Many Jeep TJ owners remove fender flares for several reasons:
- Upgrading to new flares: Aftermarket flares offer better clearance and look.
- Repairing rust or damage: Flares can hide rust, so removal helps with body repairs.
- Customizing appearance: Some drivers prefer a more rugged, flare-free style.
Before you begin, check if removing the flares affects your state’s legal requirements. Some states require fender flares for safety.
What You’ll Need
To remove your Jeep TJ fender flares, gather these tools:
- Socket wrench set (mainly 8mm and 10mm)
- Phillips screwdriver
- Trim removal tool
- Plastic pry tool (to avoid scratches)
- WD-40 or penetrating oil
- Safety gloves
If bolts are rusted, a drill with a socket adapter or a Dremel can help. Prepare a clean workspace and keep a container for bolts.

Step-by-step Removal Process
Removing fender flares is easier if you follow a clear process. Here’s how to do it:
1. Clean Around The Flares
Wash the area around the fender flares. Dirt can hide bolts and scratch the paint during removal.
2. Apply Penetrating Oil
Spray WD-40 or similar oil on all visible bolts and screws. Wait at least 10 minutes. This helps loosen rusted hardware.
3. Remove Bolts And Screws
Use a socket wrench or screwdriver to unscrew all bolts holding the flares. Most Jeep TJ models use 8mm bolts, but check your specific year.
If bolts spin but don’t come out, they might be rusted to the backing plate. Use a Dremel to cut through the bolt, or try gripping the back with pliers.
4. Pry Off The Fender Flares
Once all bolts are removed, gently use a plastic pry tool to separate the flare from the body. Don’t force it—check for hidden screws.
For stubborn flares, work slowly and use a trim removal tool. Avoid metal tools to prevent scratches.
5. Inspect The Fender Area
After removal, check the fender for rust or paint damage. Clean the area and treat any rust spots before installing new flares or leaving the fender bare.
6. Store Or Dispose Of Old Flares
If you plan to reuse or sell your flares, store them in a clean, dry place. Otherwise, dispose of them responsibly.
Comparison: Tools For Fender Flare Removal
Choosing the right tools makes the job easier. Here’s a comparison of common tools:
| Tool | Purpose | Best For | Cost Estimate |
|---|---|---|---|
| Socket wrench | Removing bolts | Standard bolts | $15–$30 |
| Plastic pry tool | Separating flare | Protecting paint | $8–$15 |
| Dremel | Cutting rusted bolts | Stuck hardware | $40–$80 |

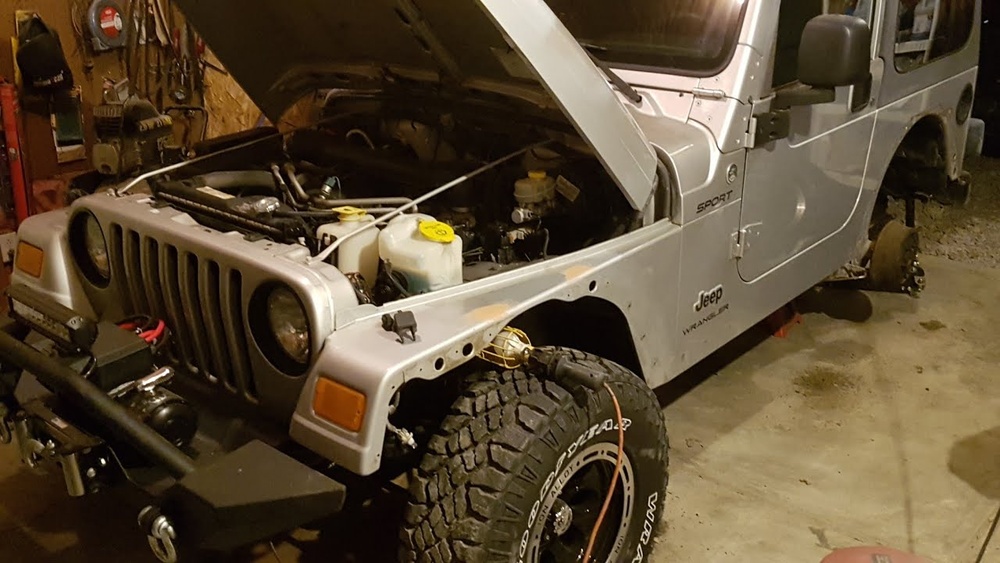
Jeep Tj Fender Flare Models: Differences
Not all Jeep TJ fender flares are the same. Here’s a look at differences by year:
| Year | Bolt Size | Material | Removal Difficulty |
|---|---|---|---|
| 1997-2002 | 8mm | ABS plastic | Easy |
| 2003-2006 | 10mm | ABS plastic | Medium (more rust) |
Older models often have more rust, making removal harder. Always check your Jeep TJ’s year before starting.
After Removal: Next Steps
Once the fender flares are off, you can:
- Install new aftermarket flares for improved clearance.
- Repair and repaint the fender to fix rust or scratches.
- Leave the fender bare for a custom look (but check legal requirements).
If you plan to leave the fender bare, consider using edge trim to protect exposed metal.
Common Mistakes And How To Avoid Them
Many beginners make mistakes when removing Jeep TJ fender flares. Here are some to watch out for:
- Forgetting to use penetrating oil: Always loosen bolts first to avoid stripping.
- Using metal tools: Metal prying tools can scratch paint—use plastic.
- Pulling too hard: Flares can crack or snap if pulled quickly. Work slowly.
- Missing hidden bolts: Check under mud and dirt for extra screws.
Non-obvious tip: Take photos before removing the flares. This helps you reinstall them or compare with aftermarket options.
Rust Removal And Prevention
After removing the flares, inspect for rust. Here’s a quick comparison of rust treatments:
| Treatment | Effectiveness | Cost | Time Required |
|---|---|---|---|
| Wire brush | Good for surface rust | $5–$10 | 10–20 min |
| Rust converter | Excellent for deep rust | $12–$25 | 30–60 min |
| Sanding | Good for paint prep | $10–$20 | 15–30 min |
Using a rust converter after wire brushing gives the best results. Always repaint after treating rust.
Expert Advice: Things Most Beginners Miss
- Double-check bolt locations: Jeep TJ flares have bolts underneath and inside the wheel well.
- Label bolts and clips: Keep track of hardware for easy reinstallation.
- Inspect for hidden clips: Some flares have plastic clips that can break easily.
If you’re unsure, consider watching a video guide or checking forums like JeepForum for tips from experienced owners.
Frequently Asked Questions
Is It Legal To Drive Without Fender Flares?
Check local laws. Some states require fender flares to cover tires for safety. Always research before removing flares.
Can I Reuse My Old Fender Flares?
Yes, if they aren’t cracked or damaged. Clean and store them properly for future use.
How Long Does It Take To Remove Jeep Tj Fender Flares?
Most owners need about 45–90 minutes. Rusted bolts can add extra time.
What’s The Best Way To Prevent Rust After Removal?
Clean and dry the area, treat any rust with converter, and apply touch-up paint. Edge trim can help protect exposed metal.
Are Aftermarket Flares Easier To Install?
Usually yes. Most aftermarket flares use new mounting hardware and are designed for quick installation.
Removing Jeep TJ fender flares is a manageable DIY project with the right tools and preparation. Take your time, avoid common mistakes, and you’ll get a clean result. Whether you’re upgrading, repairing, or customizing your Jeep, these steps will help you work confidently.