Creating a miniature Jeep out of cardboard is a fun project for kids and adults who enjoy crafts. With some planning and a few household materials, you can make a model that looks impressive and is sturdy enough for display or play. This guide will walk you through each step, from gathering materials to adding finishing touches. Even if you’ve never built a cardboard vehicle before, you’ll find clear instructions, helpful tables, and expert tips to ensure your Jeep turns out great.
Materials And Tools Needed
Before you start, gather all the supplies. Having everything ready saves time and keeps your workspace organized.
| Item | Purpose |
|---|---|
| Cardboard sheets | Main structure |
| Craft knife / Scissors | Cutting cardboard |
| Ruler & Pencil | Measuring & marking |
| Hot glue gun or white glue | Assembly |
| Markers or paint | Decoration |
| Toothpicks / Skewers | Axles |
| Plastic bottle caps | Wheels |
| Tape | Extra support |
You can substitute some materials. For example, bottle caps can be replaced with thick cardboard discs for wheels.
Designing Your Cardboard Jeep
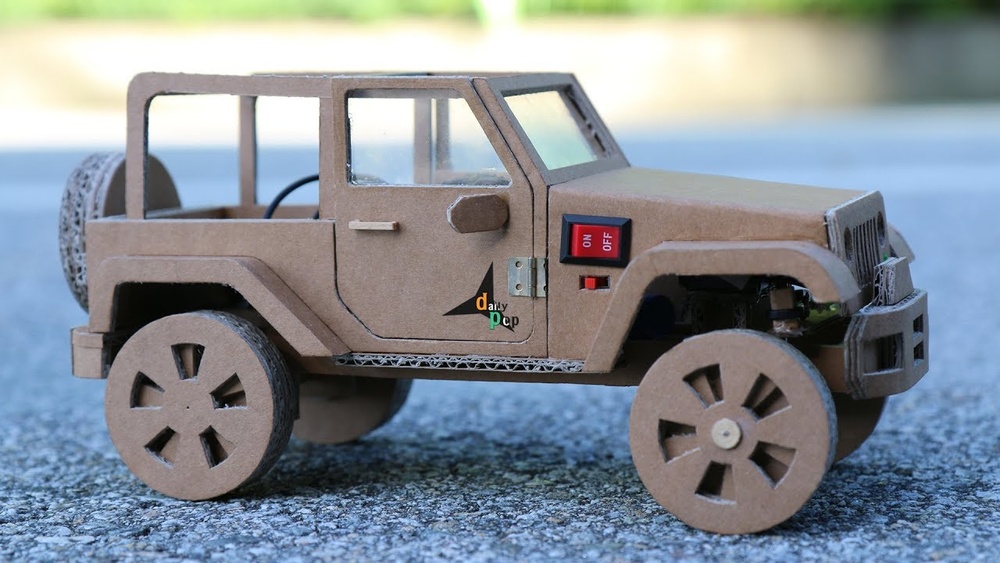
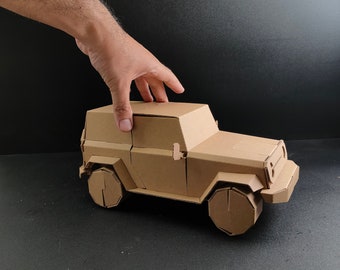
Start with a simple design. Look at photos of real Jeeps to understand the basic shape—boxy body, flat hood, open cab, and round headlights. Drawing a sketch helps you plan sizes and shapes.
Key Measurements
A common beginner mistake is making parts that don’t fit together. Measure each piece carefully. Here’s a sample plan for a model about 10 inches long:
| Part | Length (inches) | Width (inches) | Height (inches) |
|---|---|---|---|
| Main body | 10 | 4 | 3 |
| Hood | 3 | 4 | 1 |
| Windshield | 4 | 0.2 | 2 |
| Wheel diameter | 1.5 | – | – |
Adjust the size based on your available cardboard and workspace.
Step-by-step Building Instructions
Follow these steps for the best results:
1. Draw And Cut Out Shapes
Use the ruler and pencil to outline each part on the cardboard. Cut out:
- Two side panels for the Jeep’s body
- A top panel (roof) and base panel (floor)
- Hood and rear panels
- Four circles for wheels if not using bottle caps
- Small rectangles for doors and the windshield frame
- Assemble the Main Body
Attach the side panels to the base panel using hot glue. Hold each piece in place for 10-20 seconds to ensure a strong bond. Then, glue on the hood, roof, and rear panel.
3. Add The Windshield And Doors
Fix the windshield frame at the front, standing upright. Attach the doors (if you want them to open, use tape as a hinge).
4. Install The Wheels
Pierce small holes for axles near the bottom of the body. Slide toothpicks or skewers through, then glue a bottle cap or cardboard disc on each end for wheels. Make sure they spin freely.
5. Detailing
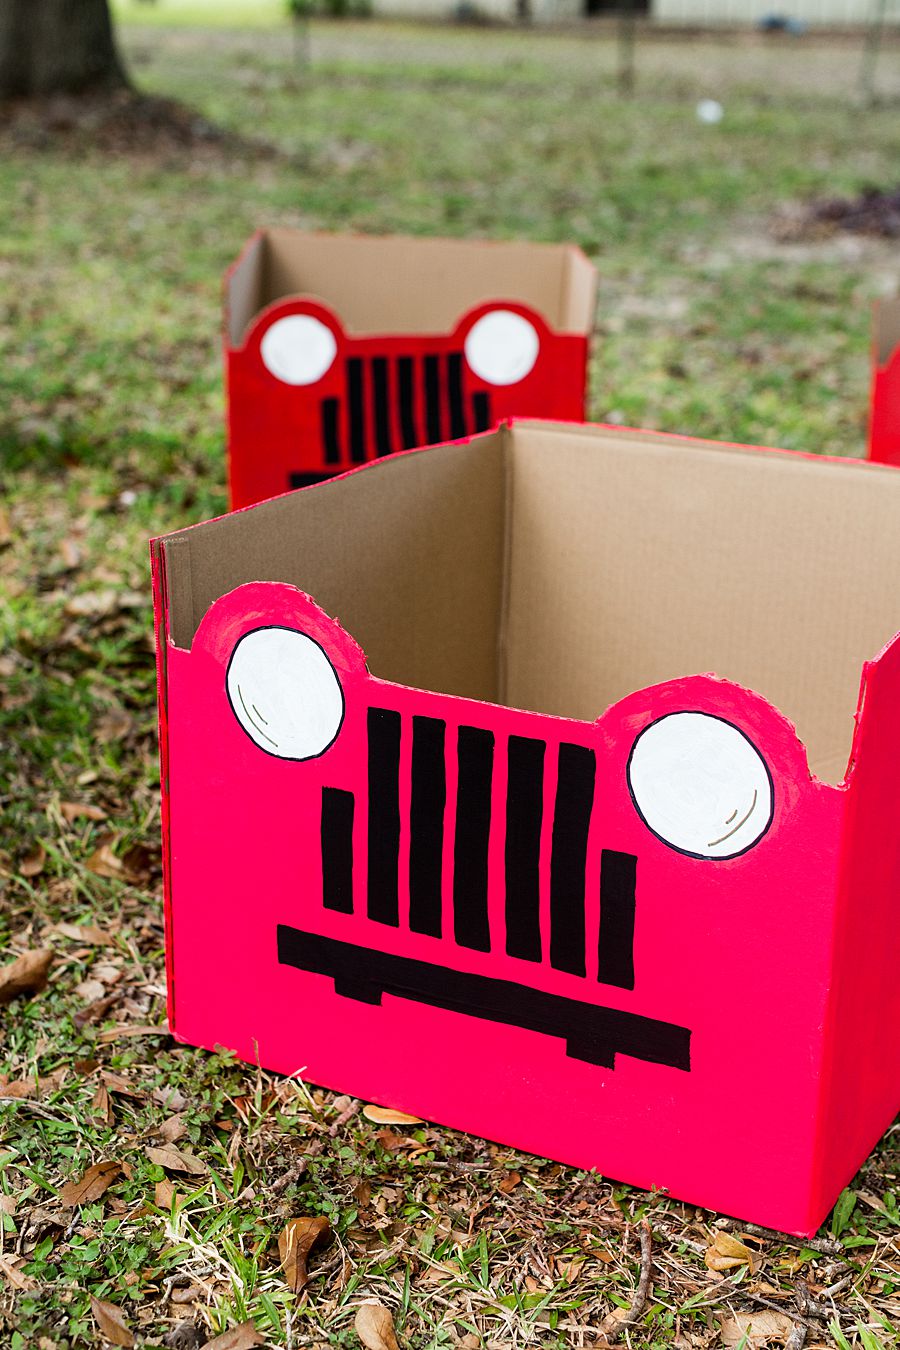
Draw headlights, grille, and bumpers with markers. Cut out small cardboard pieces for mirrors or seats. For extra realism, paint your Jeep in classic colors like army green or deep red.
Tips For A Stronger, More Realistic Jeep
- Use corrugated cardboard for strength, especially for the base.
- Double-layer the hood and roof if your cardboard is thin.
- A little white glue works for details, but hot glue is better for structure.
- Sand rough edges with a nail file for a cleaner look.
Many beginners forget to reinforce the bottom or glue the wheels securely. These small details make your Jeep last longer and look much better.
Common Mistakes And How To Avoid Them
1. Skipping The Sketch
Not planning your Jeep often leads to mismatched pieces. Always sketch and measure first.
2. Using Weak Glue
Weak glue makes the model fall apart. Hot glue dries fast and holds strong.
3. Overloading With Paint
Too much paint can make the cardboard soggy. Use thin coats and let each layer dry.
4. Forgetting Wheel Clearance
Wheels won’t spin if they touch the body. Leave enough space when attaching axles.
5. Ignoring Drying Time
Let each joint dry completely before moving to the next step. Rushing can ruin the shape.
Fun Variations To Try
Once you master the basic model, experiment with extra features:
- Opening trunk or hood for more play value
- Removable roof to mimic a real Jeep’s convertible top
- Custom paint jobs or stickers for details
- LED lights (battery-operated) for working headlights
You can even make a larger Jeep to fit small action figures or use recycled materials for an eco-friendly project.
How Cardboard Models Compare To Store-bought Toys
Building your own Jeep is rewarding, but how does it stack up to commercial models? Here’s a quick comparison:
| Feature | Cardboard Jeep | Plastic Toy Jeep |
|---|---|---|
| Price | Almost free | $10-$40 |
| Custom design | Yes, unlimited | Limited |
| Durability | Low-Medium | High |
| Eco-friendly | Very | Usually not |
| Learning value | High | Low |
| Repairable | Easy | Hard |
Final Thoughts
Making a Jeep out of cardboard is a project that boosts your creativity and problem-solving skills. It’s also an eco-friendly way to recycle materials you already have. With good planning and careful assembly, you’ll end up with a model that looks great and lasts for months. Even if your first attempt isn’t perfect, you’ll learn valuable techniques you can use for other cardboard crafts. For more inspiration and detailed vehicle plans, check out Instructables.

Frequently Asked Questions
How Long Does It Take To Make A Cardboard Jeep?
It usually takes 2–4 hours, depending on the level of detail and your experience. Beginners might need more time for planning and cutting.
Can I Use Regular Glue Instead Of A Hot Glue Gun?
Yes, but hot glue is stronger and dries much faster. Regular white glue works for small parts but may not hold the main structure well.
What Can I Use If I Don’t Have Bottle Caps For Wheels?
You can cut circles from thick cardboard and layer them for strength, or use jar lids, old toy wheels, or even thick foam.
Is This Project Safe For Children?
With supervision, yes. Let adults handle sharp tools like craft knives and hot glue. Kids can help with designing, painting, and simple assembly.
How Can I Make My Cardboard Jeep Look More Realistic?
Use real Jeep photos for reference, add small details like mirrors or bumpers, and paint in authentic colors. Thin black lines for the grille and headlights add realism.