Creating a cardboard Jeep photo booth is a fun, creative project for parties, school events, or family gatherings. It adds a playful touch and makes photos memorable. With some basic supplies and smart planning, anyone can build a Jeep photo booth that looks impressive and stands up to use.
Here’s how you can make your own, even if you don’t have much DIY experience.
Planning Your Cardboard Jeep Photo Booth
Before starting, decide the size and style of your Jeep booth. Most people make the booth large enough for two or three children, or one adult, to pose behind. A typical booth is about 5 feet wide, 3 feet tall, and 2 feet deep. This size fits in most rooms and is easy to move.
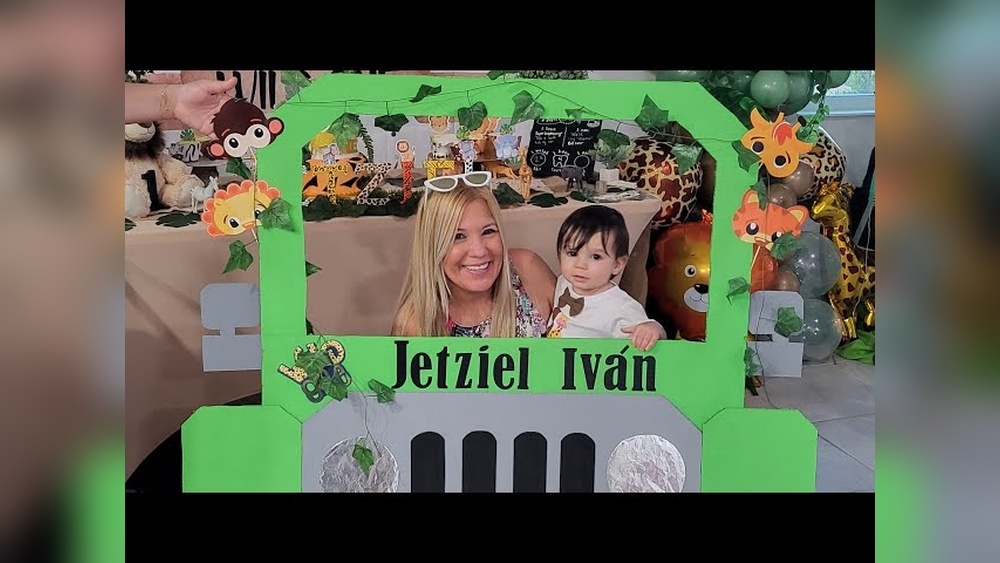
Think about the Jeep’s color and details. Classic Jeeps are olive green or black, but you can choose any color. Adding features like headlights, grill slats, and spare tire will make the booth look realistic in photos.
Materials And Tools Needed
Gather your supplies before you begin. Here’s what you’ll need:
- Cardboard boxes (large, sturdy)
- Box cutter or sharp scissors
- Hot glue gun and glue sticks
- Acrylic paint (green, black, silver, white)
- Paint brushes
- Markers (black and silver)
- Packing tape
- Ruler or measuring tape
- Paper plates (for headlights)
- Plastic cups (for taillights)
- Printed Jeep logo (optional)
One non-obvious tip: Use double-wall cardboard for the main body. It’s stronger and lasts longer. Also, collect extra cardboard for mistakes or detail work.
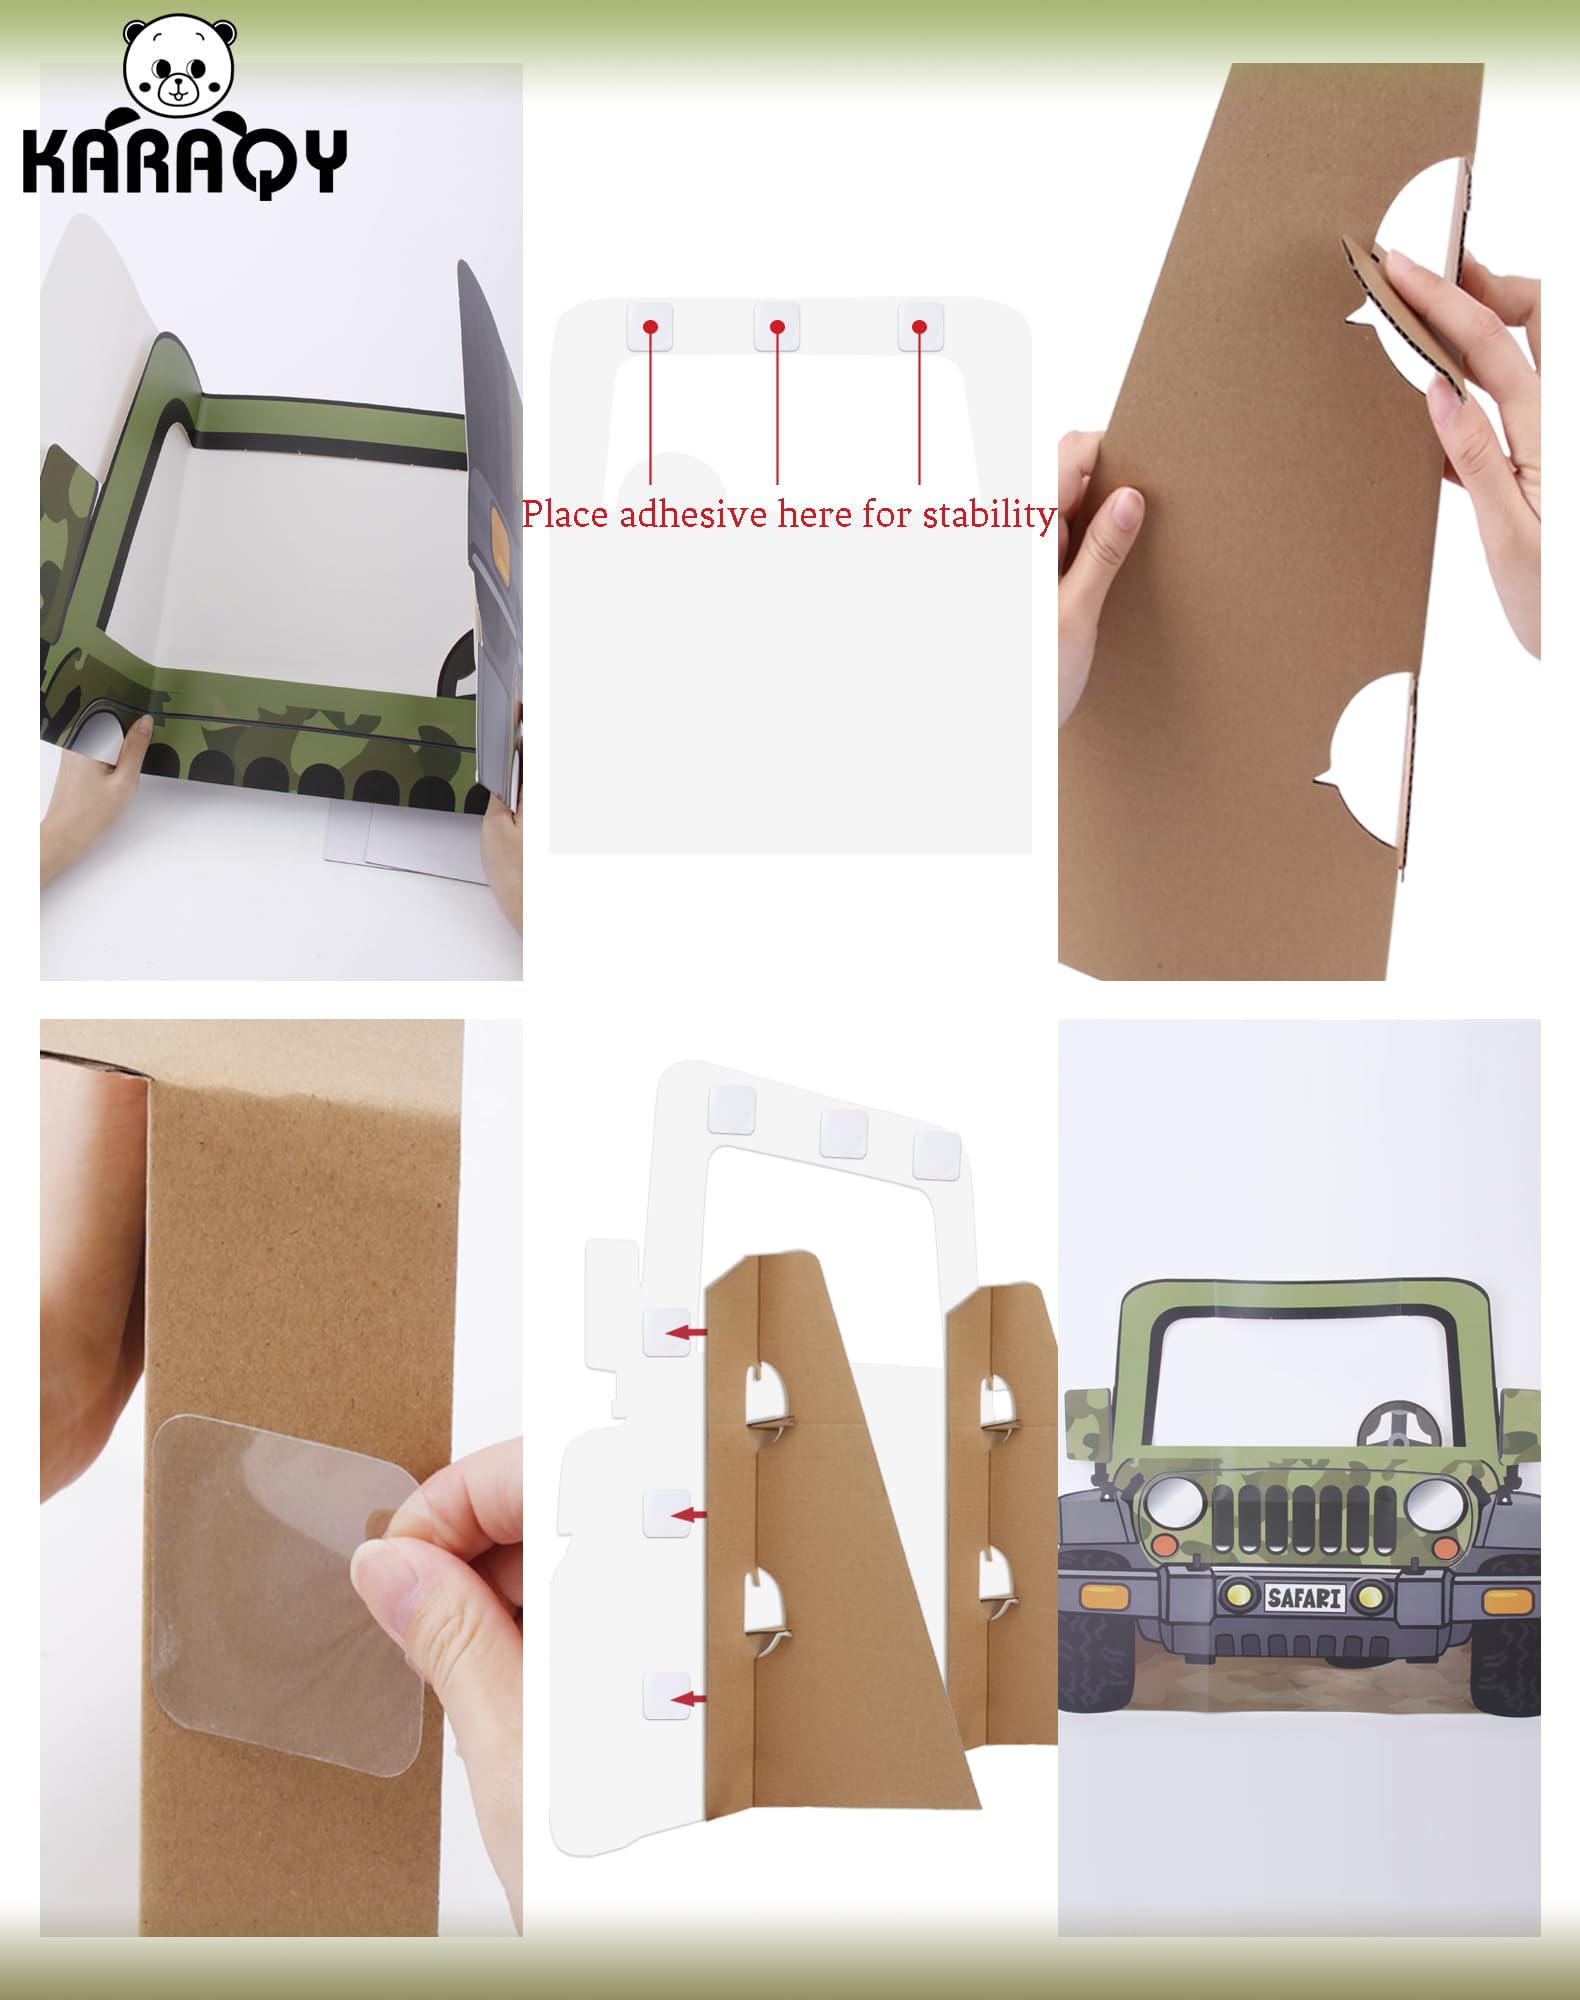
Building The Jeep Body
Start with the Jeep’s main structure. Follow these steps:
- Choose two large boxes for the front and back. Cut them so they are the same height.
- Use tape and hot glue to attach the sides. Reinforce all edges for strength.
- Cut out a windshield hole in the front panel. Make it big enough for faces to show.
- For the hood, attach a flat piece of cardboard to the front top.
- Add a dashboard shape below the windshield. Paint it black for realism.
Here’s a size comparison for different booth designs:
| Design | Width | Height | Depth | Capacity |
|---|---|---|---|---|
| Standard Jeep | 5 ft | 3 ft | 2 ft | 2-3 kids |
| Mini Jeep | 3 ft | 2 ft | 1.5 ft | 1 kid |
| XL Jeep | 6 ft | 4 ft | 2.5 ft | 2 adults |
Adding Jeep Details
Make your Jeep booth stand out by adding these details:
- Grill: Cut 7 vertical slats from cardboard. Paint them silver and glue to the front.
- Headlights: Paint two paper plates silver. Glue them above the grill.
- Taillights: Use plastic cups. Paint them red and attach to the back corners.
- Wheels: Cut four circles from cardboard. Paint black with silver hubcaps. Attach at each corner.
- Bumper: Use a strip of cardboard painted gray. Glue at the bottom front.
- Spare Tire: Attach a fifth wheel to the back for a classic Jeep look.
- Windshield Wipers: Draw with marker or glue small strips of cardboard.
- Jeep Logo: Print and glue the logo for extra detail.
Here’s a quick comparison of detail options:
| Detail | Material | Difficulty | Cost (approx) |
|---|---|---|---|
| Grill Slats | Cardboard | Easy | $0 |
| Headlights | Paper Plates | Easy | $2 |
| Taillights | Plastic Cups | Medium | $3 |
| Wheels | Cardboard | Medium | $0 |
| Bumper | Cardboard | Easy | $0 |
| Spare Tire | Cardboard | Easy | $0 |
A practical tip: Paint all parts before attaching. This avoids messy edges and helps the paint dry faster.

Painting And Decorating
Painting is where the Jeep photo booth becomes eye-catching. Choose acrylic paint because it dries fast and covers cardboard well. Start with the body color, then add details. If you want camouflage, use a sponge to dab green and brown shapes.
Use silver paint for the grill and wheels. For windows, paint light blue and draw window frames with marker. Add shadows and highlights to make the Jeep look more 3D.
Another insight: For extra shine, spray a clear gloss over the finished booth. This protects the paint and makes photos look brighter.
Setting Up Your Photo Booth
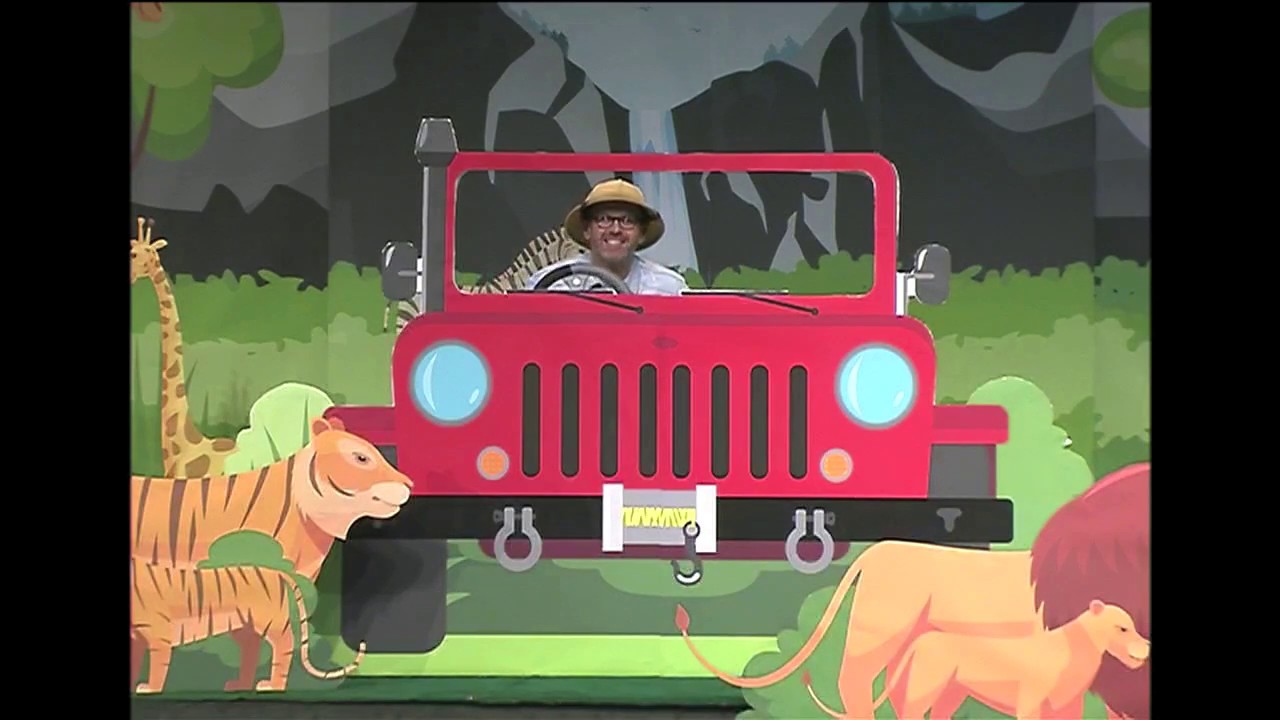
Pick a spot with good lighting. Place the Jeep booth so people can stand or sit behind the windshield cutout. Use a solid color backdrop or add scenery like trees or a desert.
Secure the booth with tape or weights if outdoors. If indoors, check the floor is flat so the booth doesn’t tip.
For props, give guests driver hats, toy steering wheels, or sunglasses. These simple touches make photos more fun.
Here’s a quick comparison of backdrop ideas:
| Backdrop | Look | Best For |
|---|---|---|
| Solid Color | Clean, simple | Birthday parties |
| Outdoor Scene | Adventure feel | School events |
| Desert/Camo | Jeep safari | Theme parties |
Safety And Durability Tips
Cardboard is light but can bend or collapse if not reinforced. Always glue and tape joints well. For extra strength, add strips of wood or PVC pipe inside the booth.
Do not let kids climb on the booth. It’s made for posing, not sitting. If the booth will be outside, waterproof it with clear tape or plastic wrap.
A useful tip: After the event, fold the booth flat for storage. You can reuse it for other parties.
Frequently Asked Questions
How Long Does It Take To Make A Cardboard Jeep Photo Booth?
Most people finish in 4–6 hours, including painting and drying time. If you have helpers, it can be faster.
What Is The Cost Of Materials?
You can build a basic booth for $10–$30 if you use recycled cardboard. Extra details or props may cost more.
How Many People Can Fit Behind The Photo Booth?
A standard booth fits 2–3 kids or 1–2 adults. Adjust the size if you expect larger groups.
Can I Use Other Materials Instead Of Cardboard?
Yes, foam board or plywood is more durable, but costs more. Cardboard is easy to work with for beginners.
Where Can I Find Templates Or Inspiration?
Search images online or check this WikiHow guide for photo booth ideas and step-by-step visuals.
Building a cardboard Jeep photo booth is a simple way to make your party unique. With careful planning, strong materials, and creative touches, your booth will impress guests and create lasting memories. Remember, the details matter most in photos, so spend time on painting and props.
Enjoy your event and the photos you create!