Changing the slave cylinder on a Jeep Wrangler is one of those jobs that can look intimidating at first. However, with the right guidance and a steady approach, it’s a task you can do at home and save on repair costs. The slave cylinder plays a critical role in your Wrangler’s clutch system. When it fails, shifting becomes hard or impossible, and you could be left stranded. Here’s a detailed, step-by-step guide to help you replace the slave cylinder the right way, avoid common mistakes, and keep your Jeep running smoothly.
Understanding The Slave Cylinder’s Role
The slave cylinder is a small hydraulic device located near the transmission. When you press the clutch pedal, hydraulic fluid from the master cylinder pushes the slave cylinder’s piston, which in turn disengages the clutch. If the slave cylinder leaks or fails, you’ll notice symptoms like a soft clutch pedal, trouble shifting gears, or fluid under your Jeep.
Many Jeep Wrangler models (especially the YJ, TJ, and early JK years) use an internal slave cylinder located inside the bellhousing. Later models may use an external slave cylinder mounted outside. Knowing which type your Wrangler uses is important, as internal units require more work.
Tools And Parts You’ll Need
Before starting, gather all necessary tools and parts. Having everything ready will make the process smoother and reduce the chance of mid-job surprises.
| Tool/Part | Purpose | Notes |
|---|---|---|
| Socket set (metric/SAE) | Remove bolts | Deep sockets help for bellhousing bolts |
| Wrenches (open/box-end) | Disconnect lines | Line wrench preferred for hydraulic fittings |
| Jack and jack stands | Lift and secure Jeep | Always use stands for safety |
| Drain pan | Catch fluid | Brake fluid can damage paint |
| Replacement slave cylinder | Main replacement part | Buy OEM or high-quality aftermarket |
| Brake fluid (DOT 3 or 4) | Refill system | Check your manual for correct type |
| Transmission jack (optional) | Support transmission | Especially for internal slave jobs |
| Shop towels/gloves | Clean up spills | Brake fluid is messy |
Pro tip: If you’re not sure about your Wrangler’s year or configuration, check your VIN or consult the owner’s manual before ordering parts.
Preparing Your Jeep Wrangler
Safety is always the first step. Park your Jeep on a flat, stable surface. Engage the parking brake. If you have a manual transmission, leave it in gear. Use wheel chocks on the opposite end from where you’ll be working.
- Disconnect the battery to prevent accidental shorts.
- Raise the Jeep using a jack and secure it with jack stands under the frame rails.
- Locate the slave cylinder: For external types, it’s usually on the driver’s side of the bellhousing. For internal types, you’ll need to remove the transmission.
Removing The Old Slave Cylinder
The process is different for internal and external slave cylinders. Here’s a breakdown for both:
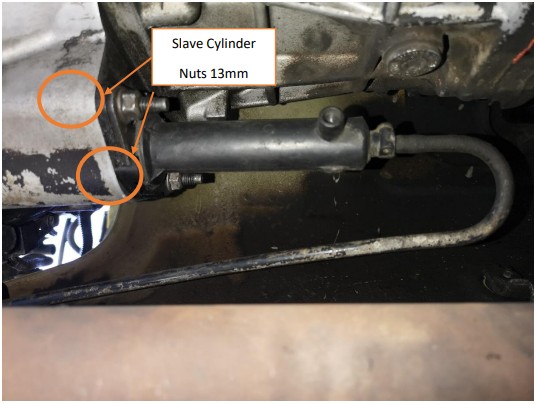
External Slave Cylinder Removal
- Locate the slave cylinder on the outside of the bellhousing.
- Disconnect the hydraulic line using a line wrench. Some fluid may leak—catch it in your drain pan.
- Remove mounting bolts (usually two) that secure the cylinder to the bellhousing.
- Gently pull the cylinder out. Inspect the pushrod and fork for wear or damage.
Internal Slave Cylinder Removal
This is more complex because you’ll need to remove the transmission.
- Remove the driveshafts (front and rear) by unbolting the U-joints and sliding them out.
- Disconnect the shifter linkage, speedometer cable, and any electrical connectors on the transmission.
- Support the transmission with a jack.
- Unbolt and remove the transmission crossmember.
- Unbolt the bellhousing from the engine. There may be six or more bolts.
- Slide the transmission back to expose the clutch assembly.
- Locate the internal slave cylinder around the input shaft.
- Disconnect the hydraulic line and remove the retaining bolts.
- Remove the old slave cylinder.
Beginner mistake: Forgetting to label connectors or take photos during disassembly can make reinstallation confusing. Use your phone to document each step.
Installing The New Slave Cylinder
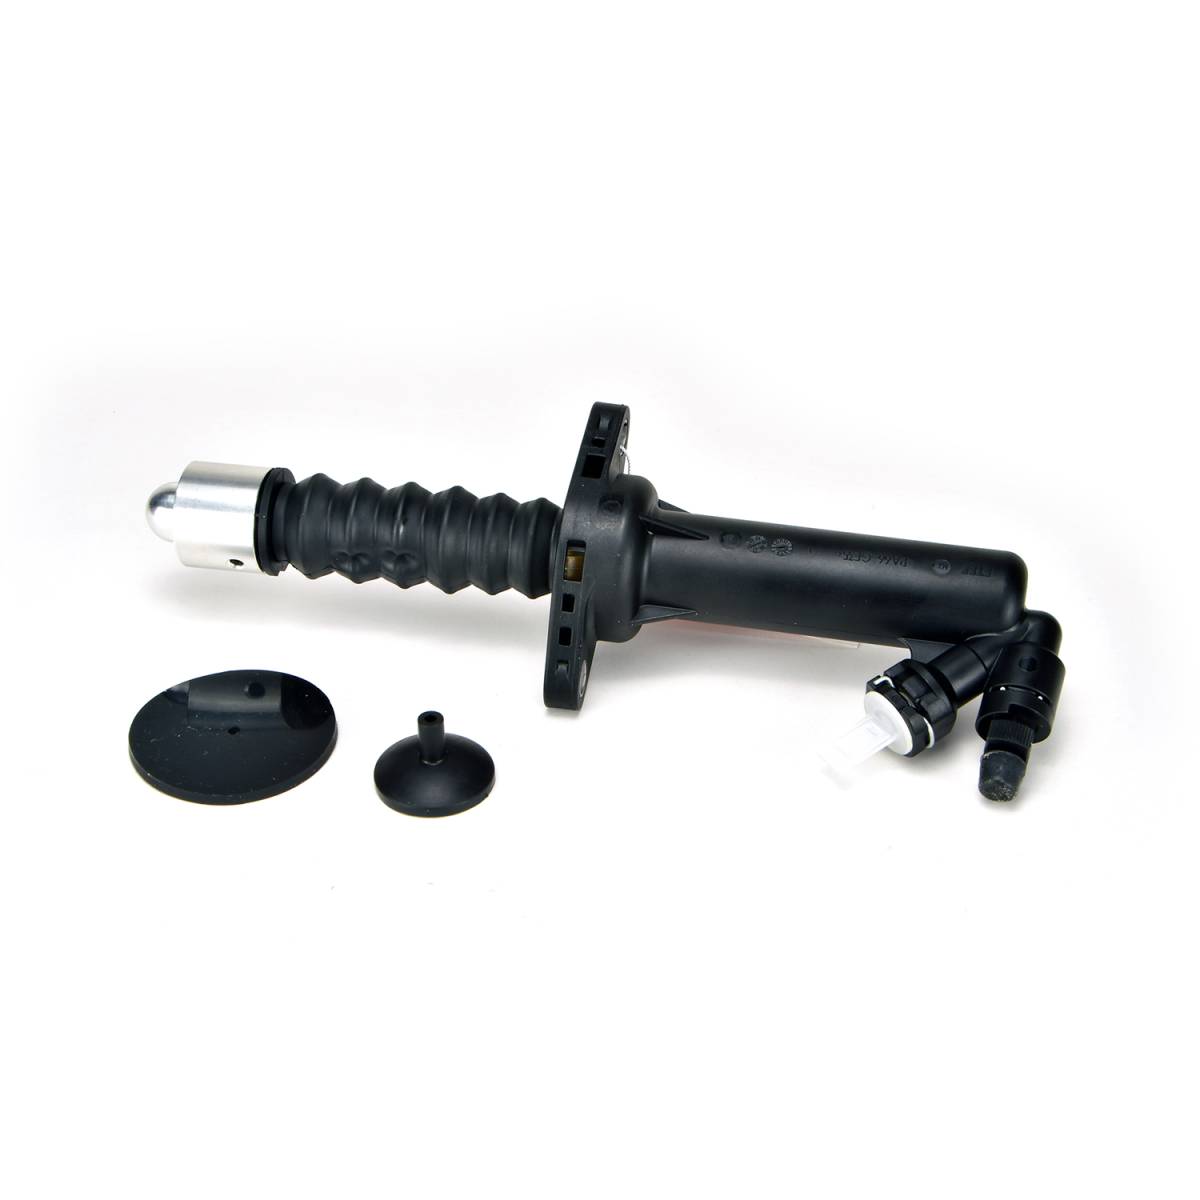
For External Slave Cylinders
- Position the new cylinder in place. Make sure the pushrod aligns with the clutch fork.
- Bolt the cylinder to the bellhousing. Torque to the manufacturer’s specs.
- Reconnect the hydraulic line. Tighten securely, but avoid overtightening which can crack fittings.
- Check for leaks before proceeding.
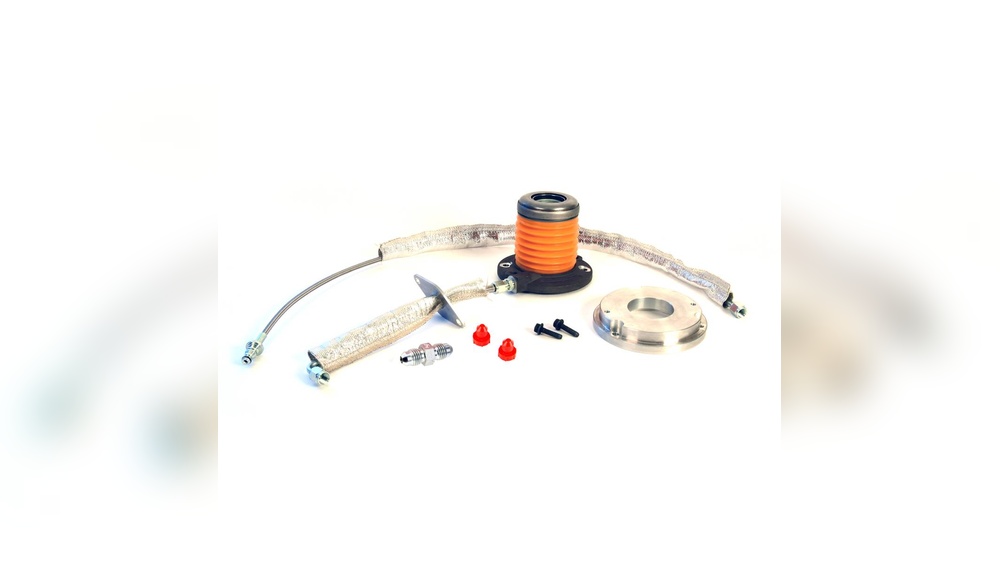
For Internal Slave Cylinders
- Install the new cylinder on the input shaft. Make sure seals are lubricated and seated properly.
- Bolt in place and attach the hydraulic line.
- Double-check alignment of the clutch fork and throwout bearing.
- Reinstall the transmission by reversing the removal steps. Take your time aligning the input shaft with the clutch disc.
- Reconnect all linkages, sensors, and driveshafts.
Non-obvious tip: It’s smart to replace the clutch and throwout bearing when you’re already removing the transmission. Labor is the same, and you’ll avoid doing this job twice.
Bleeding The Clutch System
After installing the new slave cylinder, you must bleed the system to remove air. Air pockets make the clutch pedal feel soft or spongy.
| Bleeding Method | Difficulty | Notes |
|---|---|---|
| Gravity bleed | Easy | Open bleeder, let fluid flow out until bubbles stop |
| Two-person bleed | Medium | One pumps pedal, one opens/closes bleeder screw |
| Vacuum bleed | Medium | Uses a vacuum tool, fast and clean |
Steps:
- Fill the master cylinder reservoir with fresh brake fluid.
- Attach a hose to the slave cylinder bleeder screw.
- Open the bleeder and let fluid drip into a container.
- Close the bleeder once fluid runs clear and air-free.
- Check pedal feel—it should be firm and consistent. Top off fluid as needed.
Beginner insight: Some Wrangler clutch systems are notoriously hard to bleed fully. Patience is key, and sometimes gentle tapping on the line helps release trapped air.
Reassembly And Final Checks
After bleeding, inspect all connections for leaks. Reconnect the battery. Start your Jeep and depress the clutch pedal several times. Shift through all gears while stationary to ensure smooth operation. Lower your Jeep from the jack stands.
Take a short test drive at low speed. Listen for odd noises and pay attention to clutch engagement. Any grinding, unusual resistance, or pedal issues mean you should re-inspect your work before driving further.
Pro insight: If the pedal still feels soft after multiple bleeds, double-check for leaks or consider that the master cylinder could also be worn.
Cost, Time, And Difficulty Comparison
Here’s how replacing the slave cylinder compares with other common Jeep clutch repairs:
| Repair Type | Parts Cost (USD) | Labor Time (hrs) | Difficulty Level |
|---|---|---|---|
| External Slave Cylinder | $30–$70 | 1–2 | Moderate |
| Internal Slave Cylinder | $40–$120 | 4–6 | Hard |
| Full Clutch Replacement | $150–$400 | 5–8 | Hard |
| Master Cylinder | $30–$80 | 1–2 | Moderate |
External slave jobs are much easier and cheaper, while internal types can be labor-intensive. If you’re considering paying a shop, labor costs can add $300–$600, especially for internal replacements.
Mistakes To Avoid
- Mixing up brake and clutch fluid—always use the type specified in your owner’s manual.
- Not cleaning around the hydraulic fittings before disconnecting—dirt can easily enter the system.
- Forgetting to support the transmission when removing bolts—this can cause dangerous drops or damage.
- Skipping the bleed step—air in the system can make the clutch unusable.
- Over-tightening bolts—can crack aluminum bellhousing or slave cylinder casting.
When To Seek Professional Help
While many Wrangler owners do this job themselves, it’s not for everyone. If you lack the right tools, experience, or don’t feel confident, it’s wise to let a trusted mechanic handle the replacement. Safety comes first.
Additional Tips For Success
- Always replace old fluid with fresh brake fluid. Old fluid absorbs water and can corrode internal parts.
- Check the clutch fork and pilot bearing for wear while you’re in the bellhousing. These are cheap to replace and critical for smooth clutch operation.
- If you notice clutch chatter or grinding even after replacement, inspect the flywheel for hot spots or warping.
Frequently Asked Questions
How Do I Know If My Slave Cylinder Has Failed?
Symptoms include a soft or sinking clutch pedal, difficulty shifting gears, or fluid leaks under your Wrangler. Sometimes you’ll see brake fluid on the ground near the transmission. If the clutch pedal goes straight to the floor with little resistance, the slave cylinder is likely the problem.
Can I Drive My Jeep With A Bad Slave Cylinder?
It’s not safe. A failing slave cylinder can leave you stuck without the ability to shift. If the system loses fluid, your clutch will not disengage. Continuing to drive this way can damage your transmission or clutch assembly.
What Fluid Does The Jeep Wrangler Slave Cylinder Use?
Most Jeep Wranglers use DOT 3 or DOT 4 brake fluid for the clutch hydraulic system. Always check your owner’s manual before adding fluid, as using the wrong type can cause seal failure.
Do I Need To Replace The Clutch When Changing The Slave Cylinder?
If your Jeep uses an internal slave cylinder, it’s smart to replace the clutch and throwout bearing at the same time. The labor to access these parts is the same, and reusing old components can mean repeating the job soon. For external slave cylinders, it’s not required unless you see signs of clutch wear.
Where Can I Find An Official Service Manual For My Jeep Wrangler?
The best source for official procedures, torque specs, and diagrams is the Jeep factory service manual. You can find these through Mopar’s official site or reputable automotive literature dealers. For more technical details, see the Jeep Wrangler Wikipedia page.
Taking the time to change your Jeep Wrangler’s slave cylinder properly will restore smooth shifting and prevent costly breakdowns. With patience, the right tools, and attention to detail, it’s a project that rewards you with new confidence in your Jeep’s reliability.