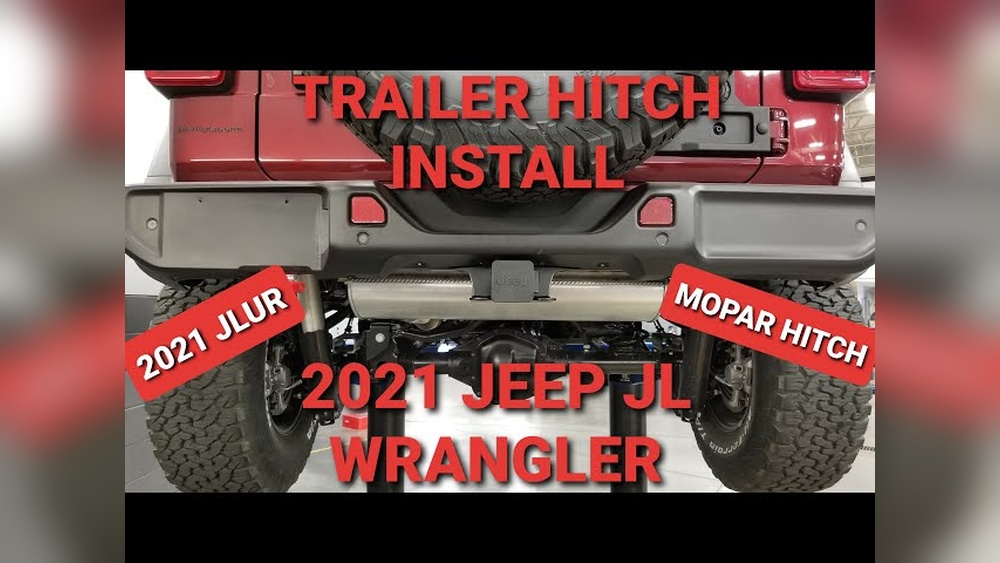
Installing a hitch on your Jeep Wrangler unlocks new adventures. It lets you tow trailers, carry bikes, and haul gear for camping or road trips. Many Wrangler owners add a hitch to expand their SUV’s capabilities, but the process can feel intimidating for beginners. The good news is: with the right tools and guidance, installing a hitch is manageable—even if you’re not a professional mechanic.
This guide breaks down every step, from choosing the right hitch to tightening the final bolts. You’ll learn practical tips, avoid common mistakes, and find answers to questions that most first-timers miss. Whether your Wrangler is a daily driver or weekend explorer, this article helps you make the upgrade confidently.
Understanding Hitch Types For Jeep Wrangler
Before you start, it’s important to know which hitch suits your needs. Jeep Wrangler models typically use Class II or Class III hitches, depending on towing capacity and usage. Here’s a quick comparison:
| Hitch Class | Towing Capacity | Receiver Size | Common Uses |
|---|---|---|---|
| Class II | 1,500-3,500 lbs | 1.25″ | Small trailers, bike racks |
| Class III | 3,500-6,000 lbs | 2″ | Medium trailers, campers |
Most Jeep Wranglers, especially the JK and JL models, support Class III hitches. If you plan to tow more than a small trailer, go for Class III—it offers greater strength and versatility.
Choosing The Right Hitch
Not all hitches fit every Wrangler. Consider these factors before buying:
- Model Year Compatibility: Wrangler frames change between generations (YJ, TJ, JK, JL). Always check the hitch’s fitment list.
- Towing Needs: If you’ll tow heavier loads, choose a hitch with a higher weight rating.
- Brand Reputation: Trusted brands like CURT, Draw-Tite, and Reese offer durable, corrosion-resistant hitches.
- Finish Quality: Powder-coated finishes last longer and resist rust.
- Mounting Type: Some hitches bolt directly to the frame; others use bumper mounts. Frame-mount hitches are stronger.
Here’s a quick comparison of popular hitch brands:
| Brand | Material | Finish | Warranty |
|---|---|---|---|
| CURT | Steel | Powder-coated | Limited Lifetime |
| Draw-Tite | Steel | Gloss black | Limited Lifetime |
| Reese | Steel | Powder-coated | Limited Lifetime |
Non-obvious insight: Many beginners forget to check the hardware kit. Ensure your hitch comes with all bolts, washers, and nuts needed for installation. Buying separately can cause delays.
Tools And Materials Needed
You don’t need expensive equipment. Basic tools are enough for most installations:
- Socket set (especially 18mm, 19mm, 21mm sockets)
- Ratchet wrench
- Torque wrench (for correct tightening)
- Screwdrivers
- Safety glasses
- Work gloves
- WD-40 or penetrating oil (for rusty bolts)
- Jack and stands (optional for easier access)
- Hitch hardware kit (should come with your hitch)
Pro tip: Have a friend help. Lifting the hitch into place is much easier with two people.
Preparing Your Jeep Wrangler
Preparation saves time and avoids mistakes. Here’s what to do before installation:
- Park on a flat surface and engage the parking brake.
- Remove spare tire if it blocks access to the rear frame (common on some models).
- Clean the mounting area using a wire brush and WD-40. Rusty or dirty surfaces make installation harder.
- Check for pre-installed tow hooks. Some Wranglers have rear hooks that must be removed.
- Lay out all hardware and compare with the instructions.
Non-obvious insight: If your Wrangler has a factory bumper, check for plastic covers or trim pieces blocking the frame. Removing these makes mounting easier.
Step-by-step Hitch Installation
Let’s dive into the actual process. These steps work for most Jeep Wrangler hitches, but always check your hitch’s manual for specifics.
1. Remove Obstructions
Take off the spare tire, tow hooks, and any plastic covers blocking the frame. Keep removed hardware in a safe place—you might need it later.
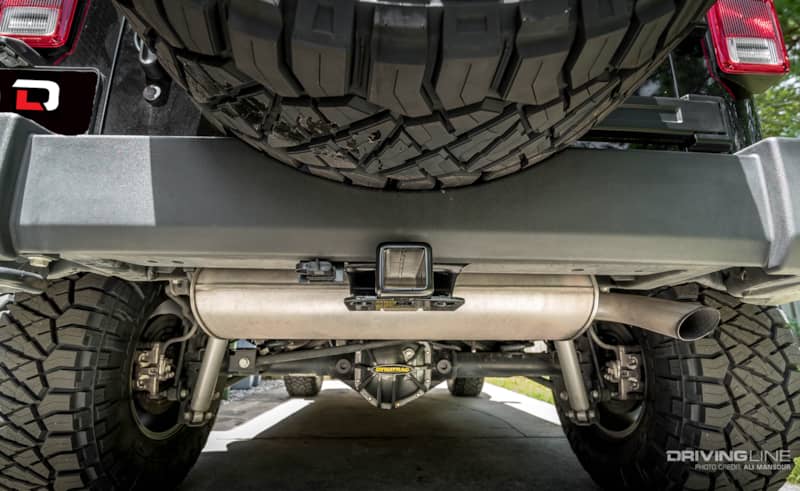
2. Position The Hitch
Lift the hitch up to the frame’s mounting holes. Align it so the holes match the frame.
- On some models, the hitch fits between the frame rails.
- Use a jack or have a helper hold the hitch in place.
3. Insert Bolts
Insert the bolts through the hitch and into the frame. Use washers as specified in your kit.
Pro tip: If bolts don’t slide easily, clean the holes with a wire brush or spray WD-40.
4. Hand-tighten Bolts
Screw in all bolts by hand first. This lets you adjust the hitch’s position before fully tightening.
5. Torque Bolts
Using a torque wrench, tighten the bolts to the manufacturer’s specified torque (usually 70–110 ft-lbs for Class III hitches). Over-tightening can strip threads; under-tightening can cause movement.
6. Double-check Alignment
Ensure the hitch sits straight and clear of the bumper. If needed, loosen bolts, reposition, and retighten.
7. Reattach Spare Tire And Covers
Put back any parts you removed. Make sure nothing rubs against the hitch.
8. Test Fit
Insert your ball mount or accessory into the receiver. Check for secure fit and clearance.
Wiring The Trailer Connector (optional)
If you plan to tow a trailer, you’ll need a wiring harness to connect the Jeep’s lights to the trailer. Here’s a quick overview:
- Buy a Wrangler-specific plug-and-play wiring kit.
- Locate the tail light wiring behind the rear bumper.
- Connect the harness following instructions.
- Route wires away from moving parts and heat.
- Test the trailer lights before towing.
Beginner mistake: Many forget to test wiring before towing. Always check brake, turn, and tail lights for proper function.
Safety Checks Before Use
A newly installed hitch needs a few safety checks before you hit the road:
- Inspect all bolts for tightness after driving 50–100 miles.
- Check for rust or paint chips. Reapply paint or rust inhibitor if needed.
- Verify load rating. Never tow above your Jeep’s or hitch’s rated capacity.
- Confirm wiring works if you installed a connector.
Expert tip: Keep your installation instructions and warranty documents. If you sell the Jeep or need repairs, this paperwork helps.
Troubleshooting Common Issues
Even careful installers run into problems. Here are solutions to frequent issues:
Hitch Doesn’t Fit
- Double-check model compatibility.
- Inspect frame for damage or aftermarket parts blocking mounting holes.
- Consider swapping for a different hitch or consulting your dealer.
Stuck Bolts
- Use penetrating oil and wait 10–20 minutes.
- Try a breaker bar for extra leverage.
- Avoid forcing bolts; stripped threads are hard to repair.
Misaligned Hitch
- Loosen bolts, reposition, and retighten.
- Check for debris or bent frame parts.
- Ask a friend to help hold the hitch level.
Rattling Or Noise
- Add rubber washers or anti-rattle kits to reduce movement.
- Ensure all bolts are torqued correctly.
Comparing Diy Vs. Professional Installation
Should you install yourself or hire a pro? Here’s a quick comparison:
| DIY Installation | Professional Installation |
|---|---|
| Costs $50–$150 (only hitch price) | Costs $150–$350 (labor + hitch) |
| 1–2 hours for beginners | 30–60 minutes for pros |
| Gain hands-on experience | Expert fit and warranty |
| May face minor difficulties | Handles tricky issues |
DIY is ideal for those comfortable with tools and basic car maintenance. If you’re unsure or lack time, consider professional installation.
Real-world Examples
Many Jeep owners share their hitch installation stories. Here are a few insights:
- 2019 Wrangler JL owner: Installed a CURT Class III hitch in 90 minutes. Needed to remove tow hooks. Found that cleaning the mounting holes with a wire brush made bolt insertion much easier.
- 2012 Wrangler JK owner: Used a Draw-Tite hitch. Had trouble with rusty bolts—WD-40 solved the issue after letting it sit overnight.
- Beginner tip: Always read both the Jeep’s manual and the hitch instructions. Sometimes, one offers details the other misses.
Mistakes To Avoid
- Skipping torque checks: Bolts must be torqued to spec.
- Forgetting spare tire removal: It blocks access on many models.
- Choosing the wrong hitch class: Match your needs to the rating.
- Ignoring wiring: Trailer lights are required by law for safe towing.
- Not checking compatibility: Frame changes between Wrangler generations.
Maintenance Tips
A hitch is not “set and forget.” Keep it strong and safe with simple care:
- Inspect monthly for rust, loose bolts, and damage.
- Wash after off-roading to remove mud and salt.
- Touch up paint to prevent corrosion.
- Lubricate receiver with a light oil for easy accessory insertion.

Where To Find Reliable Hitch Information
Want more details or model-specific guides? The best sources include:
- Official Jeep forums
- Manufacturer websites (CURT, Draw-Tite, Reese)
- Jeep Wrangler owner’s manuals
- Trusted automotive sites like etrailer.com
Frequently Asked Questions
What Is The Towing Capacity Of A Jeep Wrangler With A Class Iii Hitch?
Most Jeep Wranglers with a Class III hitch can tow up to 3,500–6,000 lbs. Always check your specific model’s manual for exact numbers—older models may have lower ratings.
Do I Need To Remove The Rear Bumper To Install A Hitch?
Usually, you do not need to remove the bumper. Most hitches bolt directly to the frame rails behind the bumper. However, some aftermarket bumpers or accessories may require extra steps.
Can I Install A Hitch Without Special Tools?
Yes, you can install a hitch with basic hand tools. A torque wrench is important for safety, but many auto stores offer tool rentals if you don’t own one.
Is A Wiring Harness Required For All Hitch Installations?
A wiring harness is only needed if you plan to tow a trailer. Bike racks and cargo carriers don’t require wiring.
Will Installing A Hitch Void My Jeep’s Warranty?
Installing a hitch usually does not void the warranty if done correctly and using approved parts. Always keep your receipts and follow manufacturer recommendations.
Adding a hitch to your Jeep Wrangler is a practical upgrade that pays off every time you need to tow, carry bikes, or move heavy gear. With careful preparation, the right tools, and a bit of patience, even beginners can complete the installation safely and confidently.
Remember to check compatibility, follow torque specs, and double-check wiring. When in doubt, ask for help or consult a pro. With your new hitch, your Wrangler is ready for bigger adventures—whether that’s camping, road-tripping, or hauling the essentials.