If your vehicle feels unstable, pulls to one side, or your tires show unusual wear, the problem may be with your front struts alignment. Correctly aligned struts make your car safer, more comfortable, and improve tire life. While many people leave this job to professionals, understanding the process can save money and help you spot issues early. This guide explains how to align front struts, including tools, step-by-step instructions, and tips most beginners miss.
Understanding Front Struts And Alignment
Front struts are a crucial part of your car’s suspension system. They help absorb shocks and keep your tires in contact with the road. Alignment refers to adjusting the angles of the wheels and struts so the car drives straight and handles properly.
Three main angles matter:
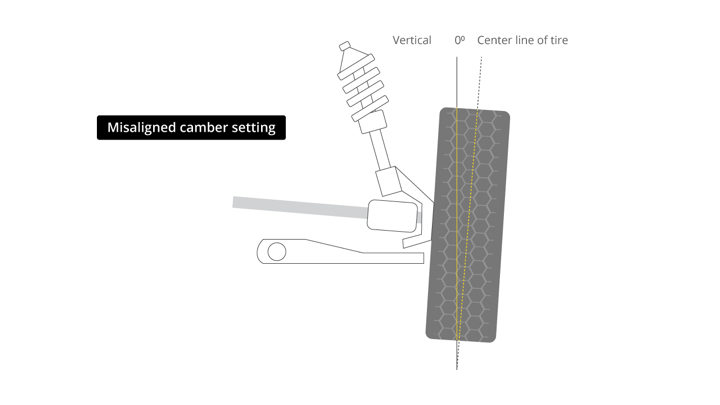
- Camber: Tilt of the wheel inward or outward.
- Caster: Angle of the steering axis from the vertical.
- Toe: Direction the tires point relative to the car’s center.
Incorrect alignment affects handling, causes tire wear, and can even damage suspension parts.
Here’s a quick overview of common alignment issues:
| Alignment Angle | Symptoms | Possible Causes |
|---|---|---|
| Camber | Tire wears on one edge | Strut mount bent, worn bushings |
| Caster | Poor straight-line stability | Damaged control arm, accident |
| Toe | Feathered tire edges | Tie rod misalignment |
Tools And Preparation
Before you start, gather the right tools. This step is easy to overlook, but missing one tool can delay the whole job.
You’ll need:
- Socket set and wrenches
- Jack and jack stands
- Tape measure
- Alignment gauge or digital angle finder (optional, but improves accuracy)
- Wheel chocks
- Pen and paper for notes
Park your car on a flat surface. Set the parking brake, and place wheel chocks behind the rear wheels. Raise the front of the car and secure it with jack stands. Remove the front wheels for better access to the struts.

Step-by-step Alignment Process
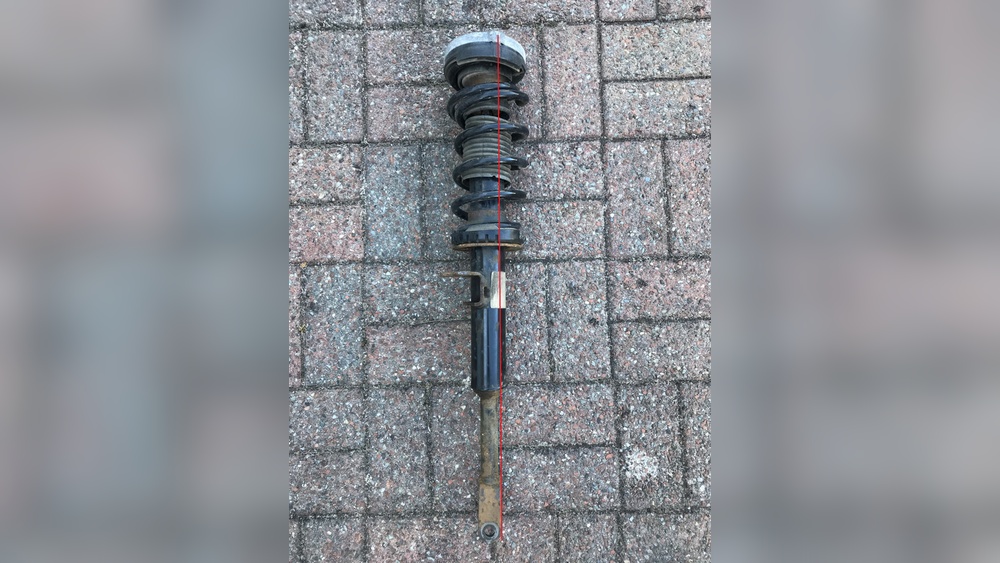
1. Inspect The Struts And Suspension
Check for worn or damaged parts. Look for leaking struts, cracked bushings, and bent mounts. Replace faulty parts before aligning, or you’ll waste effort.
2. Measure Existing Alignment
Use a tape measure or digital gauge to check camber, caster, and toe. Here’s a quick data comparison for two methods:
| Method | Accuracy | Ease of Use |
|---|---|---|
| Tape Measure | ±2 degrees | Simple |
| Digital Gauge | ±0.5 degrees | Requires setup |
Record the measurements. Compare them with your car’s factory specifications, usually found in the manual or online.
3. Adjust Camber
Most cars adjust camber by loosening the strut bolts where the strut meets the steering knuckle. Move the strut inward or outward to achieve the correct angle. Tighten bolts once set.
Tip: Always adjust camber first, as it affects caster and toe readings.
4. Adjust Caster
Caster adjustment is less common on many cars, but some models allow it by moving the strut mount. Follow your car’s manual for specific instructions. If not adjustable, check for bent components.
5. Adjust Toe
Toe is set by adjusting the tie rods. Loosen the lock nut, turn the tie rod to change the wheel angle, then retighten.
To check toe, measure the distance between the front and rear edges of the tires. They should match or follow the factory specs.
6. Recheck All Measurements
After every adjustment, remeasure all angles. It’s easy to change one and unknowingly affect another.
| Adjustment | Can Affect | Recheck Needed? |
|---|---|---|
| Camber | Caster, Toe | Yes |
| Caster | Camber | Yes |
| Toe | None | Yes |
7. Test Drive And Fine-tune
Put the wheels back on, lower the car, and drive it for a few miles. Notice any pulling, vibration, or steering issues. Recheck alignment if problems remain.
Practical Tips And Common Mistakes
- Use quality tools. Cheap wrenches can slip and damage bolts.
- Mark the original position of each bolt before adjusting, so you can return if needed.
- Don’t rush. Small changes make a big difference.
- Always torque bolts to manufacturer specs for safety.
- Never ignore worn suspension parts—alignment won’t fix them.
One insight many beginners miss: wheel alignment should be checked after any suspension repair, not just after installing new struts. Another is that even small impacts, like hitting a pothole, can throw alignment off.

When To Seek Professional Help
While DIY alignment saves money, complex cases need a shop. If your car has adjustable electronic suspension, or if you notice uneven tire wear after repeated adjustments, seek professional help. A certified alignment shop uses laser tools for higher precision.
For more details on alignment technology, visit Wikipedia.
Frequently Asked Questions
What Are The Signs Of Bad Front Strut Alignment?
Common signs include uneven tire wear, pulling to one side, and steering wheel vibration. Sometimes, you’ll hear clunking noises from the suspension.
Can I Align Struts Without Special Tools?
Basic alignment is possible with simple tools, but precision gauges improve accuracy. For perfect alignment, professional equipment is best.
How Often Should Front Struts Be Aligned?
Check alignment every 12,000 miles or once a year, and after hitting large potholes or doing suspension repairs.
Is It Safe To Drive With Misaligned Struts?
Driving with misaligned struts is not safe. It causes poor handling, increased tire wear, and can damage other parts over time.
Do All Cars Have Adjustable Front Struts?
Not all cars have adjustable struts. Many modern vehicles use fixed designs, where only toe can be adjusted. Always check your car’s manual before starting.
Aligning front struts may seem complicated at first, but with the right tools, careful measurement, and patience, you can improve your vehicle’s handling and safety. Remember to check alignment after any suspension work, and don’t hesitate to ask a professional if results aren’t perfect.
This careful approach will extend your tires’ life and keep your car driving smoothly.