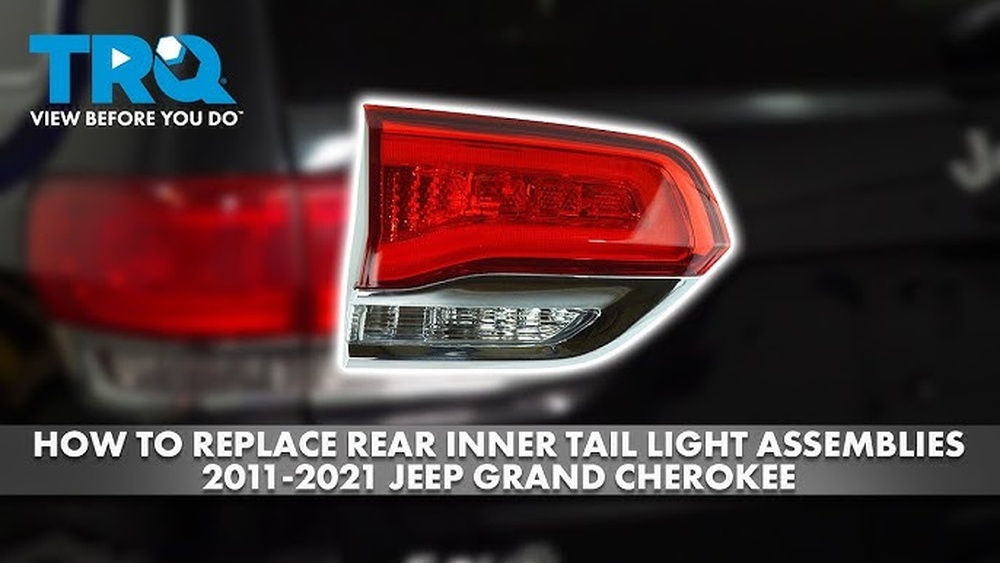
Is your Jeep Grand Cherokee’s tail light broken or not working right? Replacing the tail light assembly might seem tricky, but it’s easier than you think.
You don’t need to spend a lot on a mechanic or wait days without proper lighting. In this guide, you’ll learn simple steps to fix your tail light quickly and safely. Keep reading, and you’ll have your Jeep shining bright again in no time!
Tools Needed
Replacing the tail light assembly on a Jeep Grand Cherokee requires a few simple tools. Having the right tools ready makes the job easier and faster. You do not need special equipment. Most tools are common and easy to find.
Gathering tools before starting saves time. It also helps avoid frustration during the process. This section lists the essential tools to replace the tail light assembly.
Screwdriver Set
A screwdriver set is necessary to remove screws holding the tail light. Both flathead and Phillips screwdrivers may be needed. Choose screwdrivers with comfortable grips for better control.
Socket Wrench
A socket wrench helps remove bolts securing the tail light assembly. Common sizes for Jeep Grand Cherokee are 8mm or 10mm. A ratcheting wrench speeds up the process.
Trim Removal Tool
A plastic trim removal tool prevents damage to the car’s body. It helps pry off clips and panels gently. Avoid using metal tools that can scratch paint.
Gloves
Wearing gloves protects your hands from sharp edges and dirt. It also improves grip on tools and parts. Choose durable work gloves for comfort and safety.
Flashlight
A flashlight brightens the work area, especially in low light. It helps see screws and connectors clearly. Use a small, handheld flashlight or headlamp.

Credit: www.amazon.com
Safety Precautions
Replacing the tail light assembly on a Jeep Grand Cherokee requires care. Safety comes first to avoid injuries or damage. Follow simple steps to protect yourself and the vehicle. Proper precautions make the task easier and safer.
Wear Protective Gear
Wear gloves to protect your hands from sharp edges. Use safety glasses to shield your eyes from dust and debris. Closed-toe shoes prevent foot injuries from dropped tools or parts.
Disconnect The Battery
Always disconnect the vehicle’s battery before starting. This stops electrical shocks and short circuits. It also prevents accidental airbag deployment during work.
Work In A Well-lit Area
Choose a bright workspace to see all parts clearly. Good lighting reduces mistakes and speeds up the process. Avoid dark or cluttered places that can cause accidents.
Use The Right Tools
Select tools that fit the screws and bolts exactly. Using wrong tools can strip screws or damage parts. Keep tools organized to avoid searching during the job.
Follow Manufacturer Guidelines
Read the Jeep Grand Cherokee manual before replacing the tail light. It provides specific safety tips and steps. Following instructions reduces risks and ensures proper installation.
Locate The Tail Light Assembly
Locating the tail light assembly on a Jeep Grand Cherokee is the first step to replacing it. This part sits at the back of the vehicle. It houses the brake light, turn signal, and reverse light. Knowing its exact position helps you work faster and safer.
The tail light assembly is easy to find once you know where to look. It is mounted on the rear corners of the Jeep. Both the left and right sides have their own tail light assembly. Each side can be removed and replaced separately.
Access The Rear Of The Jeep
Stand behind your Jeep Grand Cherokee. Look at the lower corners near the bumper. The tail light assembly is located there. It covers the lights that show when you brake or turn.
Identify The Tail Light Lens
The lens is the colored cover on the tail light assembly. It is usually red or red with white sections. This lens protects the bulbs inside. It also helps other drivers see your signals clearly.
Open The Liftgate Or Trunk
Open the rear liftgate to access the bolts holding the tail light. Inside, you will see screws or clips securing the assembly. Removing these fasteners lets you pull out the tail light.
Check For Wiring Connections
Behind the tail light assembly, find the wiring harness. This connects the lights to your Jeep’s electrical system. Carefully disconnect the wires before removing the assembly.

Credit: www.youtube.com
Remove The Old Tail Light
Removing the old tail light on your Jeep Grand Cherokee is the first step in replacement. This process lets you access the faulty part safely. Follow each step carefully to avoid damage. Keep tools ready and work in a well-lit area.
Disconnect Electrical Connectors
Start by opening the rear hatch to access the tail light. Locate the electrical connectors behind the assembly. Press the tab on the connector to release it. Pull the connector gently away from the tail light. Do not pull wires directly to avoid damage.
Unscrew Mounting Bolts
Find the bolts holding the tail light in place. Use a socket wrench or screwdriver to unscrew each bolt. Keep bolts in a safe place for reinstallation. Check for any hidden screws under trim or covers. Removing all bolts ensures the tail light can move freely.
Detach Tail Light From Vehicle
With connectors unplugged and bolts removed, gently pull the tail light away. Wiggle it slightly if it feels stuck. Avoid forcing it to prevent breaking clips or wires. Once loose, carefully take the tail light off the vehicle. Place it on a soft surface to protect it.
Prepare New Tail Light Assembly
Preparing the new tail light assembly is an important step. It ensures the replacement fits and works correctly. Take your time to check and set up the new part before installation. This saves effort and avoids problems later.
Check Compatibility
First, confirm the new tail light matches your Jeep Grand Cherokee model. Look for the right year and trim. Different models may have different shapes and connectors. Using the wrong part can cause fitting issues or electrical problems. Check the part number and compare it with the old assembly.
Transfer Bulbs If Necessary
Some new tail light assemblies come without bulbs. If so, remove the bulbs from your old assembly carefully. Use gloves or a clean cloth to avoid damage. Insert the bulbs into the new assembly in the correct sockets. Make sure they fit snugly and work before installing the tail light.
Install New Tail Light
Installing the new tail light on your Jeep Grand Cherokee is a simple but important step. This process restores your vehicle’s safety and appearance. Follow these steps carefully to make sure the new tail light fits and works correctly.
Position Assembly On Vehicle
Take the new tail light assembly and align it with the mounting area. Make sure the shape matches the vehicle’s body. The assembly should fit snugly without forcing it. Check that the holes for bolts line up perfectly.
Secure With Mounting Bolts
Use the original mounting bolts to secure the tail light. Tighten each bolt by hand at first to keep the assembly in place. Then, use a wrench to firmly tighten the bolts. Avoid over-tightening to prevent damage to the plastic parts.
Reconnect Electrical Connectors
Locate the electrical connectors on the back of the tail light. Plug the connectors into their matching sockets on the vehicle. Push them in until they click or feel secure. Test the tail light functions before finalizing the installation.
Test The New Tail Light
Testing the new tail light on your Jeep Grand Cherokee is a crucial step. It confirms the assembly works correctly. Faulty lights can cause accidents or fines. Take time to check each function carefully. This ensures safety for you and other drivers.
Check Brake Lights
Press the brake pedal firmly. Ask a helper to watch the tail light. The brake light should glow bright red. No flickers or dim spots allowed. If it does not light up, check the bulb or wiring again.
Verify Turn Signals
Turn on the right turn signal. Watch the new tail light blink. The blinking should be steady and clear. Repeat for the left turn signal. Both sides must flash at a normal speed.
Ensure Reverse Lights Work
Shift your Jeep into reverse gear. The reverse lights should turn on immediately. They must be bright and white. This helps others see you backing up. If they don’t light, inspect the connection or bulbs.
Troubleshooting Tips
Troubleshooting tail light issues on a Jeep Grand Cherokee helps avoid extra repairs. Identifying simple problems saves time and money. Common issues include faulty bulbs, loose wiring, or blown fuses.
Check each part carefully to find the exact cause. Use these tips to spot problems before replacing the tail light assembly.
Check The Bulbs For Damage
Remove the tail light cover to inspect bulbs. Look for dark spots or broken filaments. Replace any bulbs that look burnt or cracked. Use bulbs that match your Jeep’s specifications.
Inspect The Wiring Connections
Loose or corroded wires cause tail light failure. Look behind the tail light for disconnected wires. Clean any rust or dirt on connectors. Secure all wires tightly to avoid flickering lights.
Test The Tail Light Fuse
Locate the fuse box under the dashboard or hood. Find the fuse labeled for tail lights. Use a fuse tester or swap with a working fuse. Replace blown fuses with the same rating only.
Use A Multimeter For Electrical Issues
A multimeter helps check voltage at the tail light socket. Set it to measure DC voltage. Touch the probes to the socket terminals while the lights are on. No reading means a wiring problem.
Clean The Tail Light Lens
Dirt and grime reduce light brightness. Remove the lens and clean with mild soap and water. Dry thoroughly before reassembly. Clear lenses improve visibility and safety on the road.

Credit: www.amazon.com
Frequently Asked Questions
How Do I Remove The Tail Light Assembly On Jeep Grand Cherokee?
To remove the tail light assembly, first disconnect the battery. Unscrew the retaining bolts inside the trunk. Gently pull the assembly out and disconnect the wiring harness. This process prevents damage and ensures safe removal.
What Tools Are Needed To Replace Jeep Grand Cherokee Tail Light?
You need a screwdriver, socket wrench, and gloves. A trim removal tool can help avoid scratches. These tools make the replacement process faster and safer.
How Long Does It Take To Replace A Tail Light Assembly?
Replacing the tail light assembly usually takes 15 to 30 minutes. Time varies depending on your experience and tool availability. Following a guide can speed up the process.
Can I Replace The Tail Light Assembly Myself Safely?
Yes, you can safely replace it by following instructions carefully. Disconnect the battery to avoid electrical issues. Use proper tools and handle parts gently to prevent damage.
Conclusion
Replacing the tail light assembly on your Jeep Grand Cherokee is simple. Follow the steps carefully to avoid mistakes. Take your time and handle parts with care. A working tail light keeps you safe on the road. It also helps you avoid tickets.
Regular checks can prevent bigger problems later. Now, you can fix the tail light yourself without extra help. Save money and feel confident doing it. Your Jeep will look good and stay road-ready. Try it today and see how easy it can be.