Is your 1994 Jeep Grand Cherokee’s rear light not working? Fixing it yourself can save you time and money.
Changing the rear light is simpler than you might think, even if you don’t have much experience with car repairs. In this guide, you’ll learn easy steps to replace your rear light quickly and safely. Keep reading to get your Jeep back on the road with bright, working lights—no hassle, no confusion.
Tools Needed
Changing the rear light on a 1994 Jeep Grand Cherokee is simple. Having the right tools makes the job faster and safer. Gather everything before starting. This saves time and avoids frustration.
Socket Wrench
A socket wrench helps remove bolts holding the light in place. Use a 7mm or 8mm socket for this Jeep model. It fits tightly and turns bolts easily. A ratcheting wrench speeds up the process.
Flathead Screwdriver
This tool helps pry off plastic covers without damage. Use it gently to avoid scratches. It also helps disconnect wiring clips with ease.
Replacement Bulb
Have the correct bulb ready. The 1994 Jeep Grand Cherokee uses a 3157 bulb for the rear light. Check the old bulb to confirm. Always use a new bulb to ensure brightness.
Gloves
Wear gloves to protect your hands and the bulb. Oils from skin can shorten bulb life. Gloves keep bulbs clean and hands safe from sharp edges.
Safety Precautions
Changing the rear light on a 1994 Jeep Grand Cherokee needs careful steps. Safety is the first priority. Taking precautions protects you and your vehicle. Avoid accidents and damage by preparing well.
Wear Protective Gear
Always wear gloves to protect your hands. Glass parts can be sharp. Safety glasses stop dust and debris from harming your eyes. Dress in clothes that cover your skin well.
Turn Off The Vehicle
Make sure the Jeep is off before starting work. Remove the key from the ignition. This stops any electrical shocks or shorts. Work on a cool vehicle to avoid burns.
Work In A Well-lit Area
Good lighting helps you see small parts clearly. Avoid working in dark places. Use a flashlight or portable light if needed. Clear the area of clutter for better focus.
Disconnect The Battery
Remove the negative cable from the battery first. This cuts power to the lights. Prevents electric shocks or shorts during the change. Keep metal tools away from the battery terminals.
Handle Bulbs Carefully
Hold bulbs with a cloth or gloves. Oils from your skin can shorten bulb life. Avoid dropping or hitting the bulbs. Dispose of old bulbs properly to prevent injury.
Locate Rear Light Assembly
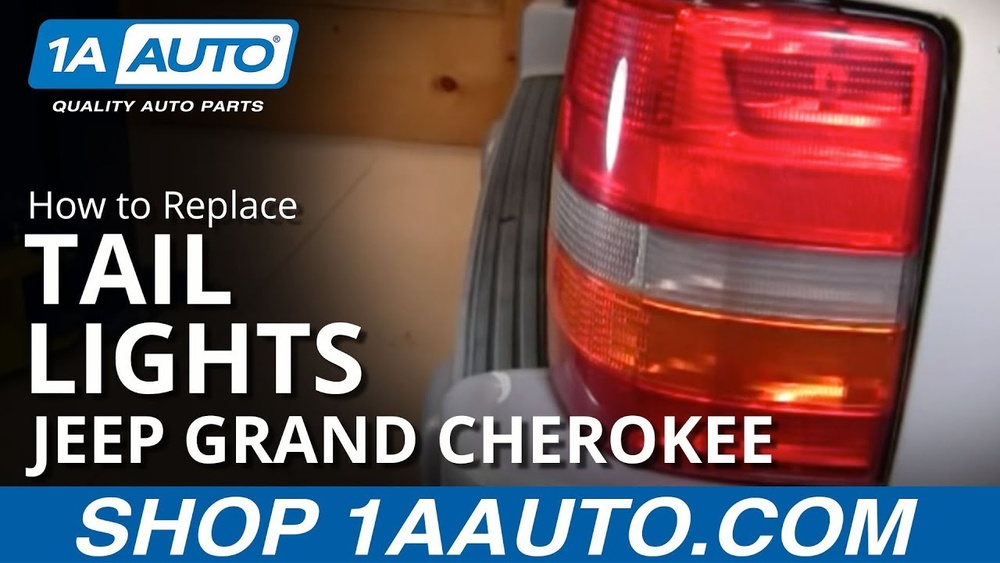
Locating the rear light assembly on a 1994 Jeep Grand Cherokee is the first step to change the light. Knowing the exact spot helps you work faster and safer. The rear light assembly holds the brake light, turn signal, and reverse light bulbs.
This part sits on the back corners of the Jeep. It is easy to find from outside the vehicle. You can see the light cover directly behind the rear wheels.
Find The Rear Light On The Outside
Stand behind your Jeep. Look at the left or right corner near the tailgate. The rear light assembly is a rectangular or square shape. It usually has red, white, and orange sections.
Open The Tailgate For Better Access
Open the tailgate to reach the back of the light assembly. This step helps to remove screws or bolts holding the light in place. It also lets you disconnect the wiring safely.
Check For Screws Or Clips Holding The Assembly
Look for screws or plastic clips around the light assembly. These fasteners secure the light to the vehicle. You may need a screwdriver or pliers to remove them.
Locate The Wiring Connector Behind The Light
Behind the light assembly, find the wiring connector. This plug supplies power to the bulbs. Carefully unplug it before pulling out the light assembly.
Remove Old Rear Light
Removing the old rear light on a 1994 Jeep Grand Cherokee is the first step to installing a new one. This process is simple and needs only a few tools. Follow clear steps to avoid damage to the vehicle. Take your time and be careful.
Accessing The Light Housing
Open the rear hatch of your Jeep Grand Cherokee. Locate the rear light assembly on the side. Remove any interior panels or covers blocking access. Use a screwdriver if needed to gently pry off panels. This reveals the back of the light housing.
Disconnecting The Wiring
Find the wiring connector attached to the light housing. Press the clip or tab to release the connector. Pull the connector away carefully to avoid wire damage. Set the wiring aside once disconnected. This step ensures safe removal of the light.
Removing Mounting Screws
Identify the screws holding the light housing in place. Use a suitable screwdriver to turn the screws counterclockwise. Keep the screws in a safe spot for reuse. Pull the light housing gently out of the vehicle. The old rear light is now ready to be replaced.
Install New Rear Light
Installing the new rear light on your 1994 Jeep Grand Cherokee is a key step. This part gives your vehicle safety and visibility at night. Careful installation ensures the light works well and lasts long.
Follow each step to place and secure the light properly. Check the wiring connections to avoid electrical issues. A good install keeps your Jeep looking good and safe to drive.
Positioning The New Light
Hold the new rear light near the mounting area. Align it carefully with the screw holes. Make sure the light fits snugly and sits flush against the body. Proper positioning avoids gaps and keeps water out.
Securing The Light Assembly
Use the original screws or new ones if needed. Tighten each screw by hand first to keep the light steady. Then, use a screwdriver to secure the screws firmly. Do not over-tighten to avoid cracking the light or the body.
Connecting The Wiring
Match the new light wires with the Jeep’s wiring harness. Connect each wire by pushing the connectors together. Ensure the connections are tight and secure to prevent loose contacts. Test the light by turning on the Jeep’s lights before closing everything up.
Credit: www.extremeterrain.com
Test The New Light
Testing the new rear light on your 1994 Jeep Grand Cherokee is important. It ensures the light works properly and keeps you safe. This step confirms the installation was done right.
Check each function of the light. Brake, turn signal, and reverse lights must all work well. A quick test saves trouble later.
Turn On The Vehicle Lights
Start by turning the ignition on. Switch on the headlights and tail lights. Look at the new rear light to see if it glows.
Press The Brake Pedal
Have someone press the brake pedal. Watch if the brake light shines brightly. It should light up immediately without flickering.
Activate The Turn Signals
Turn on the left and right turn signals one by one. The new light must blink in sync with the front signals. Check both sides carefully.
Test The Reverse Light
Put the gear in reverse. The reverse light should turn on clearly. This lets others know you are backing up.
Check For Any Flickering Or Dim Light
Observe the light for flickers or dim spots. A steady, bright light means good contact and wiring. Flickering may need a wiring check.
Common Troubleshooting Tips
Common issues can stop the rear light from working well on your 1994 Jeep Grand Cherokee. Knowing simple fixes can save time and money. Troubleshooting helps find the exact problem fast. This guide covers easy steps to check and fix common problems.
Light Not Turning On
Start by checking the bulb. A burnt bulb must be replaced. Next, check the fuse related to the rear lights. A blown fuse stops the light from working. Look for any loose wires or bad connections. Clean the socket if it looks dirty or rusty. Test the light switch inside the Jeep. A broken switch will prevent the light from turning on.
Flickering Or Dim Light
Flickering often means a weak connection or bad ground wire. Tighten any loose wires near the light. Check the wiring harness for cuts or damage. Dim light can mean the bulb is old or the power supply is weak. Inspect the battery and alternator for low voltage. Replace the bulb if it looks dark or cloudy. A clean socket also helps the light shine bright.

Credit: carts-and-parts.com

Credit: www.youtube.com
Frequently Asked Questions
How Do I Remove The Rear Light On A 1994 Jeep Grand Cherokee?
To remove the rear light, first open the tailgate. Unscrew the bolts holding the light assembly. Carefully pull the light out without damaging the wiring.
What Tools Are Needed To Change Rear Lights On A 1994 Jeep?
You will need a Phillips screwdriver, a flathead screwdriver, and possibly a socket wrench. These tools help remove bolts and clips safely.
How Long Does It Take To Replace The Rear Light?
Replacing the rear light usually takes 10 to 15 minutes. The process is straightforward with basic tools and no special skills required.
Can I Use Led Bulbs For The 1994 Jeep Rear Lights?
Yes, LED bulbs are compatible and provide better brightness. Ensure the LED bulbs match the original bulb size and socket type.
Conclusion
Changing the rear light on your 1994 Jeep Grand Cherokee is simple. Follow the steps carefully, and you will save time and money. Always use the right tools for safety and ease. Check the new light before installing it to avoid mistakes.
Keep your Jeep’s lights working well for safe driving. A small fix can make a big difference on the road. Now, you can handle this task confidently and quickly. Try it yourself next time without worry.