If your Jeep Grand Cherokee’s tail light is cracked, dim, or not working at all, it’s more than just an eyesore—it’s a safety risk. You might think replacing the tail light assembly is complicated or expensive, but it doesn’t have to be.
With the right steps, you can fix it yourself quickly and save time and money. Keep reading, and you’ll learn exactly how to replace your Jeep’s tail light assembly without stress or confusion. By the end, you’ll feel confident handling this simple repair on your own.
Tools And Materials Needed
Replacing the tail light assembly on a Jeep Grand Cherokee needs the right tools and materials. Having these ready makes the job faster and safer. This guide lists everything required to complete the task properly.
Basic Tools
A socket wrench set is essential for removing bolts. Screwdrivers, both flathead and Phillips, help with screws and clips. A trim removal tool prevents damage to plastic parts. Keep a flashlight nearby for better visibility.
Replacement Parts
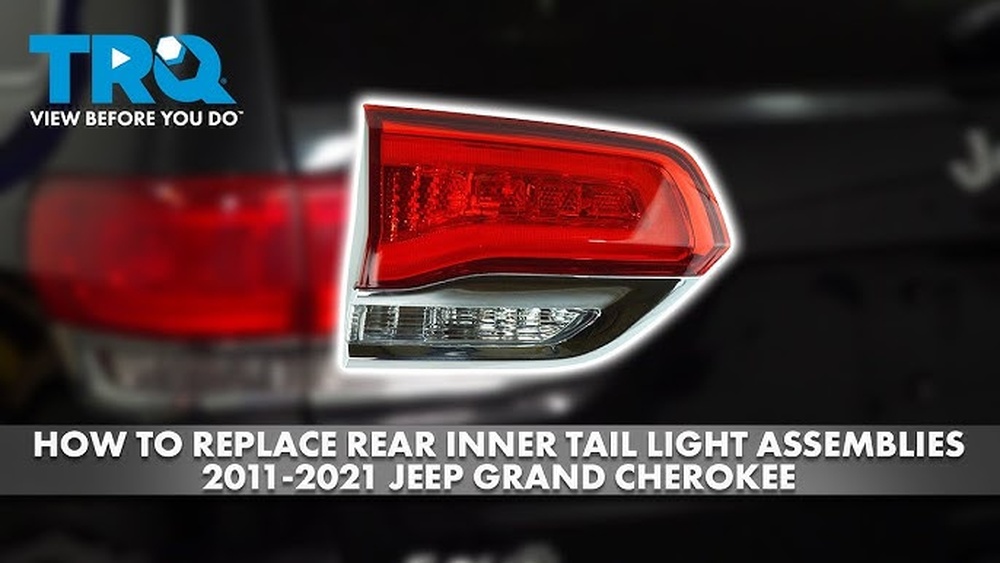
Use a new tail light assembly designed for your Jeep model. Check the part number to ensure compatibility. Also, have new bulbs on hand if the old ones are worn out or broken.
Safety Equipment
Wear gloves to protect your hands from sharp edges. Safety glasses shield your eyes from dirt and debris. Use a cloth or mat to rest removed parts and avoid scratches.
Additional Supplies
Keep a clean rag to wipe dirt off the area. Have electrical tape ready for any wiring fixes. A small container helps keep screws and bolts safe during work.

Credit: www.youtube.com
Safety Precautions
Replacing the tail light assembly on your Jeep Grand Cherokee requires care. Safety should be your top priority before starting any work. Taking the right precautions protects you and your vehicle from damage. It also helps the task go smoothly and without accidents.
Wear Protective Gear
Always wear gloves to protect your hands from sharp edges. Safety glasses shield your eyes from dust and debris. Closed-toe shoes protect your feet if tools or parts fall. Dress in clothes that cover your skin to avoid scratches.
Disconnect The Battery
Before touching any electrical parts, disconnect the vehicle’s battery. This stops electric shocks and short circuits. Use a wrench to remove the negative terminal first. Wait a few minutes before working on the tail light.
Work In A Well-lit Area
Good lighting helps you see all parts clearly. Choose a spot with plenty of natural light or use a bright lamp. This reduces mistakes and helps you find screws and clips easily. A clear view also improves your safety.
Use The Right Tools
Using the correct tools prevents damage to the tail light and vehicle. A screwdriver set, socket wrench, and pliers are usually needed. Avoid forcing parts apart; use tools designed for the job. Keep tools organized to avoid accidents.
Handle Parts With Care
Tail light assemblies are fragile and can break easily. Hold them gently and avoid dropping parts. Place removed parts on a soft surface to prevent scratches. Check for cracks or damage before reinstalling.
Accessing The Tail Light Assembly
Accessing the tail light assembly on a Jeep Grand Cherokee is the first step in replacing it. You need to reach the inside area behind the tail light. This allows you to remove bolts and disconnect wiring safely. Follow these steps carefully to avoid damage and complete the task faster.
Open The Tailgate
Start by opening the tailgate fully. This gives you room to work inside the rear of the vehicle. Make sure the tailgate stays open while you work. Use a prop or have someone hold it if needed. A wide opening helps prevent scratches and makes tools easy to reach.
Remove Interior Panels
Look inside the tailgate area for plastic panels covering the tail light assembly. These panels hide screws and wires. Use a flat tool or screwdriver to gently pry the panels loose. Work slowly to avoid breaking clips or cracking plastic. Once removed, you will see the bolts and wiring harness for the tail light.

Credit: www.amazon.com
Disconnecting The Electrical Connectors
Disconnecting the electrical connectors is an important step in replacing the Jeep Grand Cherokee tail light assembly. It ensures the tail light can be removed safely without damaging the vehicle’s wiring. Taking care during this step prevents electrical issues and keeps the new tail light working properly.
The connectors link the tail light to the Jeep’s electrical system. These connectors supply power for brake lights, turn signals, and reverse lights. Handling them gently avoids broken wires or loose connections.
Locate The Electrical Connectors
Open the rear hatch to access the tail light area. Look behind the tail light assembly for the wiring connectors. They usually have a plastic clip or tab to hold them in place. Make sure you can see and reach the connectors clearly before disconnecting.
Release The Connector Clips
Press or lift the plastic clip on the connector to unlock it. Do not pull the wires directly. Pulling on wires can cause damage or break the connection. Use your fingers or a small tool to carefully release the clip.
Separate The Connectors
Once the clip is released, gently pull the two halves of the connector apart. Move slowly to avoid bending or breaking the pins inside. Keep the connectors clean and dry to ensure a good connection later.
Removing The Old Tail Light Assembly
Removing the old tail light assembly on your Jeep Grand Cherokee is the first step to installing a new one. This part can wear out or get damaged, making replacement necessary. Taking out the old assembly carefully helps avoid damage to the vehicle’s body or wiring.
Follow these steps to remove the old tail light assembly safely. Keep tools ready and work in a well-lit area. This process is simple and takes only a few minutes.
Unscrew Mounting Bolts
Locate the mounting bolts holding the tail light in place. Use a suitable screwdriver or socket wrench to loosen these bolts. Turn each bolt counterclockwise until it comes free. Keep the bolts safe for reinstallation. Avoid stripping the screws by applying steady pressure.
Carefully Detach Assembly
Gently pull the tail light assembly away from the vehicle. Check for any clips or connectors attached to the back. Disconnect the wiring harness by pressing the release tab. Do not pull on the wires directly. Remove the assembly fully and place it on a soft surface to prevent scratches.
Installing The New Tail Light Assembly
Installing the new tail light assembly on your Jeep Grand Cherokee is a straightforward process. It requires careful handling to ensure everything fits perfectly. Proper installation keeps your tail lights working safely and efficiently.
Align And Secure Assembly
Place the new tail light assembly in the correct position. Make sure all the holes line up with the mounting points on the vehicle. Gently push the assembly into place, checking for a snug fit. Use the screws or bolts you removed earlier to secure the assembly. Tighten them evenly to avoid any gaps or loose parts. Do not overtighten, as this can crack the plastic.
Reconnect Electrical Connectors
Locate the electrical connectors behind the tail light assembly. Connect each plug to its matching socket. Ensure each connection clicks into place for a secure fit. Check that no wires are pinched or damaged during this step. Proper connections help the tail light work without issues. Test the lights before finishing the job to confirm everything works.
Testing The New Tail Light
Testing the new tail light on your Jeep Grand Cherokee is a key step. It makes sure the light works right and keeps you safe on the road. You want to confirm every function works well before finishing the job.
Check the brake lights, turn signals, and reverse lights. Each part must glow bright and clear. Testing helps spot wiring or installation issues early.
Turn On The Vehicle Lights
Start by switching on the vehicle’s headlights. The tail light should light up along with them. Look closely for any dim or flickering areas.
Check Brake Light Operation
Press the brake pedal firmly. The brake light should shine brighter than the running light. Ask someone to watch the light while you press the pedal.
Test The Turn Signals
Activate the left and right turn signals one at a time. The new tail light should blink evenly and clearly. Listen for the clicking sound inside the vehicle.
Verify The Reverse Lights
Put the vehicle in reverse gear. The reverse light on the tail assembly must turn on. It should be white and bright for safe backing up.
Inspect For Any Issues
Look for cracks, loose parts, or water inside the tail light. Tighten any screws or connectors if needed. A secure fit helps avoid future problems.

Credit: www.amazon.com
Final Adjustments And Panel Reinstallation
Final adjustments and panel reinstallation are the last steps in replacing the Jeep Grand Cherokee tail light assembly. These steps ensure the tail light fits perfectly and the vehicle looks complete. Proper alignment and secure reattachment prevent future problems.
Take time to check the tail light’s position. Make sure it sits flush against the vehicle’s body. Loose or misaligned lights can cause water leaks or electrical issues. Careful adjustment avoids these troubles.
Check Tail Light Alignment
Look closely at the tail light from different angles. Adjust the assembly so it lines up evenly with the car’s edges. Use small movements to avoid damage. Tighten screws just enough to hold the light steady but allow minor shifts.
Secure Electrical Connections
Inspect all wiring plugs and sockets. Press connectors firmly to ensure a solid connection. Loose wires can cause flickering lights or failure. Use dielectric grease to protect connections from moisture and corrosion.
Reinstall Interior Panels
Place the interior panel back into its original position. Align clips and screw holes carefully. Push panels gently but firmly to snap clips in place. Screw the fasteners tightly to avoid rattling or movement.
Test Tail Light Functions
Turn on the vehicle’s lights to check brake, turn signals, and reverse lights. Confirm all bulbs work correctly after reinstallation. Any issues might mean a loose connection or incorrect assembly. Fix problems immediately before driving.
Frequently Asked Questions
How Do I Remove A Jeep Grand Cherokee Tail Light Assembly?
To remove the tail light assembly, first disconnect the battery. Unscrew the bolts securing the assembly. Gently pull the tail light out. Disconnect the wiring harness carefully to avoid damage.
What Tools Are Needed To Replace The Tail Light Assembly?
You need a screwdriver, socket wrench, and possibly pliers. A trim removal tool helps prevent damage. Having these tools ready makes the replacement process easier and faster.
Can I Replace The Tail Light Assembly Myself?
Yes, replacing the tail light assembly is a simple DIY task. Basic tools and careful handling are required. Follow step-by-step instructions to avoid mistakes and ensure proper installation.
How Long Does It Take To Replace The Tail Light Assembly?
Replacing a tail light assembly usually takes 15 to 30 minutes. Time varies depending on your experience and the tools available. Proper preparation can speed up the process.
Conclusion
Replacing your Jeep Grand Cherokee tail light assembly is simple and quick. Follow each step carefully to avoid mistakes. Check the new light fits properly before tightening screws. Test the light to ensure it works well. A working tail light keeps you safe on the road.
Save money by doing this repair yourself. Keep your Jeep looking good and running right. You can handle this task with patience and care. No need to wait for a mechanic’s help. Your Jeep will thank you.