If you own a Jeep Commander, knowing how to remove the tail light can save you time and money. Whether you need to replace a broken bulb, upgrade your lights, or fix wiring issues, this task is easier than you might think.
In this guide, you’ll find simple, step-by-step instructions that anyone can follow. By the end, you’ll feel confident handling your Jeep’s tail light without calling a mechanic. Ready to get started? Let’s dive in and make your Jeep shine brighter!

Credit: www.youtube.com
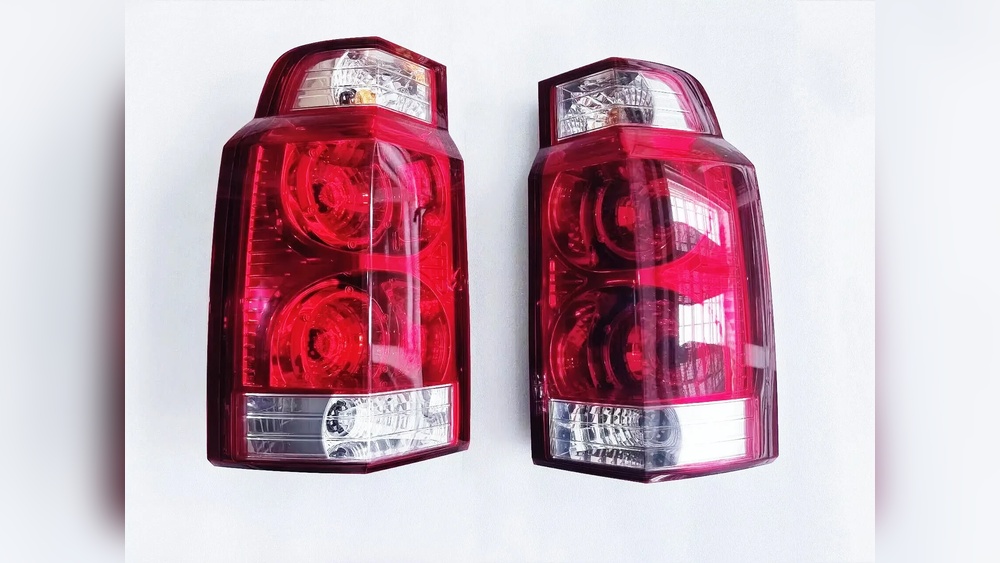
Tools Needed
Removing the tail light from a Jeep Commander requires a few simple tools. Having the right tools makes the job easier and faster. Prepare all items before starting.
Socket Wrench Set
A socket wrench set is essential for loosening bolts. The tail light bolts usually need a 7mm or 8mm socket. Using the right size prevents damage to the bolts.
Flathead Screwdriver
A flathead screwdriver helps to pry off clips and covers gently. It can also assist in disconnecting the wiring harness carefully.
Phillips Screwdriver
Some screws securing the tail light may need a Phillips screwdriver. This tool is common and easy to handle for most screws.
Work Gloves
Wear work gloves to protect your hands. Gloves provide grip and prevent cuts from sharp parts or broken glass.
Clean Cloth
Keep a clean cloth handy to wipe dirt or dust. It helps keep the work area clean and parts free from debris.
Safety Precautions
Removing the tail light from a Jeep Commander needs care and attention. Safety precautions protect you and your vehicle during the process. Taking simple steps reduces risks and makes the task easier.
Before starting, prepare your tools and workspace. Clear space around the vehicle to avoid accidents. Wear gloves and eye protection to guard against sharp edges and debris.
Turn Off The Vehicle And Disconnect The Battery
Switch off the Jeep’s engine. Remove the key from the ignition. Disconnect the negative terminal of the battery to avoid electrical shocks. This step stops power flow to the tail lights.
Work In A Well-lit And Ventilated Area
Choose a place with good lighting. It helps you see screws and clips clearly. Ensure the area has fresh air to avoid breathing in dust or fumes.
Use Proper Tools And Handle Parts Carefully
Use the right screwdriver or socket for screws. Avoid forcing parts to prevent damage. Hold the tail light gently to stop cracks or breaks.
Protect Yourself With Gloves And Eye Protection
Gloves shield your hands from cuts and dirt. Eye protection stops dust and small particles from entering your eyes. Safety gear keeps you safe throughout the task.
Locate The Tail Light Assembly
Locating the tail light assembly is the first step in removing it from your Jeep Commander. Knowing its exact position makes the process smooth and safe. The tail light assembly is easy to find once you know where to look.
Start by standing at the rear of your Jeep Commander. The tail lights are on both sides of the vehicle’s back. They sit just below the rear window and above the bumper.
Check The Exterior Position
The tail light assembly is mounted on the outer edge of the Jeep’s rear. It is the light that glows red when you apply brakes. You will also see amber or white sections for turn signals and reverse lights.
Open The Rear Hatch
Open the Jeep Commander’s rear hatch to access the tail light from inside. This gives a clear view of the assembly’s back. You can spot screws or bolts holding the tail light in place here.
Identify Fasteners Holding The Assembly
Look closely for screws or bolts around the tail light area. These fasteners secure the assembly to the vehicle’s body. Removing them is necessary to detach the tail light.
Locate Wiring Harness
Behind the tail light assembly, find the wiring harness. This connects the lights to the vehicle’s electrical system. You need to disconnect this to fully remove the tail light.
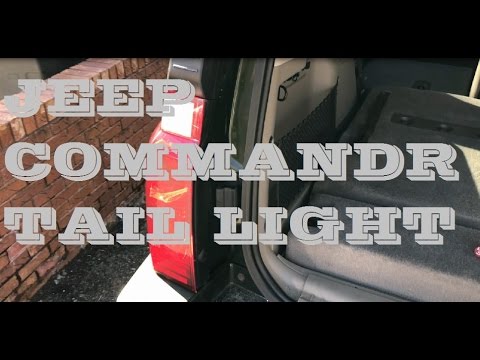
Credit: www.youtube.com
Remove Interior Panel
Removing the interior panel is the first step to access the tail light on a Jeep Commander. This panel covers the tail light assembly and holds it in place. Taking it off carefully prevents damage to the panel and nearby parts.
Start by preparing the area. Clear out any items in the back seat or cargo space to give yourself room. You need to work comfortably and safely.
Locate And Remove Screws
Look for screws holding the interior panel. They are usually near the edges or inside small plastic covers. Use a screwdriver to remove all visible screws. Keep them safe for reassembly.
Use A Trim Removal Tool
A trim removal tool helps to gently pry off the panel. Insert the tool between the panel and the body of the Jeep. Carefully pry around the edges to release the clips. Avoid using too much force to stop cracking the panel.
Some interior panels have electrical connectors for lights or sensors. Locate any connectors behind the panel. Press the tabs and pull them apart to disconnect. This step is crucial before fully removing the panel.
Remove The Interior Panel
After loosening screws and clips, pull the panel away from the Jeep. Lift it straight out to avoid bending. Set the panel aside in a safe place to prevent scratches or damage.
Disconnect Electrical Connectors
Disconnecting the electrical connectors is an important step to remove the tail light from your Jeep Commander. It stops power from flowing to the light. This makes the removal safer and easier. You need to handle the connectors carefully to avoid damage.
Each connector links wires from the vehicle to the tail light. They carry signals for brake lights, turn signals, and reverse lights. Disconnecting them properly ensures these functions work well after reinstallation.
Locate The Electrical Connectors
Open the rear hatch of your Jeep Commander. Look behind the tail light assembly. You will see one or more plastic connectors attached to the light. These connectors have wires running into them.
Release The Connector Clips
Most connectors have small clips or tabs. Press or squeeze these clips gently. This unlocks the connector from the tail light socket. Avoid pulling the wires directly to prevent damage.
Pull Out The Connectors Carefully
After unlocking, pull the connector straight out. Do this slowly to avoid breaking the clips or wires. Keep the connectors clean and dry for easier reconnection later.
Check For Any Stuck Or Damaged Connectors
Some connectors may be stuck from dirt or corrosion. Use a small tool to free them if needed. Inspect connectors for cracks or broken clips before continuing.
Unscrew The Tail Light
Unscrewing the tail light on a Jeep Commander is the first step in removal. This process frees the light assembly from the vehicle’s body. It requires basic tools and a little care to avoid damage.
Prepare your workspace and gather a screwdriver or socket wrench. Make sure the vehicle is off and the tail light is cool to touch.
Locate The Tail Light Screws
Open the rear hatch to access the tail light area. Look inside the tail light housing for visible screws. These screws hold the tail light firmly in place.
Some screws may hide behind plastic covers. Gently pry off these covers using a flat tool. Keep the covers safe to reinstall later.
Choose The Right Tool
Most Jeep Commander tail lights use Phillips head screws. Use a Phillips screwdriver or a socket wrench with the correct size bit. Using the wrong tool can strip the screws.
Inspect the screw heads before starting. This ensures a smooth and easy unscrewing process.
Remove The Screws Carefully
Turn the screws counterclockwise to loosen them. Do this slowly to avoid slipping. Keep a firm grip on the tool and steady pressure on the screw.
Place the removed screws in a small container. This prevents losing them during the tail light removal.
Remove The Tail Light Assembly
Removing the tail light assembly on a Jeep Commander is a simple task. It requires basic tools and a little care. This step is important before replacing or fixing any tail light parts.
Follow these easy steps to take out the tail light assembly safely and quickly. This guide helps avoid damage to the vehicle or the light itself.
Open The Rear Hatch
Start by opening the rear hatch of your Jeep Commander. This gives clear access to the tail light area. Make sure it stays open during the whole process.
Locate And Remove The Fasteners
Look for screws or bolts holding the tail light in place. Use a screwdriver or socket wrench to remove them. Keep these fasteners safe for reinstallation.
Carefully Pull Out The Tail Light
Gently pull the tail light assembly away from the vehicle. Do not force it. It may need a slight wiggle to come free from the clips.
Disconnect The Wiring Harness
Find the wiring connector attached to the tail light. Press the tab and carefully pull the connector out. Avoid pulling on the wires themselves.
Inspect And Clean Mounting Area
Before removing the tail light from your Jeep Commander, inspect and clean the mounting area. This step helps ensure a smooth removal and prevents damage. Dirt and debris can block screws and clips. Cleaning this area makes the process easier and safer.
Carefully check the mounting points for rust or wear. Rust can cause screws to stick or break. Worn mounts may need extra care during removal. A clean and inspected area reduces the chance of problems.
Inspect For Dirt And Debris
Look closely around the tail light mounting area. Dust, mud, and leaves often collect there. Use a soft brush or cloth to remove loose dirt. Cleaning clears the view of screws and clips. This helps avoid stripping screws or breaking clips.
Check For Rust Or Corrosion
Rust can make screws hard to remove. Examine metal parts around the tail light carefully. If you see rust, apply a rust remover or lubricant. Let it sit for a few minutes. This softens rust and eases screw removal.
Clean Mounting Surface Thoroughly
Use a mild cleaner and water to wash the mounting surface. Avoid harsh chemicals that can damage paint or plastic. Dry the area with a clean cloth. A clean surface helps the tail light fit back correctly after removal.
Verify Mounting Clips And Screws
Look at all clips and screws holding the tail light. Check for any signs of damage or looseness. Replace broken clips before reinstalling the light. Tighten any loose screws to prevent future problems.
Reinstall Or Replace Tail Light
After removing the tail light from your Jeep Commander, the next step is to reinstall or replace it. This process is important to keep your vehicle safe and street-legal. Whether you have a new tail light or want to put back the old one, follow clear steps to do it right. Proper installation ensures the tail light works well and fits securely.
Preparing The Tail Light For Installation
Check the tail light for damage or dirt. Clean the area around the light on your Jeep. Make sure the wiring and connectors are not broken. Test the bulbs to see if they light up. Use gloves to keep the light clean and avoid fingerprints.
Reconnecting The Wiring Harness
Match the wiring harness from the Jeep to the tail light connector. Push the connectors together until they click. Make sure the connection is tight to avoid loose wires. Do not force the plug if it does not fit easily. Check each wire to ensure it is secure.
Securing The Tail Light Assembly
Place the tail light back into its place on the Jeep. Align the screw holes with the mounting points. Use the correct screws or bolts to attach the light. Tighten them just enough to hold the light firmly. Avoid over-tightening, which can crack the plastic.
Testing The Tail Light Functionality
Turn on your Jeep’s headlights and brake lights. Check if the tail light shines clearly and without flicker. Test all functions: brake, turn signals, and reverse light. Ask someone to help observe the lights from behind. Fix any issues before driving.
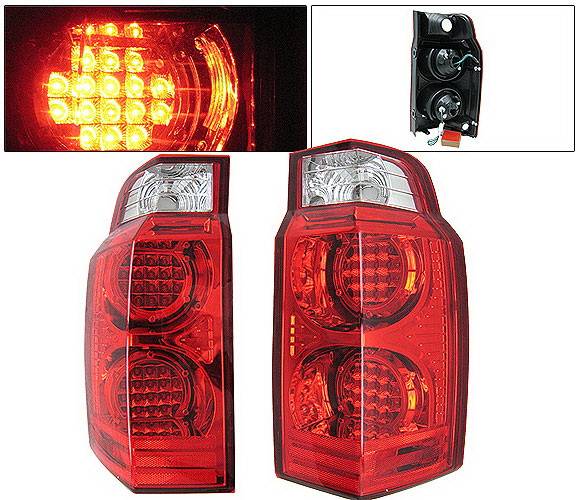
Credit: www.bodykits.com
Frequently Asked Questions
How Do I Remove The Tail Light On A Jeep Commander?
To remove the tail light, first open the rear hatch. Unscrew the bolts holding the tail light assembly. Gently pull the tail light out. Disconnect the electrical connector carefully to avoid damage. This method applies to most Jeep Commander models.
What Tools Are Needed To Remove Jeep Commander Tail Lights?
You will need a ratchet with a socket set, typically 8mm or 10mm. A flathead screwdriver helps to pry off clips. Gloves protect your hands during the process. Having these tools ensures a smooth and safe tail light removal.
How Long Does It Take To Remove A Jeep Commander Tail Light?
Removing the tail light usually takes about 10 to 15 minutes. This depends on your experience and tool availability. Taking your time avoids damage and ensures a proper disconnection of electrical parts.
Can I Replace The Tail Light Myself On A Jeep Commander?
Yes, you can replace the tail light yourself with basic tools. Follow safety steps, disconnect the battery, and handle parts carefully. DIY replacement saves money and is straightforward with proper guidance.
Conclusion
Removing the tail light from your Jeep Commander is simple with the right steps. Take your time and follow each part carefully. You only need a few tools to get the job done. Keep your work area clean to avoid losing small parts.
Once done, check the light to make sure it fits well. This helps keep your Jeep safe and looking good. Now, you can handle this task on your own without stress. Easy and quick repairs save time and money.